Perks
Overview
In this tutorial you are going to create different sellable in-game items and experiences that could be used to monetize your game.
Creators that are in the Perks Program are able to monetize their game using the built in monetization system.
For further information about the Perks Program, see the Perks Program reference.
- Completion Time: ~2 hours
- Knowledge Level: It's recommended to have completed the Scripting Beginner and Scripting Intermediate tutorials.
- Skills you will learn:
- Using the Perks Manager window to create Perks.
- Creating a resource shop with purchasable items.
- Creating a tip jar with leaderboards.
- Creating a sprint boost purchasable that applies to all players.
- Updating player UI.
- Saving player resources persistently.
Enable Player Storage
Player Storage will need to be enabled so that data can persist for the player between game sessions. For example, if a player purchases a resource perk, then this will need to be saved for the player so they don't lose any resources they don't use in the current game session.

Import Asset from Community Content
You will be importing an asset from Community Content that will contain various components you will drop into the Hierarchy while you follow the tutorial.
- Open the Community Content window.
- Search for
Perks Tutorialby CoreAcademy. - Click Import.
Creating a Resource Shop
A resource shop will allow players to purchase various resources that are used in your game. You can sell a wide range of resources that could help the player catch up, get a head start, or simply to cut out some of the grinding. For example, selling an XP Potion that the players can drink to increase the amount of XP they get from performing tasks in your game (that is killing enemies).
In this tutorial you will create a resource shop that sells 4 items. Below is a list of those items, and a description of what the perk could potentially be used for in a game.
| Item | Description |
|---|---|
| Pumpkins | A food resource that could provide additional benefits when eaten by the player. |
| Coins | In game currency for purchasing items that aren't premium (that is purchasing a weapon from a blacksmith). |
| XP Potion | A potion the player could drink and get an XP boost for a certain amount of time. |
| Gems | An in game currency used to purchase and trade items with other players. |
Add Starting Assets Template to Hierarchy
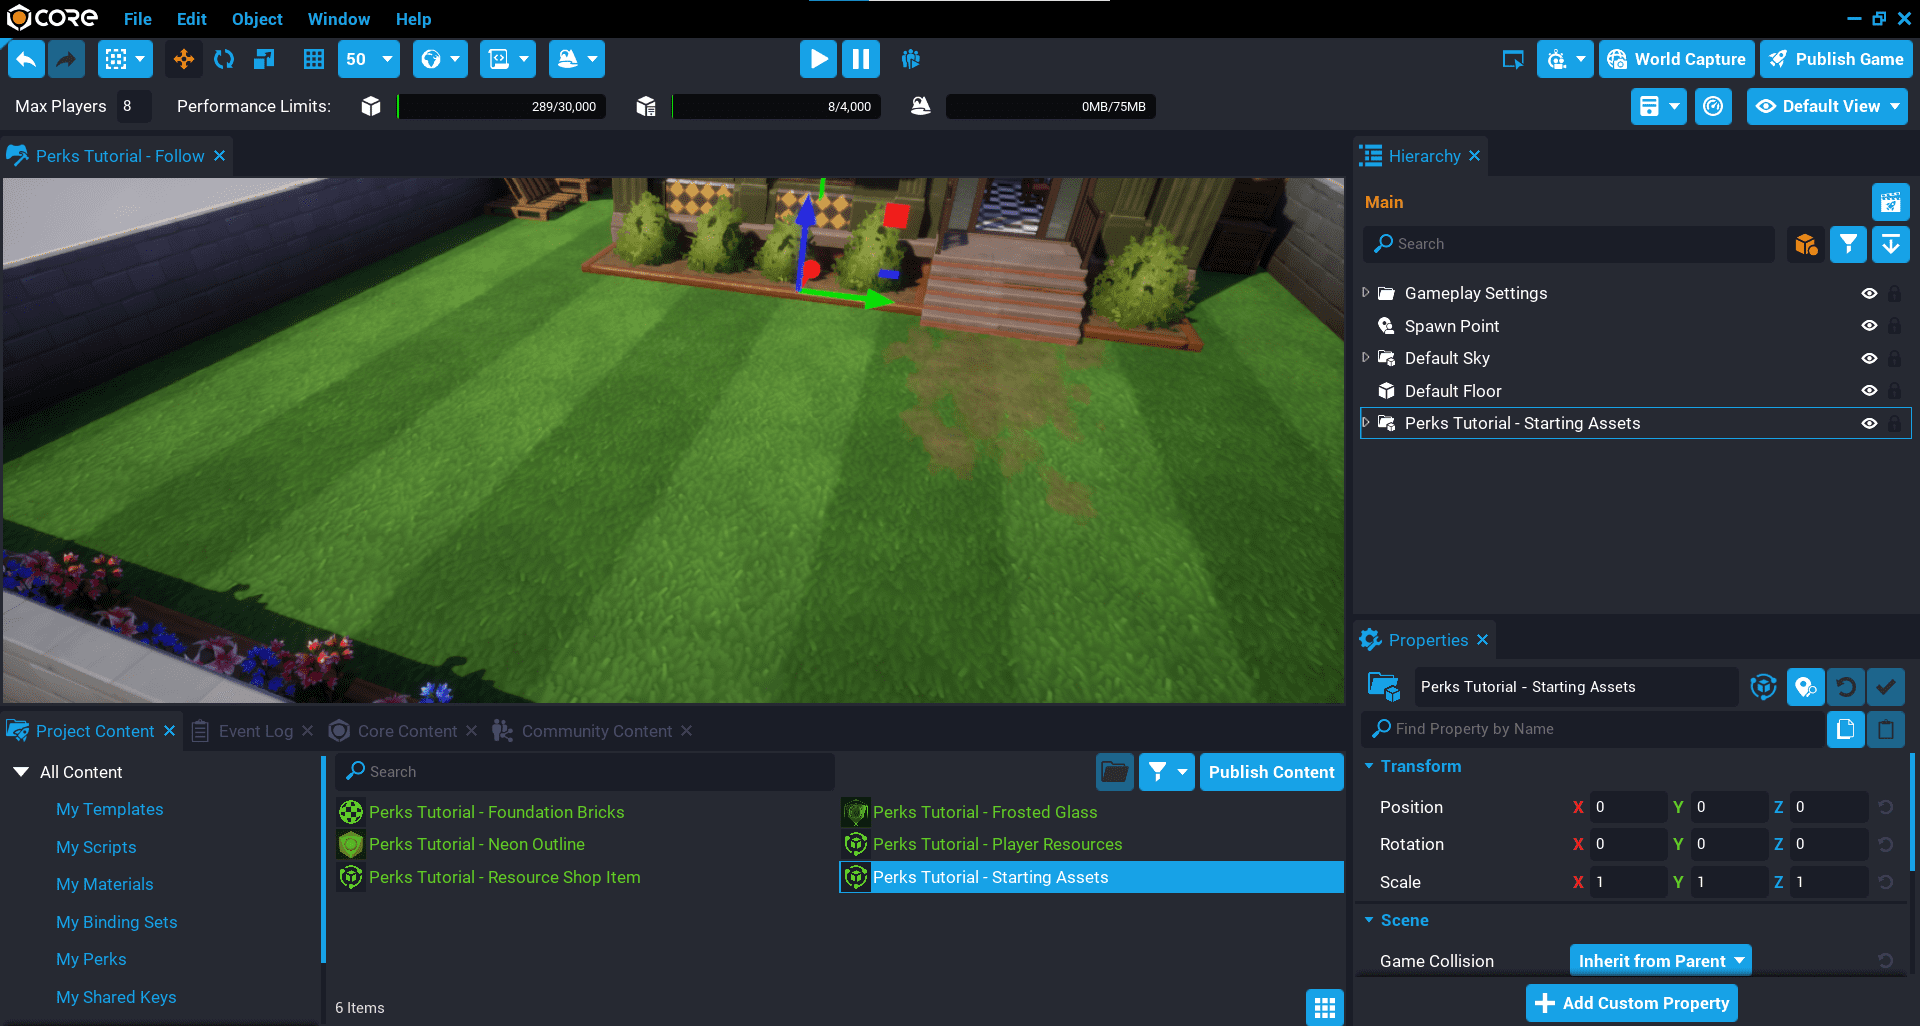
- Click the Project Content tab.
- Click My Templates under All Content.
- Add the template Perks Tutorial - Starting Assets into the Hierarchy.
- Deinstance the Perks Tutorial - Starting Assets template in the Hierarchy.
Move Player Spawn Point
The default spawn point for the player is not in a good starting position, so move this to a better location so that the player doesn't spawn inside existing geometry.
Press V to turn on gizmo visibility to view the bounding volume of the spawn point.
Create Shop Trigger
You will use a trigger so you can detect when the player has entered the trigger volume, and then display the interaction label so the player can open the shop UI.
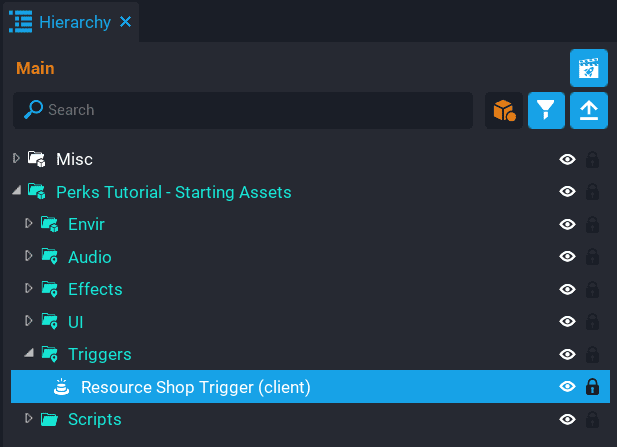
- Create a Trigger, and place it inside the Triggers group in the Hierarchy.
- Rename the trigger to Resource Shop Trigger.
Force Collision On
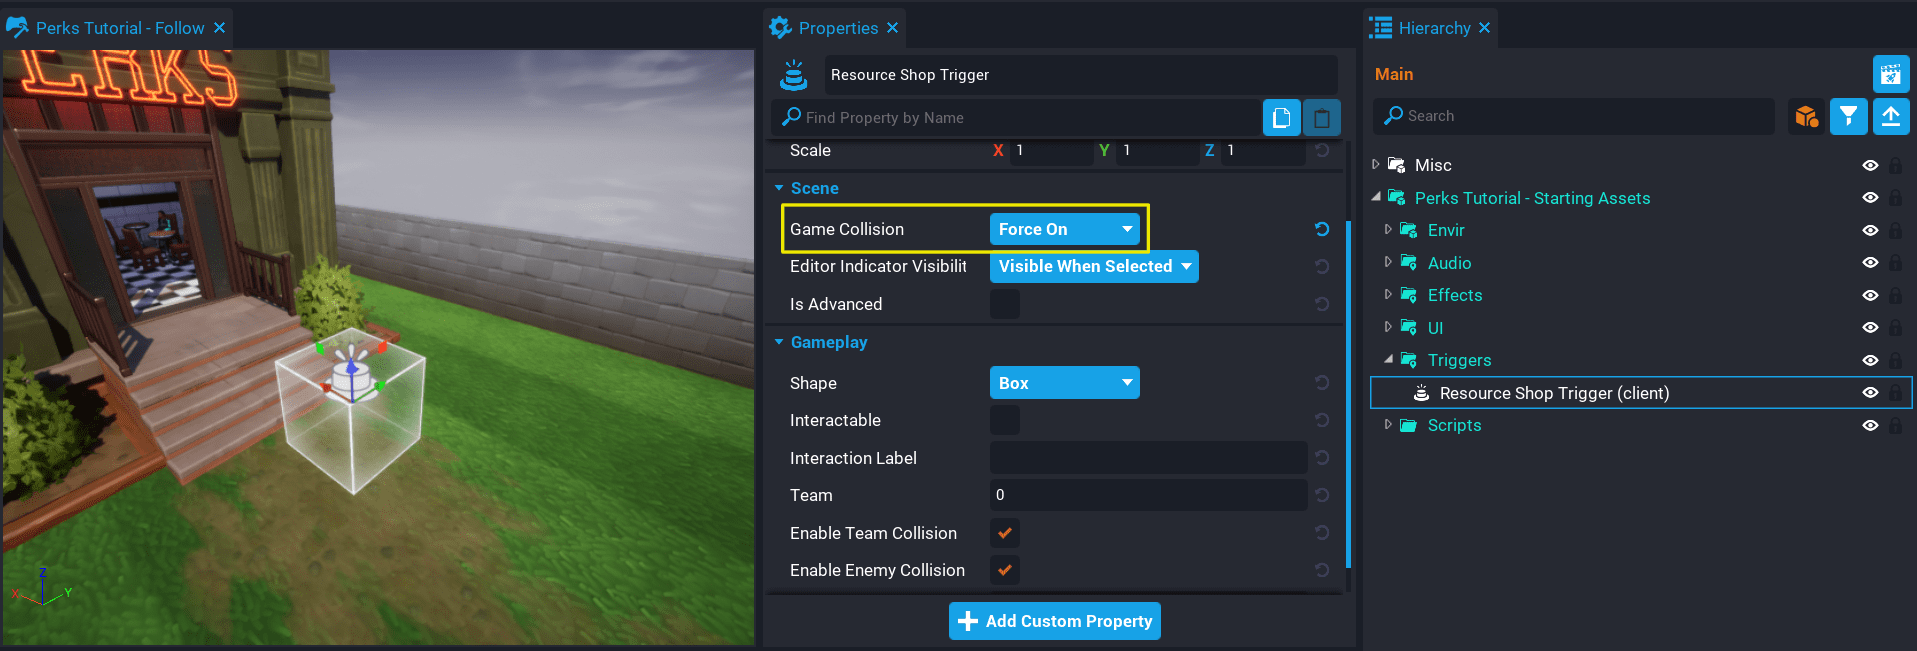
Because the trigger is in a client context, you need to force collision on, otherwise you will not be able to detect when a player has entered the trigger volume.
Click on the Resource Shop Trigger, and set the Game Collision property to Force On in the Properties window. In doing so, the gizmo for the trigger volume will now show up in the scene view.
Position and Resize Trigger
The Resource Shop Trigger needs to be moved into the correct position, and resized to make sure the player can enter the Resource Shop Trigger volume.
Press V to turn on gizmo visibility to view the bounding volume of the Resource Shop Trigger.
Move the Resource Shop Trigger inside the Perks Shop. Place it in front of the counter, and resize the Resource Shop Trigger.
Set Trigger Label
When the Resource Shop Trigger has the interactable property set to true, the label of the Resource Shop Trigger will be shown to the player when they enter the Resource Shop Trigger volume.
Set the Interaction Label property for the Resource Shop Trigger to Resource Shop in the Properties window.

Create Perks
For the resource shop, there will be 4 perks that you will need to create.
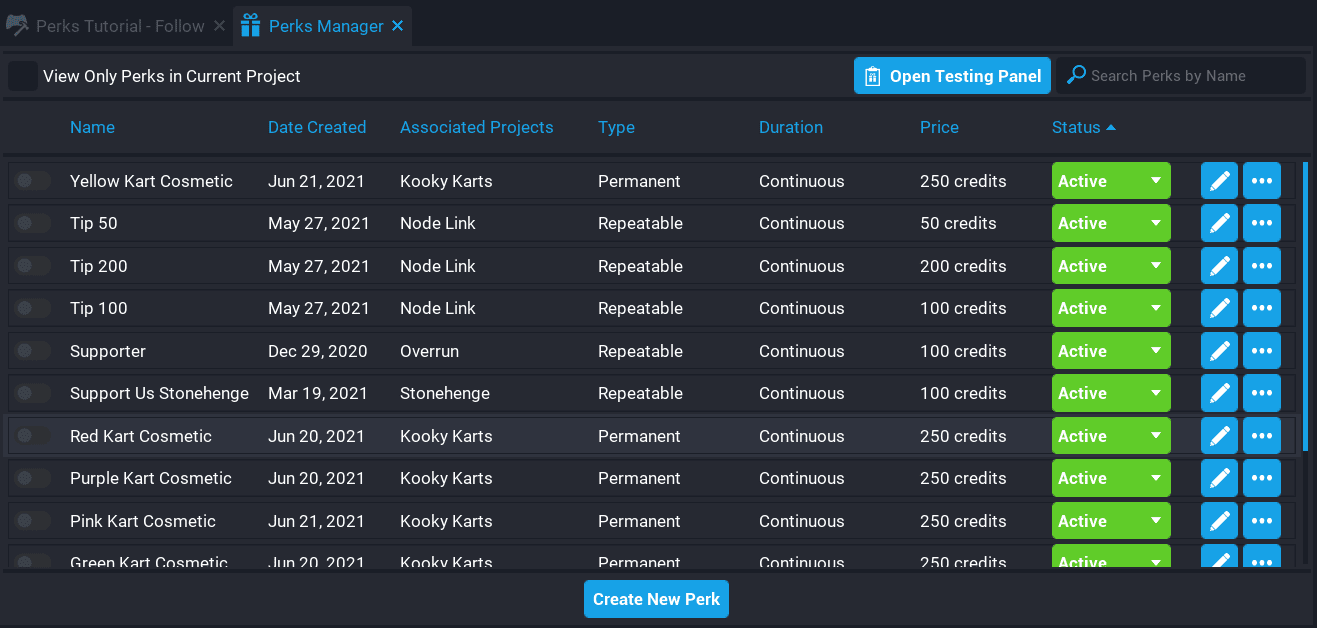
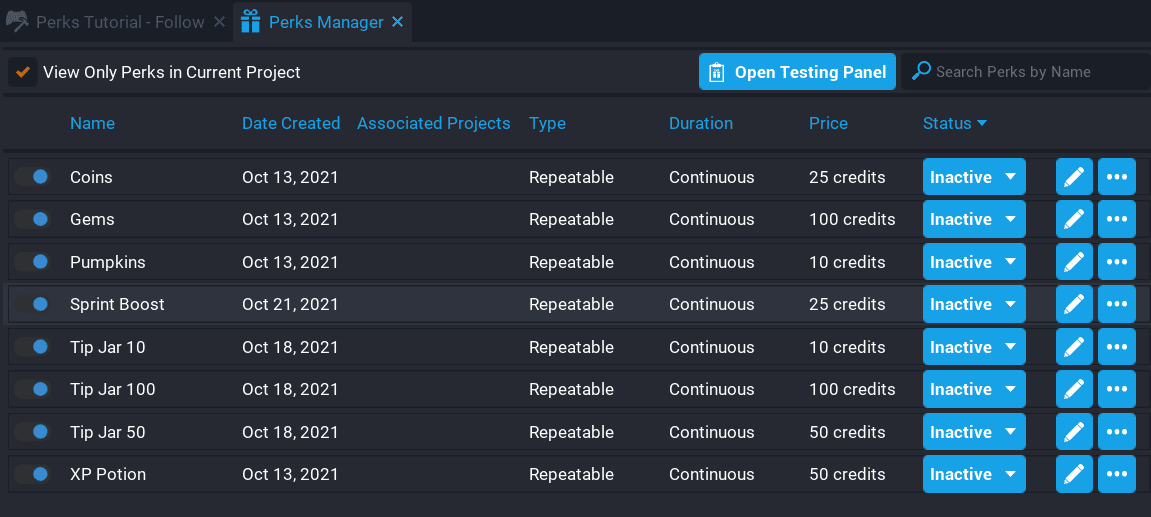
Open the Perks Manager window from the Window menu.
If you already have created perks for other projects, then you will see all your created perks inside the Perks Manager window. It may be useful to enable the option View Only Perks in Current Project, this will filter out all the perks that were not created in the current project.
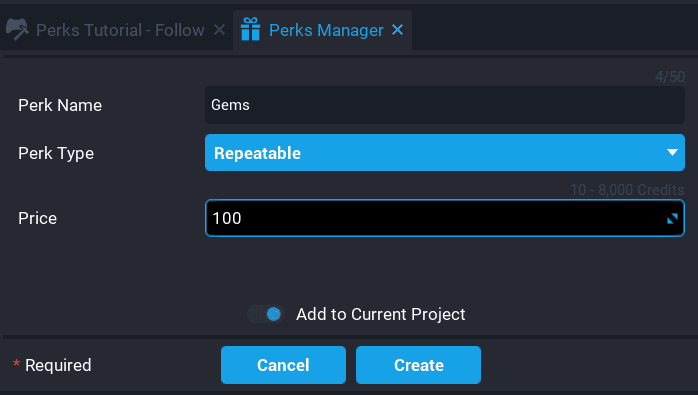
Click the Create Perk button at the bottom of the Perks Manager window and create the 4 resource perks for the shop. It's a good idea to be descriptive with the perk name, as this will show up to players in game when the perk purchase window is open.
All the perks in the resource shop will be repeatable so players can buy multiple of the same perk.
Perk names must be unique. If the Create Perk button is disabled, check for an existing perk with the same name.

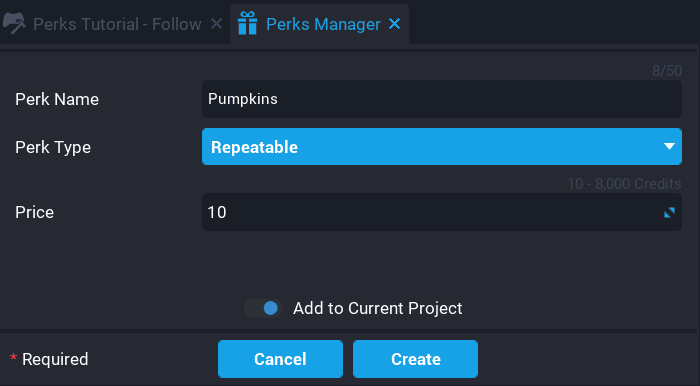
Create Pumpkins Perk
- Set the Perk Name to
Pumpkins. - Set the Perk Type to Repeatable.
- Set the Price to anything between 10 and 8000.
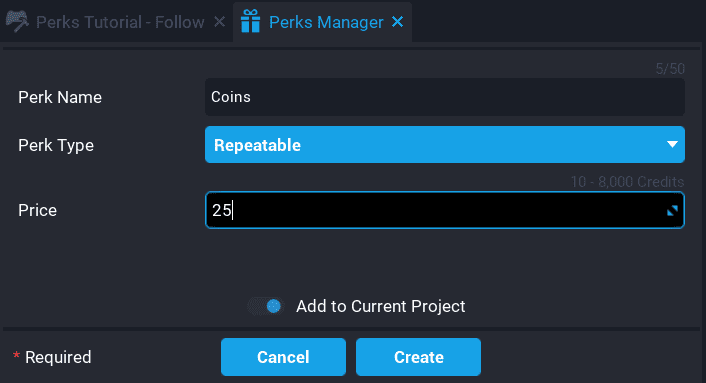
Create Coins Perk
- Set the Perk Name to
Coins. - Set the Perk Type to Repeatable.
- Set the Price to anything between 10 and 8000.
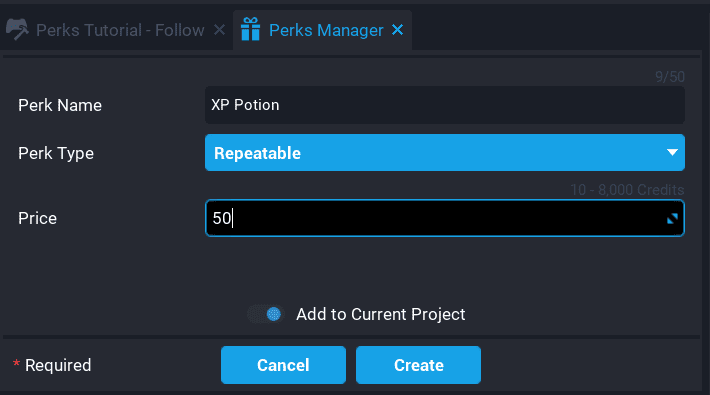
XP Potion Perk
- Set the Perk Name to
XP Potion - Set the Perk Type to Repeatable.
- Set the Price to anything between 10 and 8000.
Gems Perk
- Set the Perk Name to
Gems - Set the Perk Type to Repeatable.
- Set the Price to anything between 10 and 8000.
Create UI Items
Each resource item needs to be added to the Items panel in the Resource Shop panel. An item template has been created for you that can be placed into the Items panel in the Hierarchy.
Do the following for each shop resource. Since 4 perks were created, then 4 items should be added to the shop UI.
- Drag the template Perks Tutorial - Resource Shop Item into the Items panel.
- Rename the item to one of the resources being sold (that is
Coins). - Open the group in the Hierarchy and set the text property for the Amount object in the Properties window.
- Change the Image property for the image object in the Properties window.
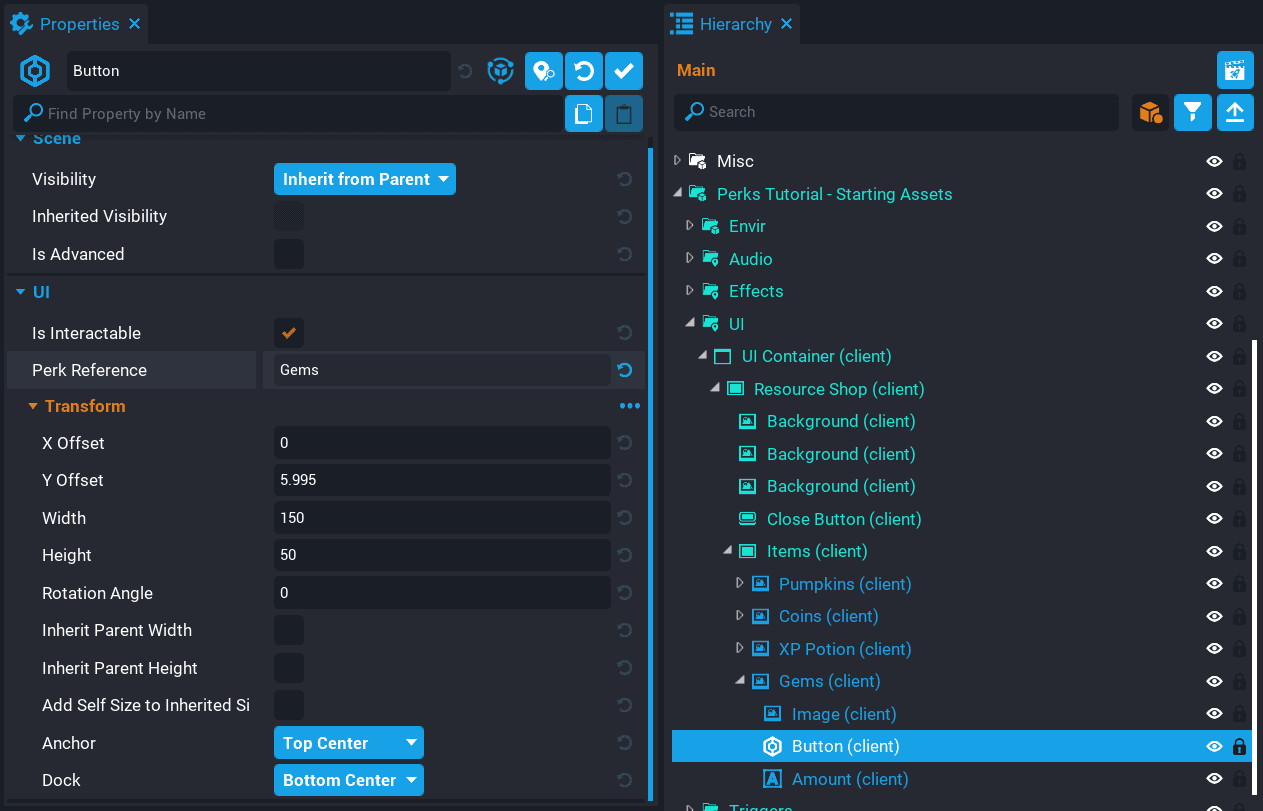
- Select the Button object.
- Add the Perk for this item to the Perk Reference property in the Properties window.
Setting Perk References
The perk reference in the Properties window can be set a few different ways:
- Dragging the perk reference from the Perks Manager window onto the Perk Reference property.
- Double clicking on the Perk Reference property and selecting the perk.
- Dragging the perk from My Perks in Project Content onto the Perk Reference property.
Position UI Items
The UI items added for each resource that will be sold in the shop, will need to be positioned so they are spaced apart.
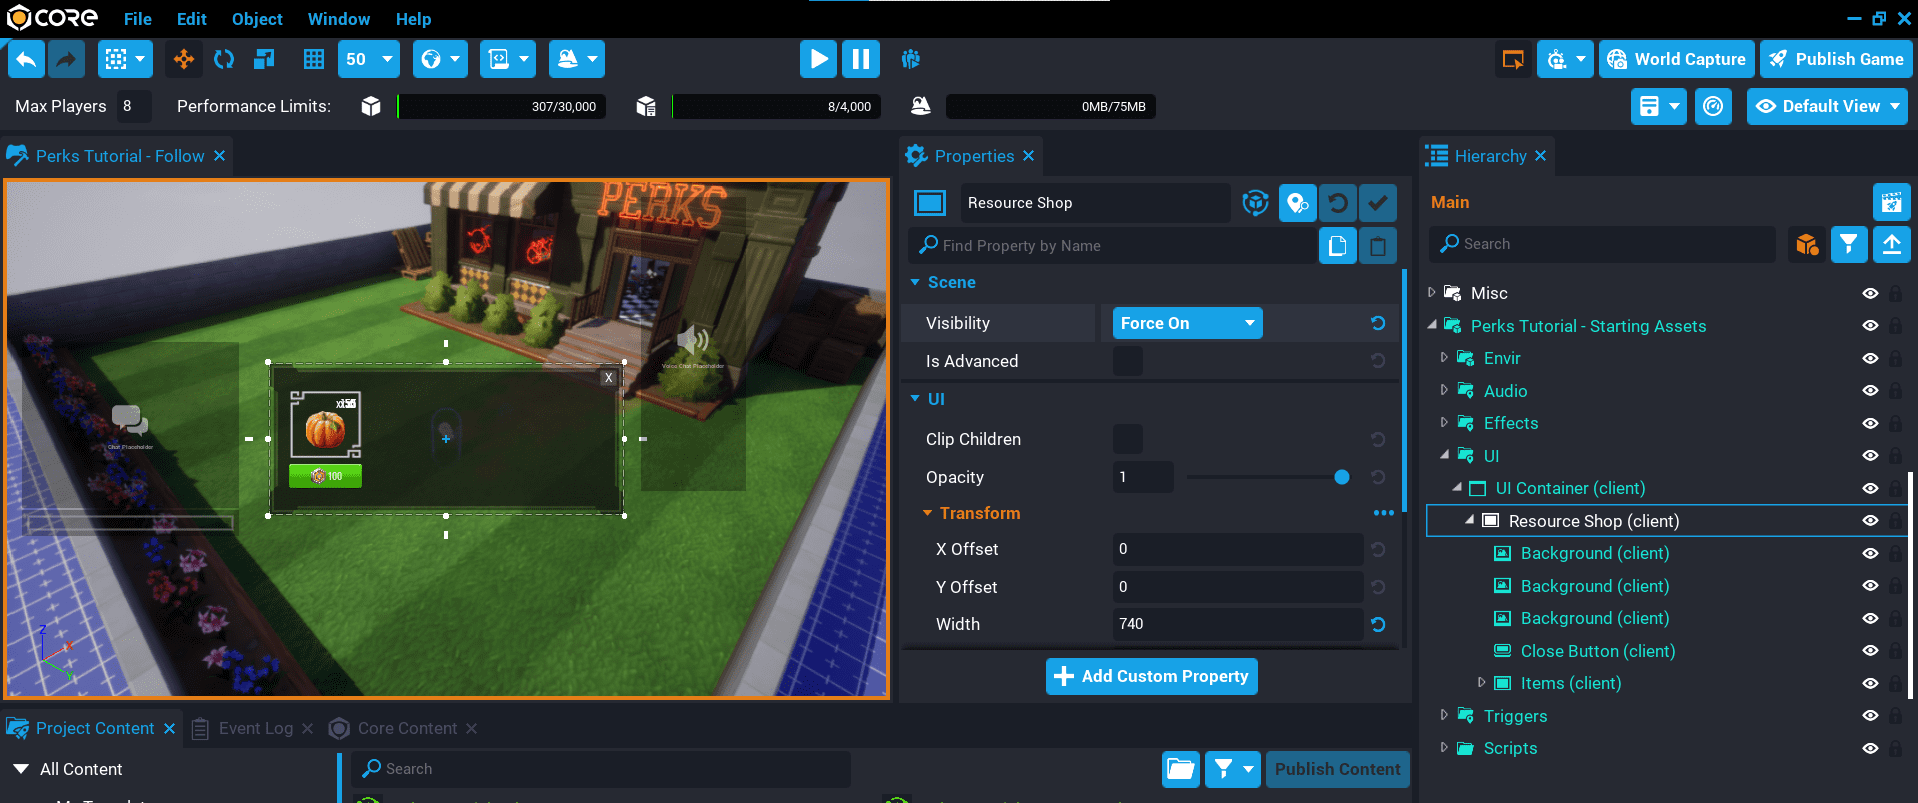
To visually see how the UI will look, you can temporarily set the Visibility to Force On in the Properties window for the Resource Shop panel in the Hierarchy.
See how the items in the UI are overlapping.
Set Item Position
The width of the UI Image, and a little spacing between each image is 165. Move each item after the first item by 165 for the X Offset property. You can use the X Offset field to handle the calculation each time for you by using the addition operator. For example, 165+165.
After all the images have been positioned, the Resource Shop panel Visibility property can be set to Force Off in the Properties window.
Create ResourceShopClient Script
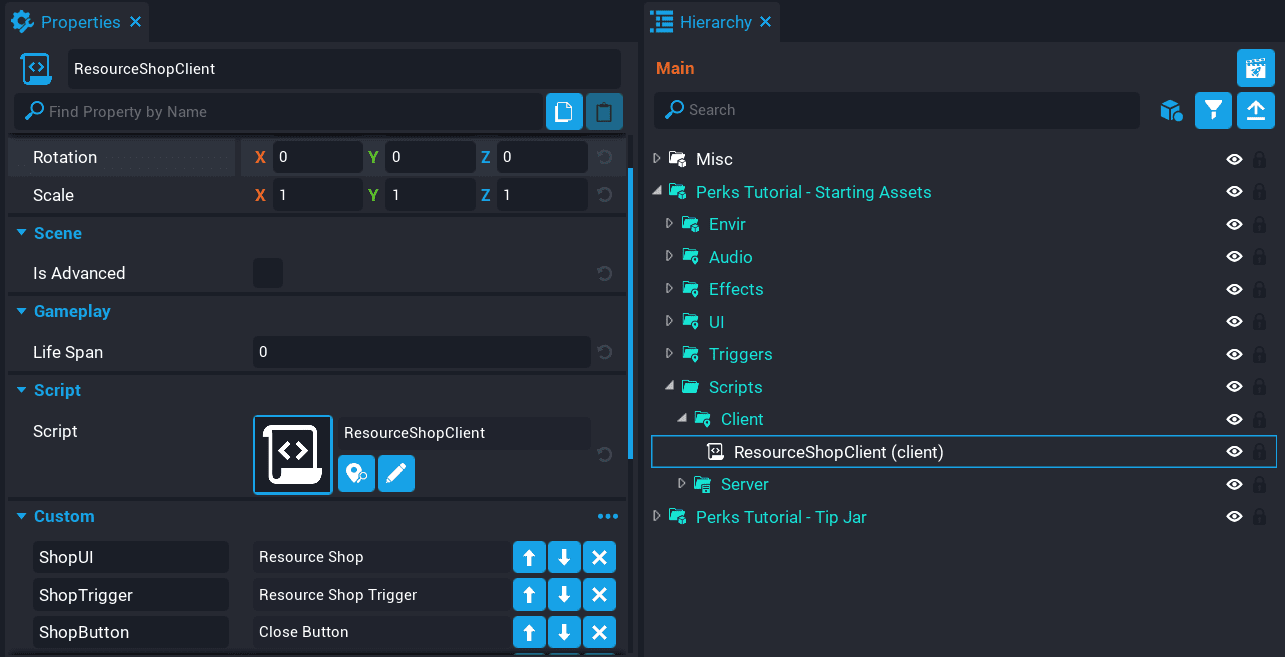
Create a new script called ResourceShopClient, and place it into the Client group, in the Scripts group. The ResourceShopClient script will be responsible for opening and closing the UI.
The ResourceShopClient script needs references to a few things, so you will need to set up some custom properties.
- Add the Resource Shop panel as a custom property. Rename the property
ShopUI. - Add the Resource Shop Trigger as a custom property. Rename the property
ShopTrigger - Add the Close Button as a custom property. Rename the property
ShopButton
Create Shop UI Variables
Open the ResourceShopClient script.
Create these variables so you have a reference to the shop UI components.
local SHOP_UI = script:GetCustomProperty("ShopUI"):WaitForObject()
local SHOP_TRIGGER = script:GetCustomProperty("ShopTrigger"):WaitForObject()
local SHOP_BUTTON = script:GetCustomProperty("ShopButton"):WaitForObject()
The inTrigger variable will be used to determine if the player is in the trigger or not
local localPlayer = Game.GetLocalPlayer()
local inTrigger = false
Create CloseUI Function
The CloseUI function will be responsible for closing the UI when the clickedEvent listener for SHOP_BUTTON is fired, and when the player leaves the SHOP_TRIGGER volume.
local function CloseUI()
    SHOP_UI.visibility = Visibility.FORCE_OFF

    if inTrigger then
        SHOP_TRIGGER.isInteractable = true
    else
        SHOP_TRIGGER.isInteractable = false
    end

    UI.SetCursorVisible(false)
    UI.SetCanCursorInteractWithUI(false)
end
If the player closes the shop UI, they could still be inside the trigger volume, so you don't want to turn off the interaction label, otherwise the player would need to leave the trigger volume, and enter again.
if inTrigger then
    SHOP_TRIGGER.isInteractable = true
else
    SHOP_TRIGGER.isInteractable = false
end
Create OnInteracted Function
The OnInteracted function will be called when the player interacts with the SHOP_TRIGGER. The function will check to make sure inTrigger is true, indicating that the player is inside the SHOP_TRIGGER volume.
local function OnInteracted(trigger, obj)
    if inTrigger and Object.IsValid(obj) and obj:IsA("Player") and obj == localPlayer then
        SHOP_UI.visibility = Visibility.FORCE_ON
        SHOP_TRIGGER.isInteractable = false

        UI.SetCursorVisible(true)
        UI.SetCanCursorInteractWithUI(true)
    end
end
The last part of the if condition checks to see if the obj that has entered the SHOP_TRIGGER is the local player.
obj == localPlayer
Client Triggers
The listener for a client trigger can fire if another player enters the trigger volume. This is because players are replicated to each client. Meaning, you have copy of each player in the game on your side that has a collision capsule. To prevent this, check that the obj in the trigger volume matches the local player.
Create OnExitTrigger Function
The OnExitTrigger will check if the local player has exited the SHOP_TRIGGER volume and close the shop UI. The inTrigger variable is set to false so that the interaction label is turned off.
local function OnExitTrigger(trigger, obj)
    if Object.IsValid(obj) and obj:IsA("Player") and obj == localPlayer then
        inTrigger = false
        CloseUI()
    end
end
Create OnEnterTrigger Function
The OnEnterTrigger will check when the local player has entered the SHOP_TRIGGER volume and turn on interaction so the label will show up for the player. The inTrigger variable is set to true, indicating the player is inside the SHOP_TRIGGER volume.
local function OnEnterTrigger(trigger, obj)
    if Object.IsValid(obj) and obj:IsA("Player") and obj == localPlayer then
        SHOP_TRIGGER.isInteractable = true
        inTrigger = true
    end
end
Trigger Interaction Label
If a trigger is interactable, then the interaction label can show up to the player even when that player has not entered the trigger volume (that is the player getting close to the trigger volume). This is why the inTrigger variable is used, to make sure the player is inside the trigger volume before showing the interaction label.
Connect Events
Connect the CloseUI function to the clickedEvent for the SHOP_BUTTON. When the SHOP_BUTTON is clicked by the player, it will close the UI.
SHOP_BUTTON.clickedEvent:Connect(CloseUI)
Connect the OnInteracted function to the interactedEvent for the SHOP_TRIGGER. When trigger is interacted with, it will show or hide the UI for the player.
SHOP_TRIGGER.interactedEvent:Connect(OnInteracted)
Connect the OnExitTrigger function to the endOverlapEvent for the SHOP_TRIGGER. When the player exits the trigger volume, it will automatically close the UI for the player.
SHOP_TRIGGER.endOverlapEvent:Connect(OnExitTrigger)
Connect the OnEnterTrigger function to the beginOverlapEvent for the SHOP_TRIGGER. When the player enters the trigger volume, it will enable the interaction label for the player, so they can open the UI.
SHOP_TRIGGER.beginOverlapEvent:Connect(OnEnterTrigger)
The ResourceShopClient Script
ResourceShopClient
local SHOP_UI = script:GetCustomProperty("ShopUI"):WaitForObject()
local SHOP_TRIGGER = script:GetCustomProperty("ShopTrigger"):WaitForObject()
local SHOP_BUTTON = script:GetCustomProperty("ShopButton"):WaitForObject()

local localPlayer = Game.GetLocalPlayer()
local inTrigger = false

local function CloseUI()
    SHOP_UI.visibility = Visibility.FORCE_OFF

    if inTrigger then
        SHOP_TRIGGER.isInteractable = true
    else
        SHOP_TRIGGER.isInteractable = false
    end

    UI.SetCursorVisible(false)
    UI.SetCanCursorInteractWithUI(false)
end

local function OnInteracted(trigger, obj)
    if inTrigger and Object.IsValid(obj) and obj:IsA("Player") and obj == localPlayer then
        SHOP_UI.visibility = Visibility.FORCE_ON
        SHOP_TRIGGER.isInteractable = false

        UI.SetCursorVisible(true)
        UI.SetCanCursorInteractWithUI(true)
    end
end

local function OnExitTrigger(trigger, obj)
    if Object.IsValid(obj) and obj:IsA("Player") and obj == localPlayer then
        inTrigger = false
        CloseUI()
    end
end

local function OnEnterTrigger(trigger, obj)
    if Object.IsValid(obj) and obj:IsA("Player") and obj == localPlayer then
        SHOP_TRIGGER.isInteractable = true
        inTrigger = true
    end
end

SHOP_BUTTON.clickedEvent:Connect(CloseUI)

SHOP_TRIGGER.interactedEvent:Connect(OnInteracted)
SHOP_TRIGGER.endOverlapEvent:Connect(OnExitTrigger)
SHOP_TRIGGER.beginOverlapEvent:Connect(OnEnterTrigger)
Test the Game
Test the game and make sure the following work:
- Trigger interaction label is visible when entering the trigger volume.
- Trigger interaction label is not visible when exiting the trigger volume.
- Shop UI opens when pressing F.
- Shop UI closes when clicking on the close button.
- Shop UI closes when the player leaves the trigger volume.
- Shop Items can be purchased.
Purchasing Perks
In preview mode, and for the creator of a published game, you will not be charged the credits for purchasing any perk. This is useful when you need to test the various perks in local and a published game.
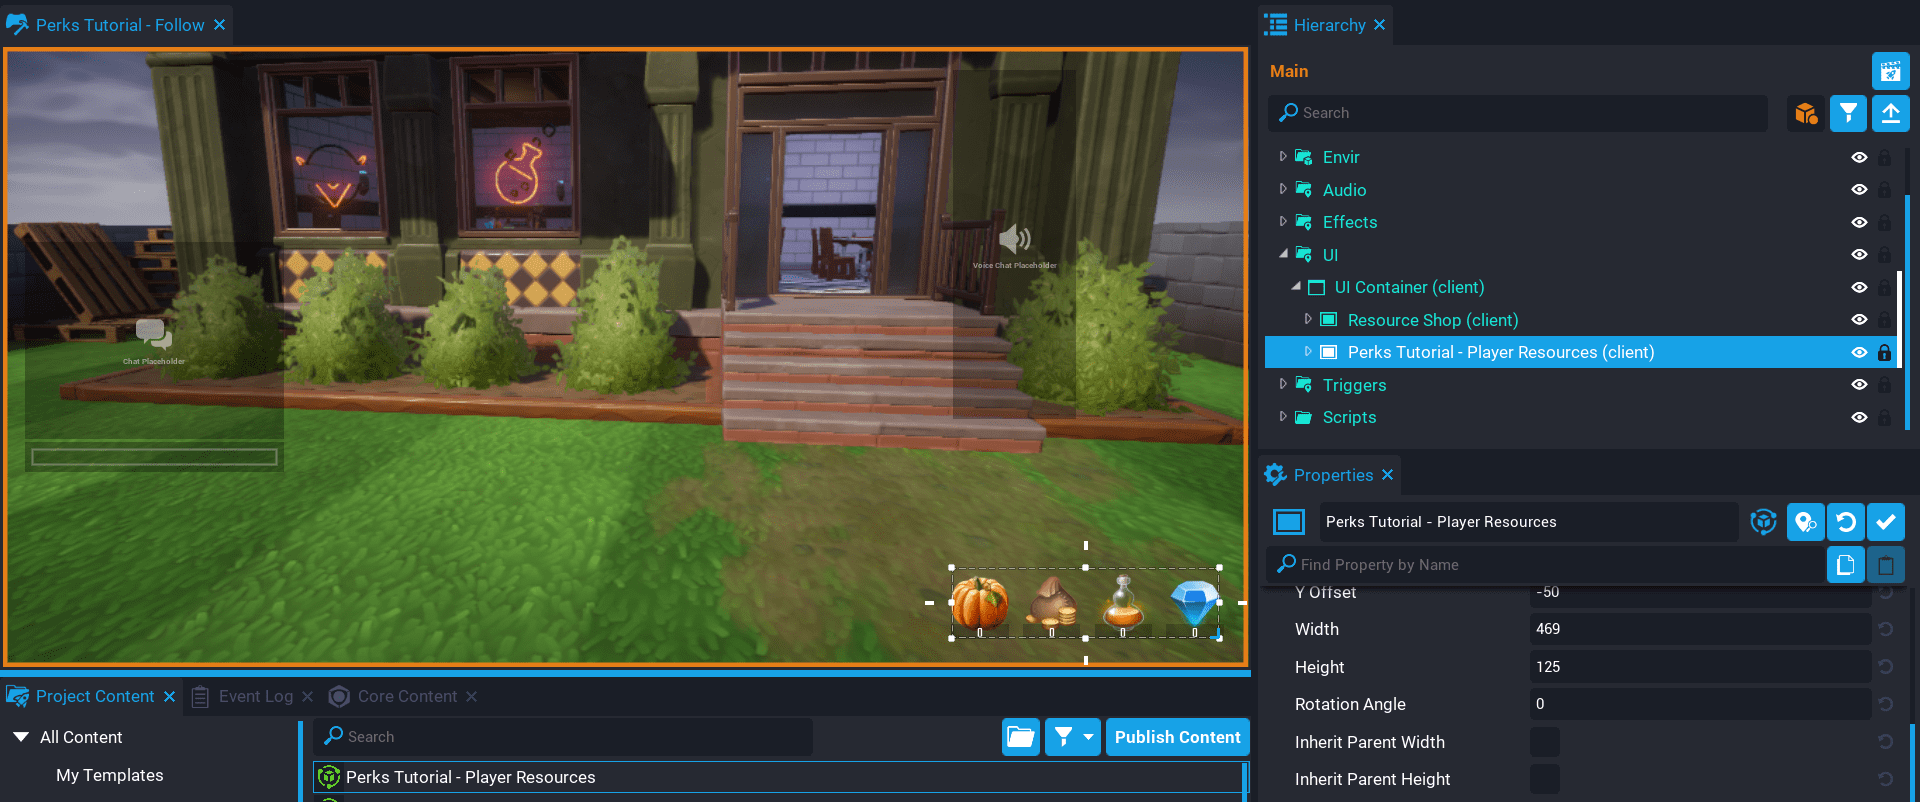
Create Player Resource UI
The player can now purchase perks, but there is no way to see how much of each resource they have. So in this section, you will be adding some new UI and code to handle showing the resources to the player, which will update when the player makes purchases from the resource shop.
Add Player Resource Template
In Project Content, drag the template Perks Tutorial - Player Resources into the UI Container in the Hierarchy. This template contains 4 resources for the shop that have been set up for you already.
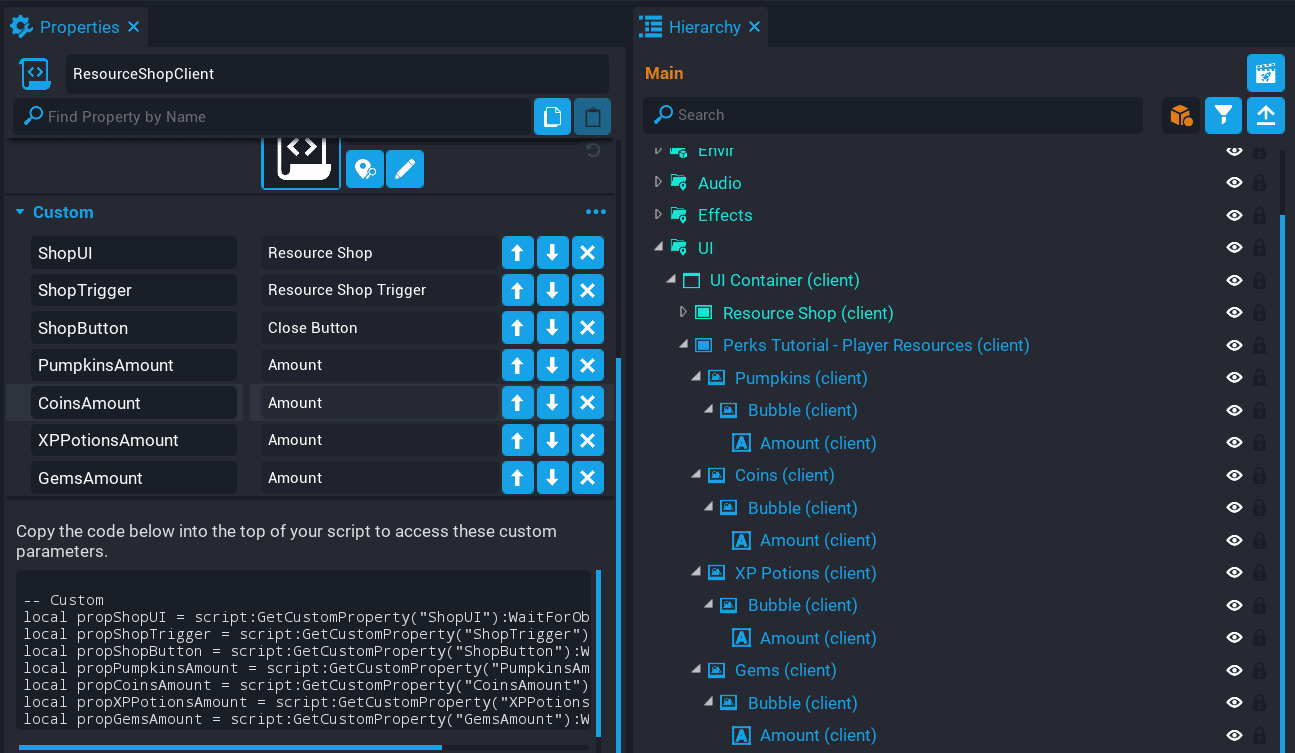
Update ResourceShopClient Script
The ResourceShopClient script will need references to each Amount object for each resource in the UI so that it can update the number when the resource changes.
Each Amount object inside each resource item in the Perks Tutorial - Player Resources template, needs to be added as a custom property.
- Add the Amount object from inside Pumpkins as a custom property. Name the property
PumpkinsAmount. - Add the Amount object from inside Coins as a custom property. Name the property
CoinsAmount. - Add the Amount object from inside XP Potions as a custom property. Name the property
XPPotionsAmount. - Add the Amount object from inside Gems as a custom property. Name the property
GemsAmount.
Create Amount Variables
Create these variables so you have a reference to each UI Text for each resource item in the shop. The textproperty will be set, based on how much of that resource the player has.
local PUMPKINS_AMOUNT = script:GetCustomProperty("PumpkinsAmount"):WaitForObject()
local COINS_AMOUNT = script:GetCustomProperty("CoinsAmount"):WaitForObject()
local XP_POTIONS_AMOUNT = script:GetCustomProperty("XPPotionsAmount"):WaitForObject()
local GEMS_AMOUNT = script:GetCustomProperty("GemsAmount"):WaitForObject()
Create UpdateResources Function
The UpdateResources will check which resource has changed, and update the text value for the resource that was updated. This will allow the player to see how much of a resource they have.
local function UpdateResources(player, resource, amount)
    if resource == "pumpkins" then
        PUMPKINS_AMOUNT.text = tostring(amount)
    elseif resource == "coins" then
        COINS_AMOUNT.text = tostring(amount)
    elseif resource == "xppotions" then
        XP_POTIONS_AMOUNT.text = tostring(amount)
    elseif resource == "gems" then
        GEMS_AMOUNT.text = tostring(amount)
    end
end
The text property of a UIText component needs to be a string. Because the amount is an integer, you need to convert it to a string using the tostring function.
tostring(amount)
Connect Resource Event
You need to know when a resource has changed so the UI can be updated. When a player's resource has changed using functions such as AddResource, SetResource, and RemoveResource, the resourceChangeEvent will be fired, allowing you to check which resource has changed, and to update the UI with the new amount.
localPlayer.resourceChangedEvent:Connect(UpdateResources)
The ResourceShopClient Script
ResourceShopClient
local SHOP_UI = script:GetCustomProperty("ShopUI"):WaitForObject()
local SHOP_TRIGGER = script:GetCustomProperty("ShopTrigger"):WaitForObject()
local SHOP_BUTTON = script:GetCustomProperty("ShopButton"):WaitForObject()

local PUMPKINS_AMOUNT = script:GetCustomProperty("PumpkinsAmount"):WaitForObject()
local COINS_AMOUNT = script:GetCustomProperty("CoinsAmount"):WaitForObject()
local XP_POTIONS_AMOUNT = script:GetCustomProperty("XPPotionsAmount"):WaitForObject()
local GEMS_AMOUNT = script:GetCustomProperty("GemsAmount"):WaitForObject()

local localPlayer = Game.GetLocalPlayer()
local inTrigger = false

local function CloseUI()
    SHOP_UI.visibility = Visibility.FORCE_OFF

    if inTrigger then
        SHOP_TRIGGER.isInteractable = true
    else
        SHOP_TRIGGER.isInteractable = false
    end

    UI.SetCursorVisible(false)
    UI.SetCanCursorInteractWithUI(false)
end

local function OnInteracted(trigger, obj)
    if inTrigger and Object.IsValid(obj) and obj:IsA("Player") and obj == localPlayer then
        SHOP_UI.visibility = Visibility.FORCE_ON
        SHOP_TRIGGER.isInteractable = false

        UI.SetCursorVisible(true)
        UI.SetCanCursorInteractWithUI(true)
    end
end

local function OnExitTrigger(trigger, obj)
    if Object.IsValid(obj) and obj:IsA("Player") and obj == localPlayer then
        inTrigger = false
        CloseUI()
    end
end

local function OnEnterTrigger(trigger, obj)
    if Object.IsValid(obj) and obj:IsA("Player") and obj == localPlayer then
        SHOP_TRIGGER.isInteractable = true
        inTrigger = true
    end
end

local function UpdateResources(player, resource, amount)
    if resource == "pumpkins" then
        PUMPKINS_AMOUNT.text = tostring(amount)
    elseif resource == "coins" then
        COINS_AMOUNT.text = tostring(amount)
    elseif resource == "xppotions" then
        XP_POTIONS_AMOUNT.text = tostring(amount)
    elseif resource == "gems" then
        GEMS_AMOUNT.text = tostring(amount)
    end
end

SHOP_BUTTON.clickedEvent:Connect(CloseUI)

SHOP_TRIGGER.interactedEvent:Connect(OnInteracted)
SHOP_TRIGGER.endOverlapEvent:Connect(OnExitTrigger)
SHOP_TRIGGER.beginOverlapEvent:Connect(OnEnterTrigger)

localPlayer.resourceChangedEvent:Connect(UpdateResources)
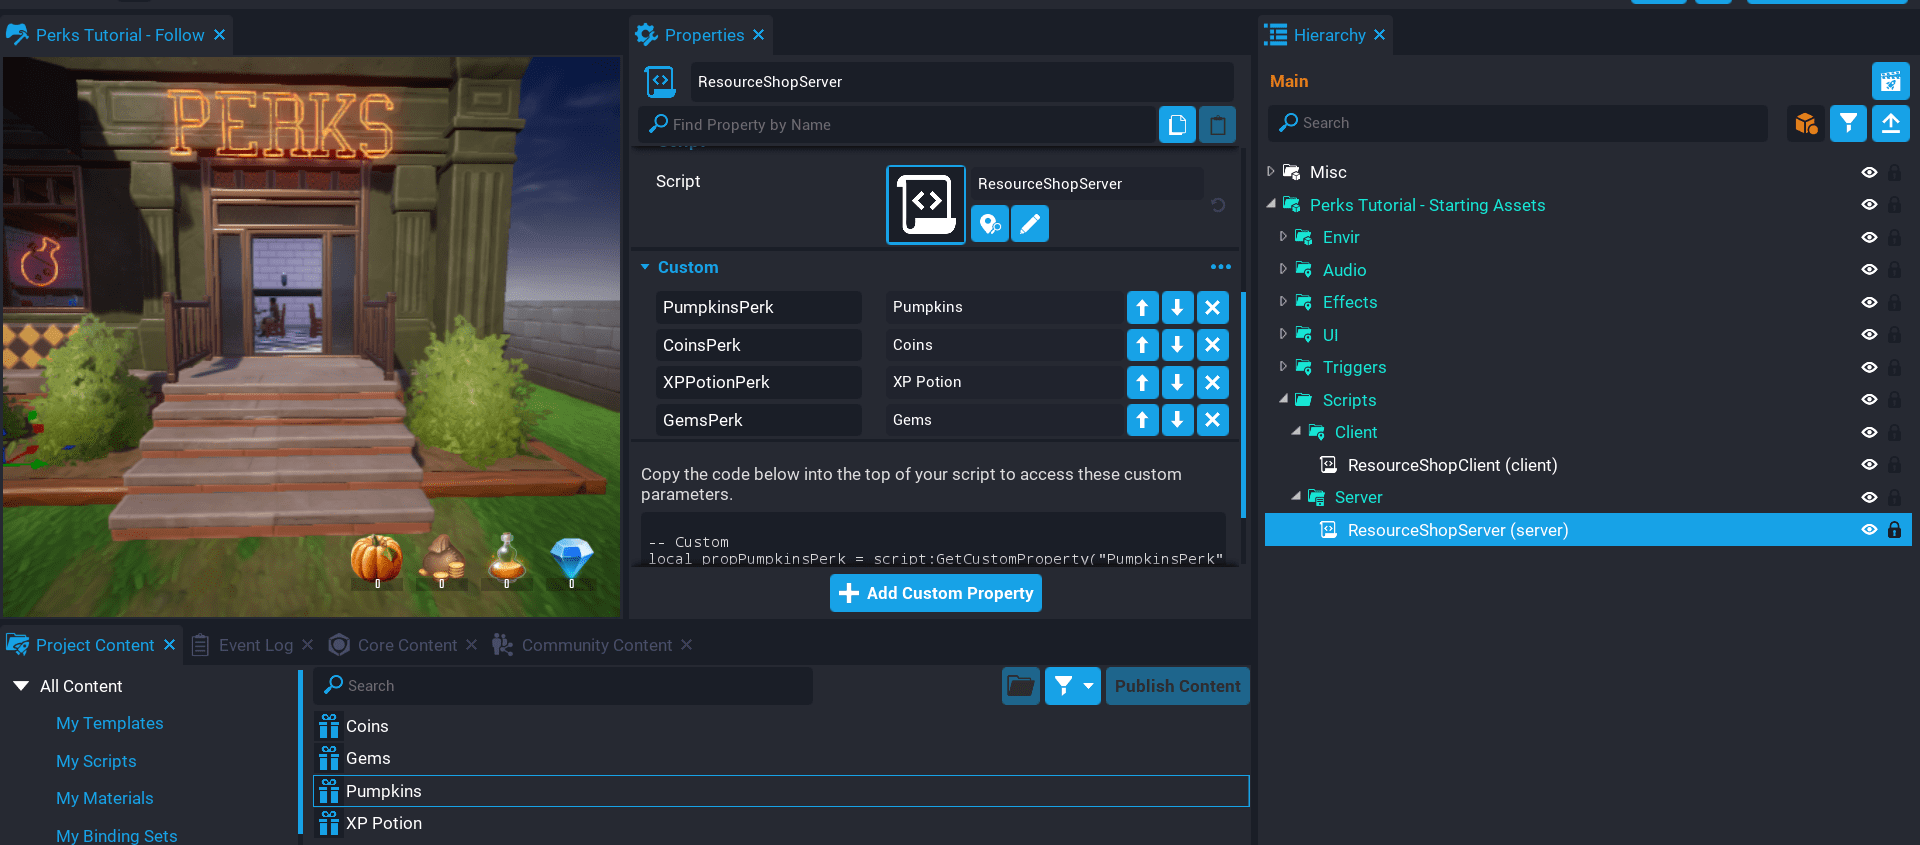
Create ResourceShopServer Script
Create a new script called ResourceShopServer, and place it into the Server group, in the Scripts group. The ResourceShopServer script will be responsible for updating the player resources, and later on saving to player storage to persist the player's resources.
Create Resource Perk Properties
The ResourceShopServer needs to know about the resource perks. Add each resource perk as a custom property to the ResourceShopServer script.
- Add the Pumpkins Perk as a custom property. Name the property
PumpkinsPerk. - Add the Coins Perk as a custom property. Name the property
CoinsPerk. - Add the XP Potion Perk as a custom property. Name the property
XPPotionPerk. - Add the Gems Perk as a custom property. Name the property
GemsPerk.
Create Perks Table
Open the ResourceShopServer script.
The PERKS table contains an entry for each resource perk which also includes some data. Storing them in a table like this will be easier later on when you need to persistently store them, as you can just loop through the PERKS table.
local PERKS = {

    {

        perk = script:GetCustomProperty("PumpkinsPerk"),
        resourceKey = "pumpkins",
        resourceAmount = 5,
        storageKey = "p"

    },

    {

        perk = script:GetCustomProperty("CoinsPerk"),
        resourceKey = "coins",
        resourceAmount = 150,
        storageKey = "c"

    },

    {

        perk = script:GetCustomProperty("XPPotionPerk"),
        resourceKey = "xppotions",
        resourceAmount = 1,
        storageKey = "xpp"

    },

    {

        perk = script:GetCustomProperty("GemsPerk"),
        resourceKey = "gems",
        resourceAmount = 50,
        storageKey = "g"

    }

}
| Property | Description |
|---|---|
perk |
Net reference to the perk custom property. |
resourceKey |
The resource key that will be used for add / setting the resource for the player. |
resourceAmount |
The amount to give to the player when they purchase the resource perk. |
storageKey |
The key used in the table that will be stored in player storage. |
Hierarchy Lookup
If you have a lot of perks, instead of creating a large table, you could create a look list in the Hierarchy. The list would contain an entry for each perk, along with the data (similar to each entry in the PERKS table). This will allow you to edit and update the list from the editor without needing to open the script.
Create GetPerkData Function
The GetPerkData will loop through the PERKS table to find a perk that matches the perk parameter that is passed in.
local function GetPerkData(perk)
    for i, data in ipairs(PERKS) do
        if data.perk == perk then
            return data
        end
    end

    return nil
end
Create PerkChanged Function
The PerkChanged function is the listener that will be fired when the player has purchased a resource perk. The perk parameter will be the perk the player purchased, which can be used to lookup the perk data from the PERKS table.
local function PerkChanged(buyer, perk)
    local perkData = GetPerkData(perk)

    if perkData ~= nil then
        buyer:AddResource(perkData.resourceKey, perkData.resourceAmount)
    end
end
This will also trigger the resourceChangedEvent on the client in the ResourceShopClient script, so will update the player's UI.
buyer:AddResource(perkData.resourceKey, perkData.resourceAmount)
Create OnJoined Function
When the player purchases a perk, the listener PerkChanged will be called, which will update the player's resource.
local function OnJoined(player)
    player.perkChangedEvent:Connect(PerkChanged)
end
Connect playerJoinedEvent
When a player joins the game, the OnJoined listener will be called.
Game.playerJoinedEvent:Connect(OnJoined)
The ResourceShopServer Script
ResourceShopServer
local PERKS = {

    {

        perk = script:GetCustomProperty("PumpkinsPerk"),
        resourceKey = "pumpkins",
        resourceAmount = 5,
        storageKey = "p"

    },

    {

        perk = script:GetCustomProperty("CoinsPerk"),
        resourceKey = "coins",
        resourceAmount = 150,
        storageKey = "c"

    },

    {

        perk = script:GetCustomProperty("XPPotionPerk"),
        resourceKey = "xppotions",
        resourceAmount = 1,
        storageKey = "xpp"

    },

    {

        perk = script:GetCustomProperty("GemsPerk"),
        resourceKey = "gems",
        resourceAmount = 50,
        storageKey = "g"

    }

}

local function GetPerkData(perk)
    for i, data in ipairs(PERKS) do
        if data.perk == perk then
            return data
        end
    end

    return nil
end

local function PerkChanged(buyer, perk)
    local perkData = GetPerkData(perk)

    if perkData ~= nil then
        buyer:AddResource(perkData.resourceKey, perkData.resourceAmount)
    end
end

local function OnJoined(player)
    player.perkChangedEvent:Connect(PerkChanged)
end

Game.playerJoinedEvent:Connect(OnJoined)
Test the Game
Test the game and make sure that each perk purchased, updates the amount in the UI.
Store Player Resources Persistently
The resources that the player purchases need to be stored persistently so that in the next session, the game will load from storage the amount of resources the player has.
Update ResourceShopServer Script
You will need to make some changes to a few of the functions in the ResourceShopServer script so the player's resources are loaded and saved to player storage.
Update PerkChanged Function
Update the PerkChanged function to add support for player storage.
local function PerkChanged(buyer, perk)
    local perkData = GetPerkData(perk)
    local playerData = Storage.GetPlayerData(buyer)

    if perkData ~= nil then
        buyer:AddResource(perkData.resourceKey, perkData.resourceAmount)

        if not playerData[perkData.storageKey] then
            playerData[perkData.storageKey] = 0
        end

        playerData[perkData.storageKey] = playerData[perkData.storageKey] + perkData.resourceAmount

        Storage.SetPlayerData(buyer, playerData)
    end
end
Each time a perk has been purchased, the player's storage data is loaded and stored in the playerData variable. This will be a table, even if there is no data stored.
local playerData = Storage.GetPlayerData(buyer)
Check to see if the storageKey for the perk exists in the player's data. If it doesn't, create it and set the resource value to 0. This is done to make sure there is a valid entry for the perk in the playerData table.
if not playerData[perkData.storageKey] then
    playerData[perkData.storageKey] = 0
end
Shortcut
A shortcut for the above code can be written as playerData[perkData.storageKey] = playerData[perkData.storageKey] or 0. If the value is nil, then 0 will be stored. This reduces readability, but is handy to know.
Update the value in the table with the amount the player has just purchased.
playerData[perkData.storageKey] = playerData[perkData.storageKey] + perkData.resourceAmount
Update the player's storage. This is done after each purchase to make sure the data stored is the most up to date data.
Storage.SetPlayerData(buyer, playerData)
Update OnJoined Function
The OnJoined function needs to be updated, so that when the player joins, the PERKS table is looped over and sets the player's resource for the perk on that iteration of the loop.
local function OnJoined(player)
    local playerData = Storage.GetPlayerData(player)

    for i, data in ipairs(PERKS) do
        player:SetResource(data.resourceKey, playerData[data.storageKey] or 0)
    end

    player.perkChangedEvent:Connect(PerkChanged)
end
The ResourceShopServer Script
ResourceShopServer
local PERKS = {

    {

        perk = script:GetCustomProperty("PumpkinsPerk"),
        resourceKey = "pumpkins",
        resourceAmount = 5,
        storageKey = "p"

    },

    {

        perk = script:GetCustomProperty("CoinsPerk"),
        resourceKey = "coins",
        resourceAmount = 150,
        storageKey = "c"

    },

    {

        perk = script:GetCustomProperty("XPPotionPerk"),
        resourceKey = "xppotions",
        resourceAmount = 1,
        storageKey = "xpp"

    },

    {

        perk = script:GetCustomProperty("GemsPerk"),
        resourceKey = "gems",
        resourceAmount = 50,
        storageKey = "g"

    }

}

local function GetPerkData(perk)
    for i, data in ipairs(PERKS) do
        if data.perk == perk then
            return data
        end
    end

    return nil
end

local function PerkChanged(buyer, perk)
    local perkData = GetPerkData(perk)
    local playerData = Storage.GetPlayerData(buyer)

    if perkData ~= nil then
        buyer:AddResource(perkData.resourceKey, perkData.resourceAmount)

        if not playerData[perkData.storageKey] then
            playerData[perkData.storageKey] = 0
        end

        playerData[perkData.storageKey] = playerData[perkData.storageKey] + perkData.resourceAmount

        Storage.SetPlayerData(buyer, playerData)
    end
end

local function OnJoined(player)
    local playerData = Storage.GetPlayerData(player)

    for i, data in ipairs(PERKS) do
        player:SetResource(data.resourceKey, playerData[data.storageKey] or 0)
    end

    player.perkChangedEvent:Connect(PerkChanged)
end

Game.playerJoinedEvent:Connect(OnJoined)
Update ResourceShopClient Script
The final thing left to do, is update the ResourceShopClient script.
This code will loop over all the local player's resources, and update the resource in the UI. The reason for this, is that when the resources get set on the server when the player joins the game, the resourceChangeEvent for the client may not be connected yet.
for key, value in pairs(localPlayer:GetResources()) do
    UpdateResources(localPlayer, key, value)
end
The ResourceShopClient Script
ResourceShopClient
local SHOP_UI = script:GetCustomProperty("ShopUI"):WaitForObject()
local SHOP_TRIGGER = script:GetCustomProperty("ShopTrigger"):WaitForObject()
local SHOP_BUTTON = script:GetCustomProperty("ShopButton"):WaitForObject()

local PUMPKINS_AMOUNT = script:GetCustomProperty("PumpkinsAmount"):WaitForObject()
local COINS_AMOUNT = script:GetCustomProperty("CoinsAmount"):WaitForObject()
local XP_POTIONS_AMOUNT = script:GetCustomProperty("XPPotionsAmount"):WaitForObject()
local GEMS_AMOUNT = script:GetCustomProperty("GemsAmount"):WaitForObject()

local localPlayer = Game.GetLocalPlayer()
local inTrigger = false

local function CloseUI()
    SHOP_UI.visibility = Visibility.FORCE_OFF

    if inTrigger then
        SHOP_TRIGGER.isInteractable = true
    else
        SHOP_TRIGGER.isInteractable = false
    end

    UI.SetCursorVisible(false)
    UI.SetCanCursorInteractWithUI(false)
end

local function OnInteracted(trigger, obj)
    if inTrigger and Object.IsValid(obj) and obj:IsA("Player") and obj == localPlayer then
        SHOP_UI.visibility = Visibility.FORCE_ON
        SHOP_TRIGGER.isInteractable = false

        UI.SetCursorVisible(true)
        UI.SetCanCursorInteractWithUI(true)
    end
end

local function OnExitTrigger(trigger, obj)
    if Object.IsValid(obj) and obj:IsA("Player") and obj == localPlayer then
        inTrigger = false
        CloseUI()
    end
end

local function OnEnterTrigger(trigger, obj)
    if Object.IsValid(obj) and obj:IsA("Player") and obj == localPlayer then
        SHOP_TRIGGER.isInteractable = true
        inTrigger = true
    end
end

local function UpdateResources(player, resource, amount)
    if resource == "pumpkins" then
        PUMPKINS_AMOUNT.text = tostring(amount)
    elseif resource == "coins" then
        COINS_AMOUNT.text = tostring(amount)
    elseif resource == "xppotions" then
        XP_POTIONS_AMOUNT.text = tostring(amount)
    elseif resource == "gems" then
        GEMS_AMOUNT.text = tostring(amount)
    end
end

SHOP_BUTTON.clickedEvent:Connect(CloseUI)

SHOP_TRIGGER.interactedEvent:Connect(OnInteracted)
SHOP_TRIGGER.endOverlapEvent:Connect(OnExitTrigger)
SHOP_TRIGGER.beginOverlapEvent:Connect(OnEnterTrigger)

localPlayer.resourceChangedEvent:Connect(UpdateResources)

for key, value in pairs(localPlayer:GetResources()) do
    UpdateResources(localPlayer, key, value)
end
Test the Game
Test the game and make sure the following work:
- Purchasing a perk updates the UI.
- Leaving and rejoining the game loads the resources from storage.
- Test in multiplayer preview.
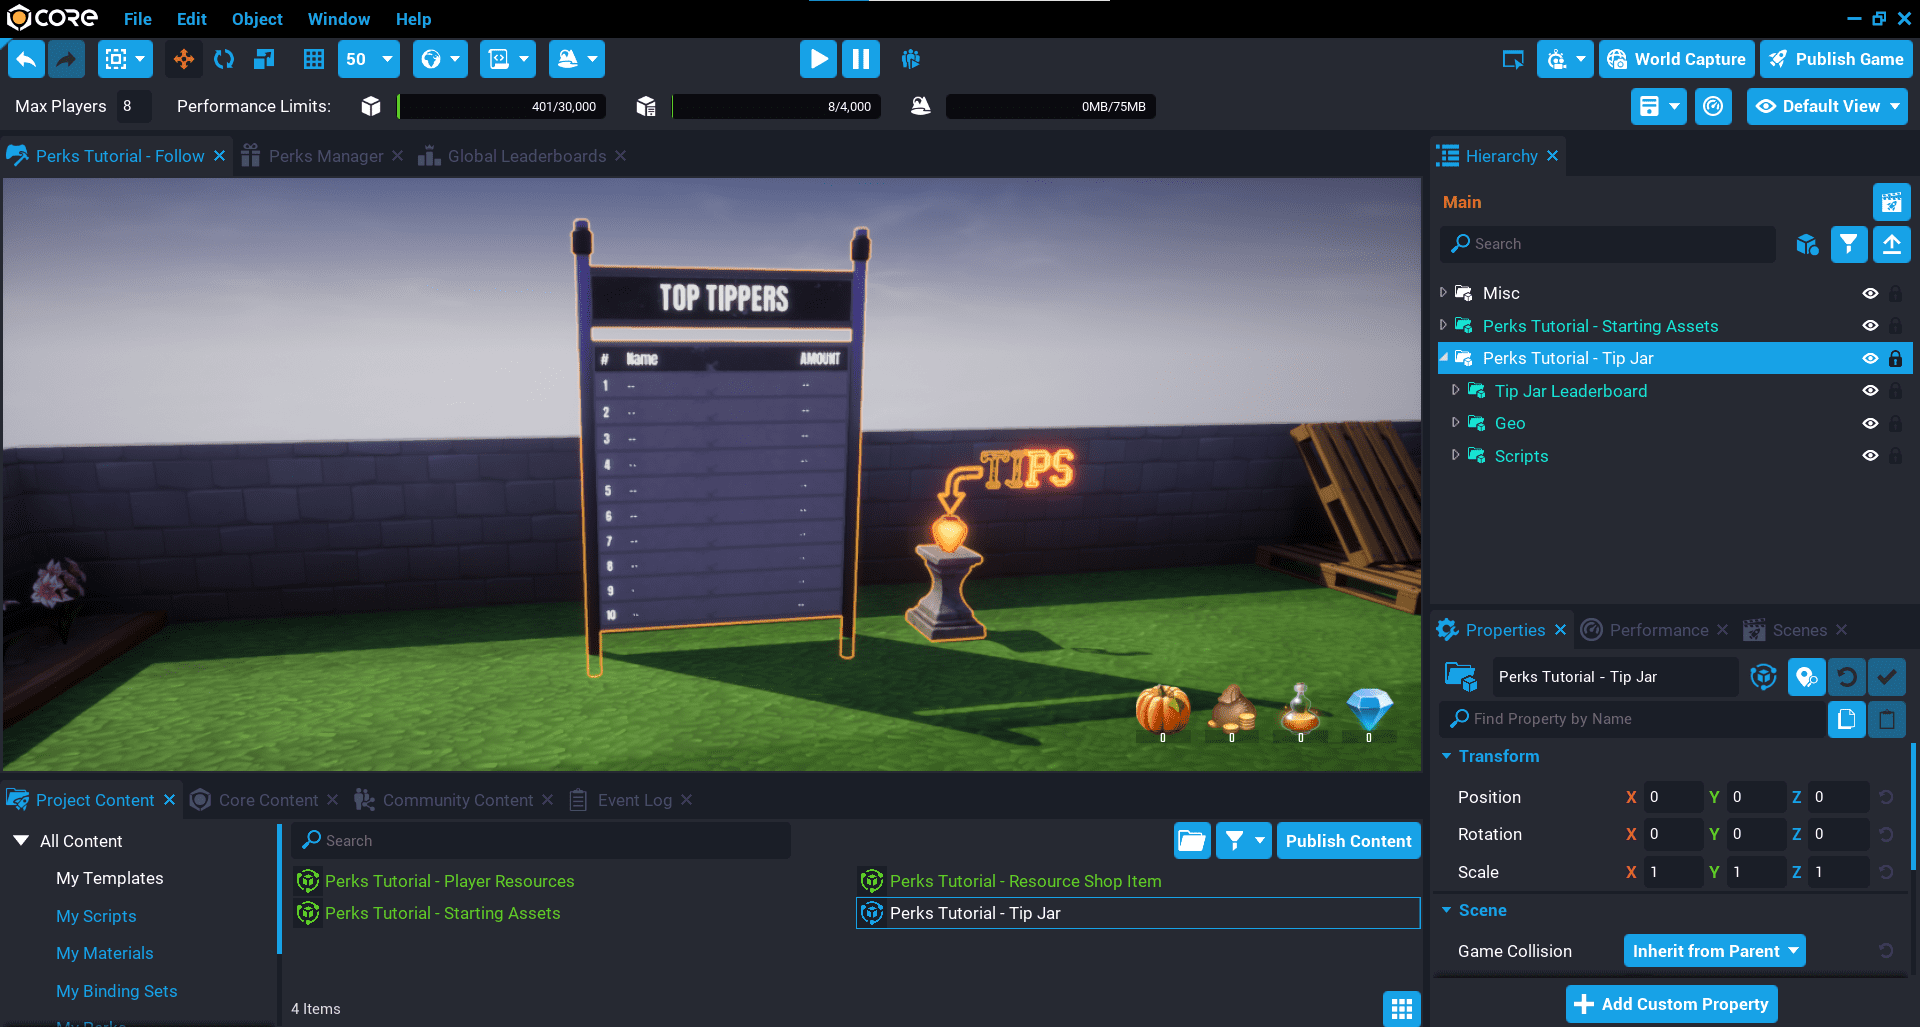
Creating a Tip Jar
In this section you will be creating a tip jar where players can give you a tip in game. You will also be adding a leaderboard to keep track of the top 10 tippers.
As you work through this section, you should see some familiarity with how things are set up, including the code. You are putting to use what you have already learned in the previous section, but adapting it for a different purpose.
Add Tip Jar Template to Hierarchy
- Click the Project Content tab.
- Click My Templates under All Content.
- Add the template Perks Tutorial - Tip Jar into the Hierarchy.
- Deinstance the Perks Tutorial - Tip Jar template in the Hierarchy.
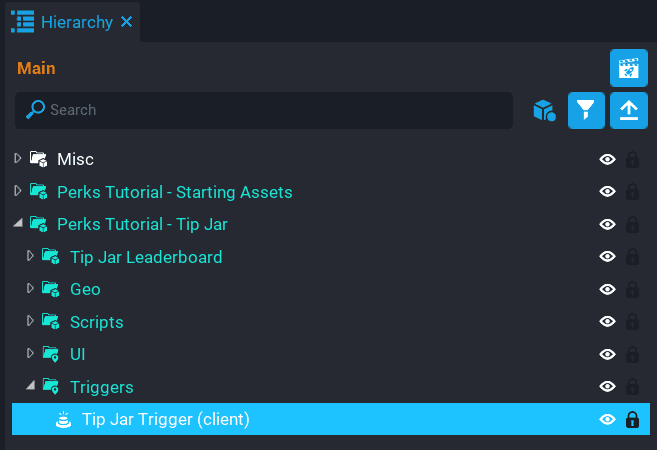
Create Tip Jar Trigger
A trigger will need to be added so you can detect when the player has entered the trigger volume so the interaction label is visible for the player for them to open the tip jar UI.
- Create a Trigger, and place it inside the Triggers group in the Hierarchy.
- Rename the trigger to Tip Jar Trigger.
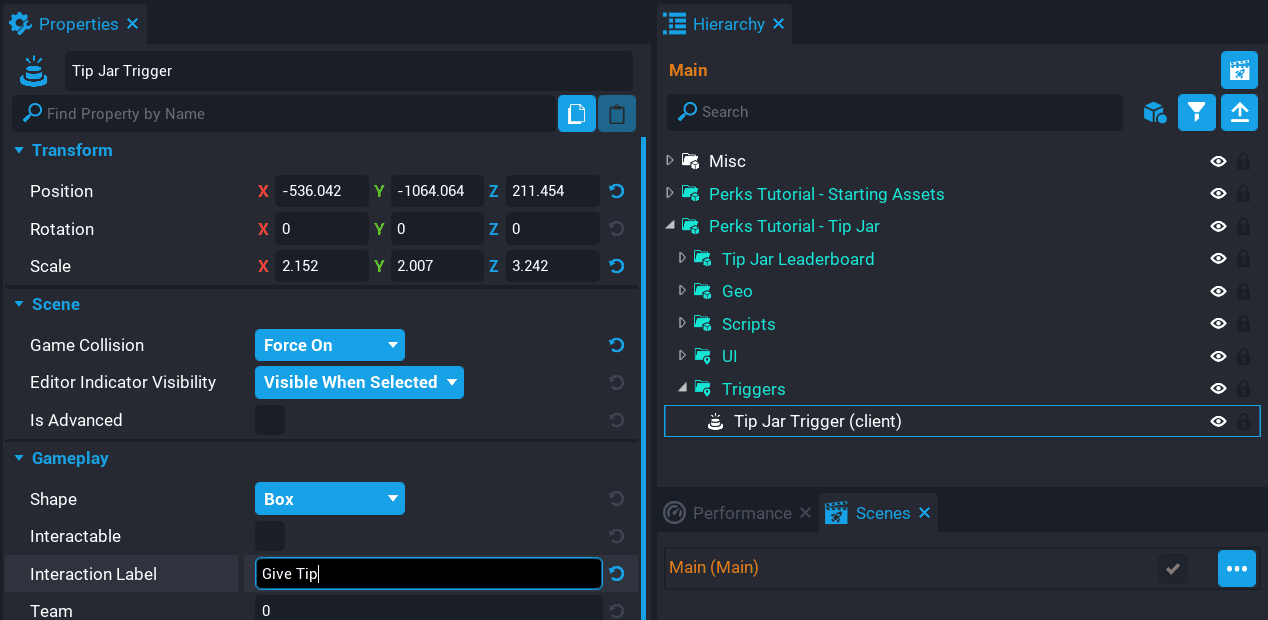
Force Collision On
Because the trigger is in a client context, you need to force collision on, otherwise you will not be able to detect when a player has entered the trigger volume.
Click on the Tip Jar Trigger, and set the Game Collision property to Force On in the Properties window. In doing so, the gizmo for the trigger volume will now show up in the scene view.

Position and Resize Trigger
The Tip Jar Trigger needs to be moved into the correct position, and resized to make sure the player can enter the Tip Jar Trigger volume.
Press V to turn on gizmo visibility to view the bounding volume of the Tip Jar Trigger.
Move the Tip Jar Trigger in front of the tip jar pedestal, and resize it.
Set Trigger Label
When the Tip Jar Trigger has the interactable property set to true, the label of the Tip Jar Trigger will be shown to the player when they enter the Tip Jar Trigger volume.
Set the Interaction Label property for the Tip Jar Trigger to Give Tip in the Properties window.
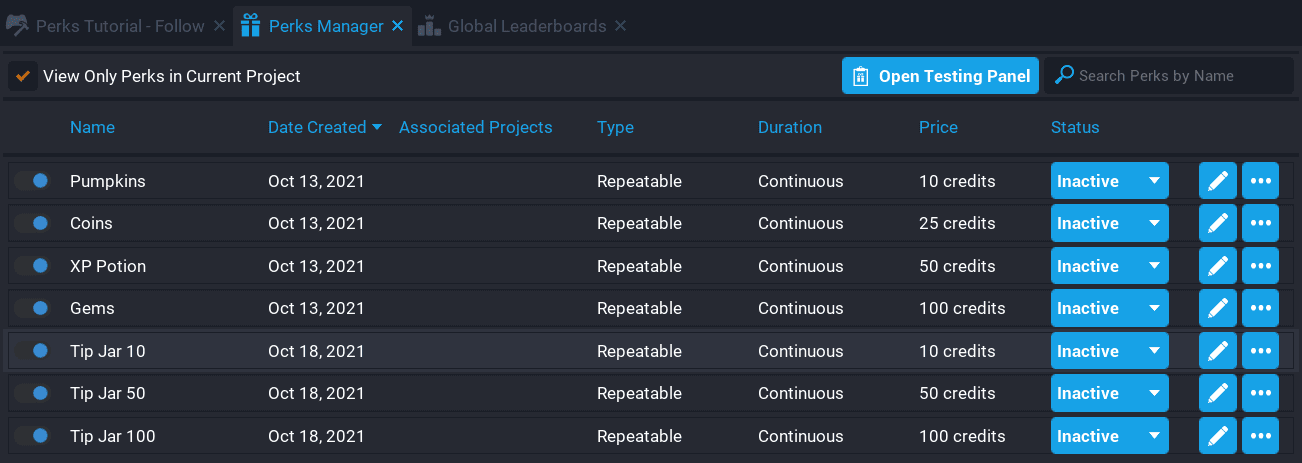
Create Perks
You will be creating 3 perks that allow the player to pick how much they want to tip. These perks will be repeatable, so the player can tip more if they like.
Create the following new repeatable perks.
- Tip Jar 10
- Tip Jar 50
- Tip Jar 100
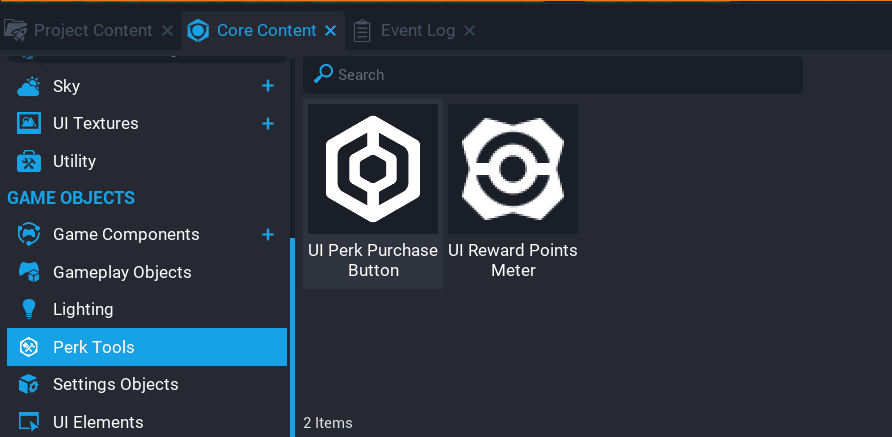
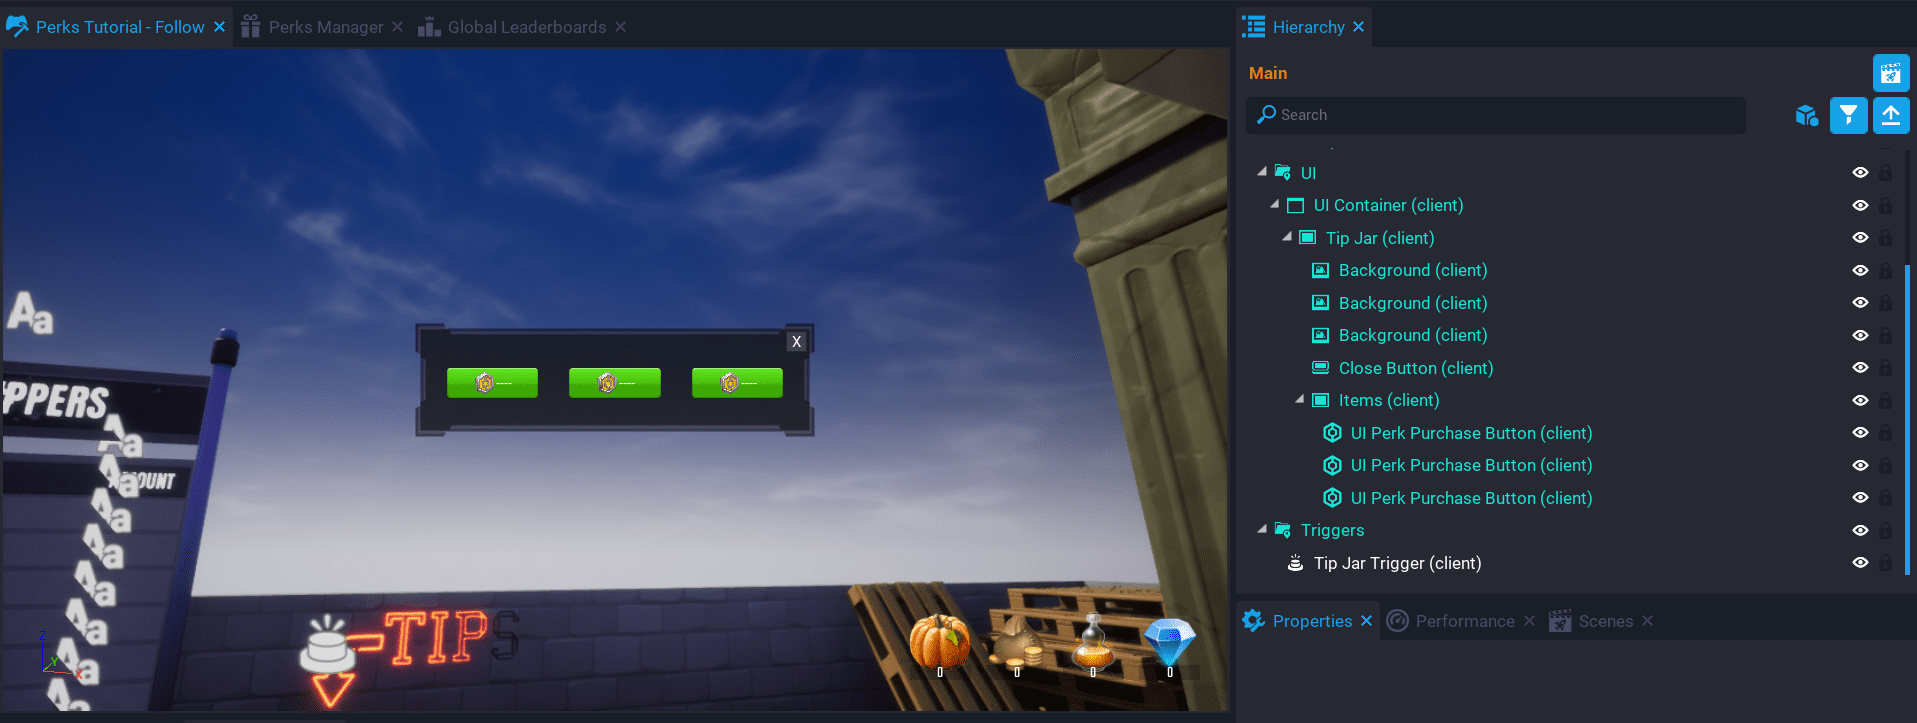
Create UI Perk Buttons
The tip jar template comes with some UI already set up. You will need to create the perk buttons and set up the perk references.
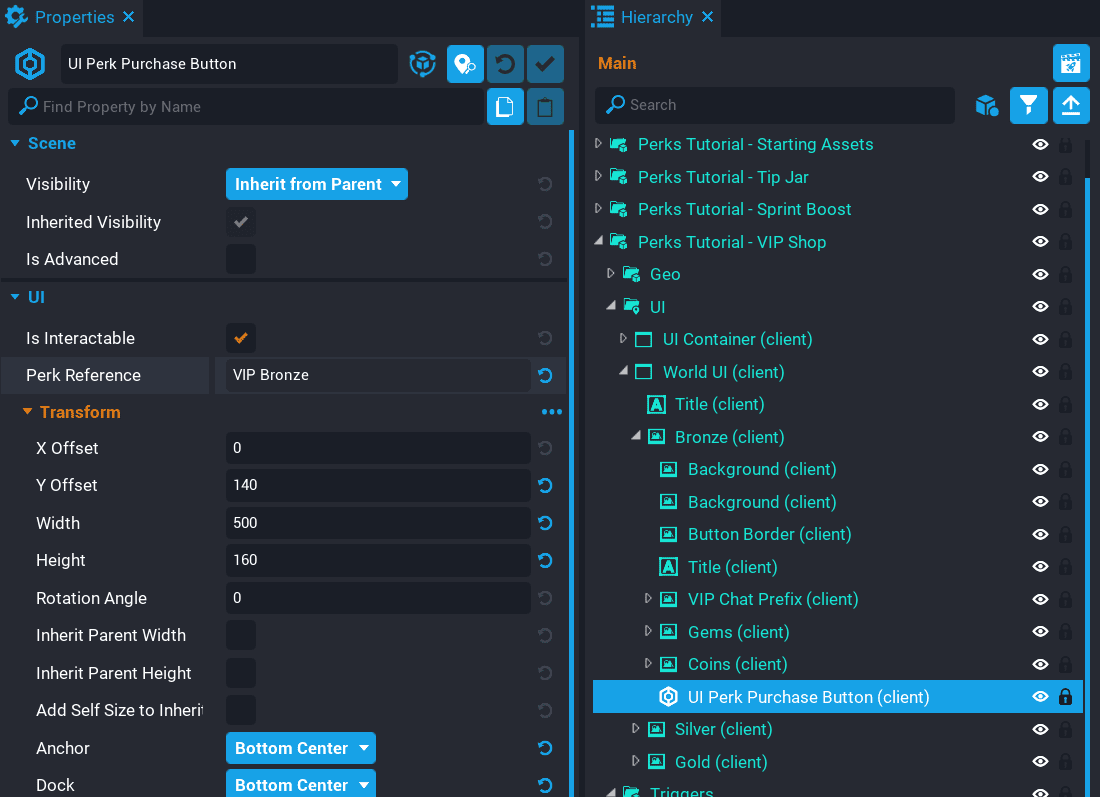
Create 3 perk buttons inside the Items group in the Tip Jar group. You can drag the UI Perk Purchase Button from Perk Tools in Project Content into your Hierarchy.
For each perk added to the UI, drag the perk reference onto the Perk Reference property in the Properties window.
View Tip Jar UI
Turn on the Visibility of the Tip Jar panel to see the UI while you position the buttons.
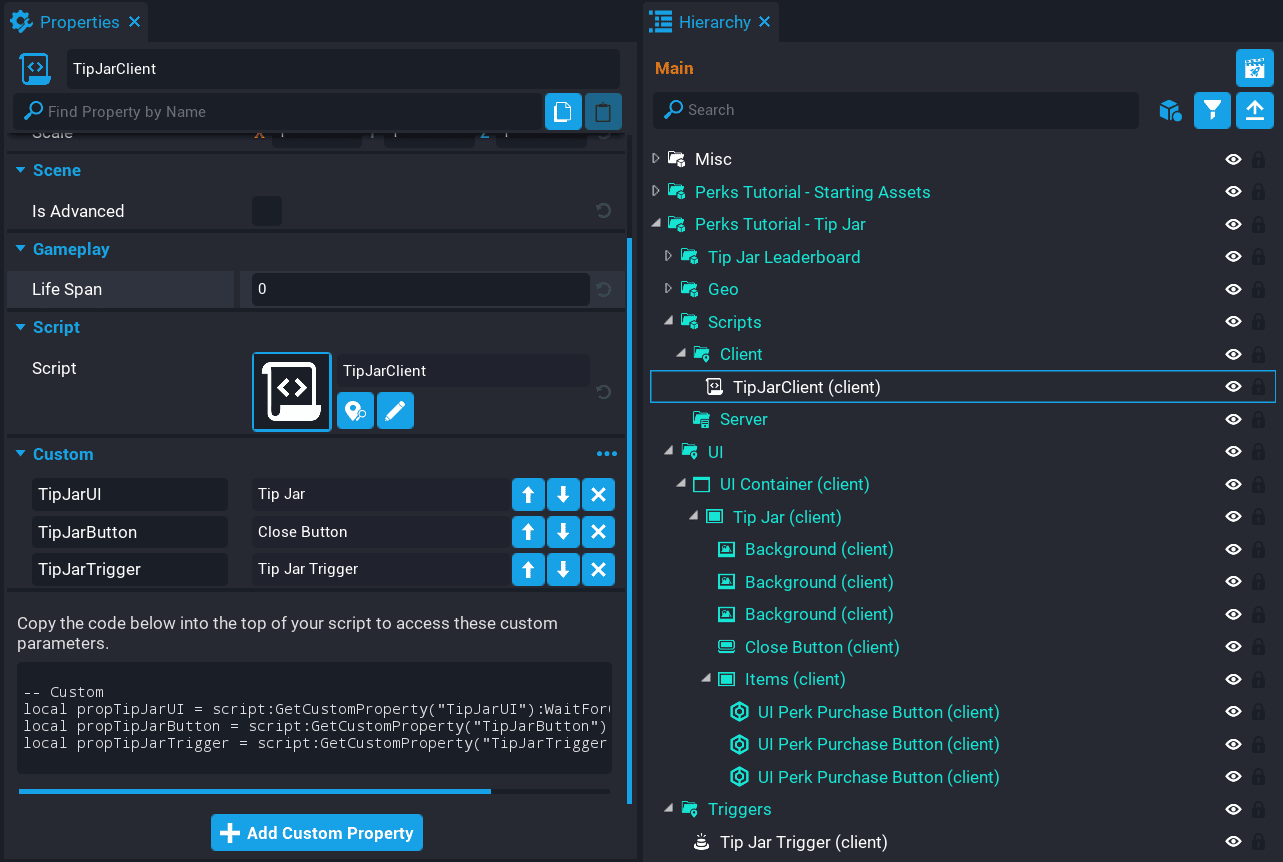
Create TipJarClient Script
Create a new script called TipJarClient and place it into the Client group, in the Scripts group. The TipJarClient script will be responsible for opening and closing the UI, and later on retrieving the leaderboard entries.
- Add the Tip Jar panel as a custom property. Rename the property
TipJarUI. - Add the Tip Jar Trigger as a custom property. Rename the property
TipJarTrigger. - Add the Close Button as a custom property. Rename the property
TipJarButton.
Create UI Variables
Open the TipJarClient script.
Create the variables so you have a reference to the UI objects for the Tip Jar.
local TIP_JAR_UI = script:GetCustomProperty("TipJarUI"):WaitForObject()
local TIP_JAR_TRIGGER = script:GetCustomProperty("TipJarTrigger"):WaitForObject()
local TIP_JAR_BUTTON = script:GetCustomProperty("TipJarButton"):WaitForObject()
The inTrigger variable will be used to determine if the player is in the trigger or not.
local localPlayer = Game.GetLocalPlayer()
local inTrigger = false
Create CloseUI Function
The CloseUI will be called when the clickedEvent for TIP_JAR_BUTTON is fired, and when the player leaves the TIP_JAR_TRIGGER volume.
local function CloseUI()
    TIP_JAR_UI.visibility = Visibility.FORCE_OFF

    if inTrigger then
        TIP_JAR_TRIGGER.isInteractable = true
    else
        TIP_JAR_TRIGGER.isInteractable = false
    end

    UI.SetCursorVisible(false)
    UI.SetCanCursorInteractWithUI(false)
end
If the player closes the Tip Jar UI, they could still be inside the trigger volume, so you don't want to turn of the interaction label, otherwise the player would need to leave the trigger volume, and enter again.
if inTrigger then
    TIP_JAR_TRIGGER.isInteractable = true
else
    TIP_JAR_TRIGGER.isInteractable = false
end
Create OnInteracted Function
The OnInteracted will be called when the player interacts with the TIP_JAR_TRIGGER.
local function OnInteracted(trigger, obj)
    if inTrigger and Object.IsValid(obj) and obj:IsA("Player") and obj == localPlayer then
        TIP_JAR_UI.visibility = Visibility.FORCE_ON
        TIP_JAR_TRIGGER.isInteractable = false

        UI.SetCursorVisible(true)
        UI.SetCanCursorInteractWithUI(true)
    end
end
Create OnExitTrigger Function
The OnExitTrigger will check if the local player has exited the TIP_JAR_TRIGGER volume, and close the tip jar UI.
local function OnExitTrigger(trigger, obj)
    if Object.IsValid(obj) and obj:IsA("Player") and obj == localPlayer then
        inTrigger = false
        CloseUI()
    end
end
Create OnEnterTrigger Function
The OnEnterTrigger will check when the local player has entered the TIP_JAR_TRIGGER volume and turn on interaction so the label will show up for the player.
local function OnEnterTrigger(trigger, obj)
    if Object.IsValid(obj) and obj:IsA("Player") and obj == localPlayer then
        TIP_JAR_TRIGGER.isInteractable = true
        inTrigger = true
    end
end
Connect Events
Connect the CloseUI function to the clickedEvent for the TIP_JAR_BUTTON. When the TIP_JAR_BUTTON is clicked by the player, it will close the UI.
TIP_JAR_BUTTON.clickedEvent:Connect(CloseUI)
Connect the OnInteracted function to the interactedEvent for the TIP_JAR_TRIGGER. When trigger is interacted with, it will show or hide the UI for the player.
TIP_JAR_TRIGGER.interactedEvent:Connect(OnInteracted)
Connect the OnExitTrigger function to the endOverlapEvent for the TIP_JAR_TRIGGER. When the player exits the trigger volume, it will automatically close the UI for the player.
TIP_JAR_TRIGGER.endOverlapEvent:Connect(OnExitTrigger)
Connect the OnEnterTrigger function to the beginOverlapEvent for the TIP_JAR_TRIGGER. When the player enters the trigger volume, it will enable the interaction label for the player, so they can open the UI.
TIP_JAR_TRIGGER.beginOverlapEvent:Connect(OnEnterTrigger)
The TipJarClient Script
TipJarClient
local TIP_JAR_UI = script:GetCustomProperty("TipJarUI"):WaitForObject()
local TIP_JAR_TRIGGER = script:GetCustomProperty("TipJarTrigger"):WaitForObject()
local TIP_JAR_BUTTON = script:GetCustomProperty("TipJarButton"):WaitForObject()

local localPlayer = Game.GetLocalPlayer()
local inTrigger = false

local function CloseUI()
    TIP_JAR_UI.visibility = Visibility.FORCE_OFF

    if inTrigger then
        TIP_JAR_TRIGGER.isInteractable = true
    else
        TIP_JAR_TRIGGER.isInteractable = false
    end

    UI.SetCursorVisible(false)
    UI.SetCanCursorInteractWithUI(false)
end

local function OnInteracted(trigger, obj)
    if inTrigger and Object.IsValid(obj) and obj:IsA("Player") and obj == localPlayer then
        TIP_JAR_UI.visibility = Visibility.FORCE_ON
        TIP_JAR_TRIGGER.isInteractable = false

        UI.SetCursorVisible(true)
        UI.SetCanCursorInteractWithUI(true)
    end
end

local function OnExitTrigger(trigger, obj)
    if Object.IsValid(obj) and obj:IsA("Player") and obj == localPlayer then
        inTrigger = false
        CloseUI()
    end
end

local function OnEnterTrigger(trigger, obj)
    if Object.IsValid(obj) and obj:IsA("Player") and obj == localPlayer then
        TIP_JAR_TRIGGER.isInteractable = true
        inTrigger = true
    end
end

TIP_JAR_BUTTON.clickedEvent:Connect(CloseUI)

TIP_JAR_TRIGGER.interactedEvent:Connect(OnInteracted)
TIP_JAR_TRIGGER.endOverlapEvent:Connect(OnExitTrigger)
TIP_JAR_TRIGGER.beginOverlapEvent:Connect(OnEnterTrigger)
Test the Game
Test the game and make sure the following work:
- Trigger interaction label is visible when entering the trigger volume.
- Trigger interaction label is not visible when exiting the trigger volume.
- Tip jar UI opens when pressing F.
- Tip jar UI closes when clicking on the close button.
- Tip jar UI closes when the player leaves the trigger volume.
- Tip jar items can be purchased.
Create Tip Jar Leaderboard
Create a new leaderboard called Top Tippers, and set Sorting to Higher Is Better, and the Rank Entries to 10.
When a player tips you, the amount will be added to the stored amount for that player, and submitted to the leaderboard.

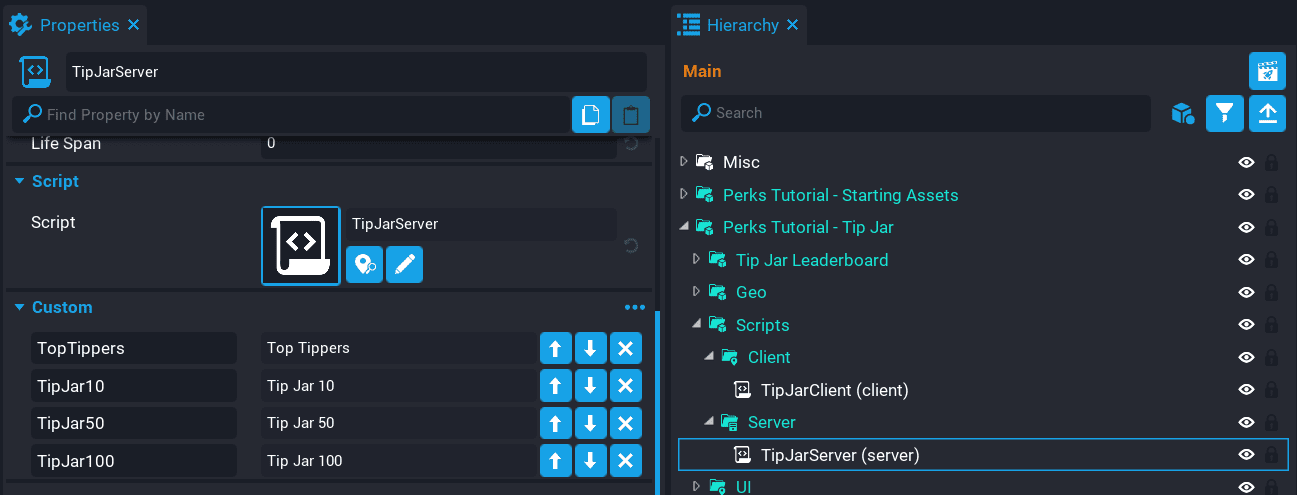
Create TipJarServer Script
Create a new script called TipJarServer, and place it into the Server group, in the Scripts group. The TipJarServer script will be responsible for updating the player's total tip amount so it is saved persistently, and submitting the new amount to the leaderboard.
- Add the leaderboard
Top Tippersas a custom property. Name the propertyTopTippers. - Add the
Tip Jar 10perk as a custom property. Name the propertyTipJar10. - Add the
Tip Jar 50perk as a custom property. Name the propertyTipJar50. - Add the
Tip Jar 100perk as a custom property. Name the propertyTipJar100.
Create Perk & Leaderboard Variables
Open the TipJarServer script.
You need a reference to the leaderboard, and the 3 tip jar perks.
local TOP_TIPPERS_LEADERBOARD = script:GetCustomProperty("TopTippers")

local TIP_JAR_10 = script:GetCustomProperty("TipJar10")
local TIP_JAR_50 = script:GetCustomProperty("TipJar50")
local TIP_JAR_100 = script:GetCustomProperty("TipJar100")
Create SubmitLeaderboardEntry Function
The SubmitLeaderboardEntry will check if the game has leaderboards, and then will submit the player's score. The score will be the total amount that player has tipped.
local function SubmitLeaderboardEntry(player, score)
    if Leaderboards.HasLeaderboards() then
        Leaderboards.SubmitPlayerScore(TOP_TIPPERS_LEADERBOARD, player, score)
    end
end
Create PerkChanged Function
The PerkChanged function will be called when the perkChanged event has fired when a player purchases a perk. It will check to see which perk was purchased, and store the perk amount in the amount variable.
local function PerkChanged(buyer, perk)
    local playerData = Storage.GetPlayerData(buyer)

    if not playerData.tips then
        playerData.tips = 0
    end

    local amount = 0

    if perk == TIP_JAR_10 then
        amount = 10
    elseif perk == TIP_JAR_50 then
        amount = 50
    elseif perk == TIP_JAR_100 then
        amount = 100
    end

    playerData.tips = playerData.tips + amount

    Storage.SetPlayerData(buyer, playerData)
    SubmitLeaderboardEntry(buyer, playerData.tips)
end
The total tips amount for the player is updated with the amount.
playerData.tips = playerData.tips + amount
Update the player's storage, and submit the total tip amount to the leaderboard.
Storage.SetPlayerData(buyer, playerData)
SubmitLeaderboardEntry(buyer, playerData.tips)
Multiple perkChanged Events
Something to be aware of, is if you have multiple perkChanged events, all of them will fire when the player purchases a perk.
Create OnJoined Function
When the player joins the game, the perkChangedEvent will be connected.
local function OnJoined(player)
    player.perkChangedEvent:Connect(PerkChanged)
end
Connect Event
You need to connect up the playerJoinedEvent so the OnJoined listener is fired when a player joins the game.
Game.playerJoinedEvent:Connect(OnJoined)
The TipJarServer Script
TipJarServer
local TOP_TIPPERS_LEADERBOARD = script:GetCustomProperty("TopTippers")

local TIP_JAR_10 = script:GetCustomProperty("TipJar10")
local TIP_JAR_50 = script:GetCustomProperty("TipJar50")
local TIP_JAR_100 = script:GetCustomProperty("TipJar100")

local function SubmitLeaderboardEntry(player, score)
    if Leaderboards.HasLeaderboards() then
        Leaderboards.SubmitPlayerScore(TOP_TIPPERS_LEADERBOARD, player, score)
    end
end

local function PerkChanged(buyer, perk)
    local playerData = Storage.GetPlayerData(buyer)

    if not playerData.tips then
        playerData.tips = 0
    end

    local amount = 0

    if perk == TIP_JAR_10 then
        amount = 10
    elseif perk == TIP_JAR_50 then
        amount = 50
    elseif perk == TIP_JAR_100 then
        amount = 100
    end

    playerData.tips = playerData.tips + amount

    Storage.SetPlayerData(buyer, playerData)
    SubmitLeaderboardEntry(buyer, playerData.tips)
end

local function OnJoined(player)
    player.perkChangedEvent:Connect(PerkChanged)
end

Game.playerJoinedEvent:Connect(OnJoined)
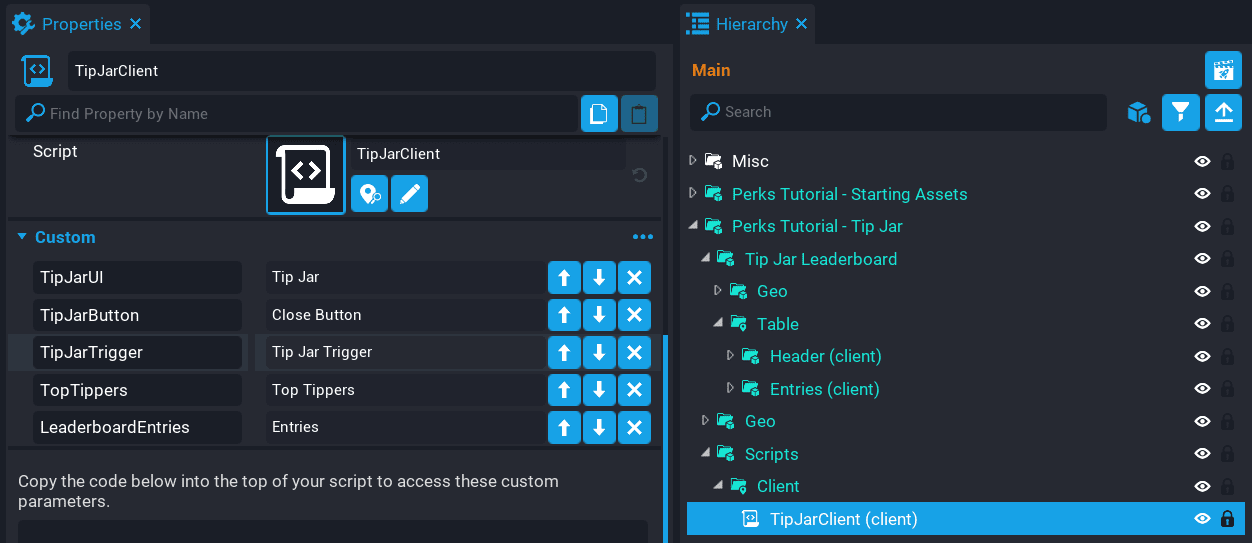
Update TipJarClient Script
The TipJarClient script needs to be updated so that it loads the leaderboard list and displays the top tippers in game.
- Add the Top Tippers leaderboard as a custom property. Name the property
TopTippers. - Add the Entries group found in the Table group, in the Tip Jar Leaderboard group as a custom property. Name the property
LeaderboardEntries.
Create Leaderboard Variables
Open the TipJarClient script.
You will need a reference to the leaderboard to get the submitted entries, and a reference to the UI entries so they can be updated to display the names and amount of the top tippers.
local TOP_TIPPERS_LEADERBOARD = script:GetCustomProperty("TopTippers")
local LEADERBOARD_ENTRIES = script:GetCustomProperty("LeaderboardEntries"):WaitForObject()
Create UpdateLeaderboard Function
The UpdateLeaderboard function will refresh the leaderboard by spawning a task that repeats forever, but will repeat every 10 seconds.
Task Repeating Interval
For the tutorial the repeatInterval property for the task is set to 10 seconds. For a public game, 30 seconds would be more ideal.
local function UpdateLeaderboard()
    local updater = Task.Spawn(function()
        if Leaderboards.HasLeaderboards() then
            local list = Leaderboards.GetLeaderboard(TOP_TIPPERS_LEADERBOARD, LeaderboardType.GLOBAL)

            if list ~= nil then
                for index, value in ipairs(list) do
                    local entry = LEADERBOARD_ENTRIES:GetChildren()[index]

                    if entry ~= nil then
                        entry:FindDescendantByName("Name").text = value.name
                        entry:FindDescendantByName("Amount").text = string.format("%0.f", value.score)
                    end
                end
            end
        end
    end)

    updater.repeatInterval = 10
    updater.repeatCount = -1
end
The GetLeaderboard function will fetch the global list for the Top Tippers leaderboard that you created.
local list = Leaderboards.GetLeaderboard(TOP_TIPPERS_LEADERBOARD, LeaderboardType.GLOBAL)
Iterate through the list, on each iteration, it will use the index to get a reference to the leaderboard entry child.
for index, value in ipairs(list) do
    local entry = LEADERBOARD_ENTRIES:GetChildren()[index]

    if entry ~= nil then
        entry:FindDescendantByName("Name").text = value.name
        entry:FindDescendantByName("Amount").text = string.format("%0.f", value.score)
    end
end
If the entry is not nil, then find the Name and Amount, and update the text properties.
entry:FindDescendantByName("Name").text = value.name
entry:FindDescendantByName("Amount").text = string.format("%0.f", value.score)
Because the score value is an integer, you need to convert it to a string so it can be set for the text property. You can use either tostring, or better, use string.format so the string can be formatted to display with no decimal points. For example, string.format in this case will return 300 instead of 300.0.
string.format("%0.f", value.score)
Call UpdateLeaderboard Function
At the end of the script, you need to call the UpdateLeaderboard() function.
UpdateLeaderboard()
The TipJarClient Script
TipJarClient
local TIP_JAR_UI = script:GetCustomProperty("TipJarUI"):WaitForObject()
local TIP_JAR_TRIGGER = script:GetCustomProperty("TipJarTrigger"):WaitForObject()
local TIP_JAR_BUTTON = script:GetCustomProperty("TipJarButton"):WaitForObject()

local TOP_TIPPERS_LEADERBOARD = script:GetCustomProperty("TopTippers")
local LEADERBOARD_ENTRIES = script:GetCustomProperty("LeaderboardEntries"):WaitForObject()

local localPlayer = Game.GetLocalPlayer()
local inTrigger = false

local function CloseUI()
    TIP_JAR_UI.visibility = Visibility.FORCE_OFF

    if inTrigger then
        TIP_JAR_TRIGGER.isInteractable = true
    else
        TIP_JAR_TRIGGER.isInteractable = false
    end

    UI.SetCursorVisible(false)
    UI.SetCanCursorInteractWithUI(false)
end

local function OnInteracted(trigger, obj)
    if inTrigger and Object.IsValid(obj) and obj:IsA("Player") and obj == localPlayer then
        TIP_JAR_UI.visibility = Visibility.FORCE_ON
        TIP_JAR_TRIGGER.isInteractable = false

        UI.SetCursorVisible(true)
        UI.SetCanCursorInteractWithUI(true)
    end
end

local function OnExitTrigger(trigger, obj)
    if Object.IsValid(obj) and obj:IsA("Player") and obj == localPlayer then
        inTrigger = false
        CloseUI()
    end
end

local function OnEnterTrigger(trigger, obj)
    if Object.IsValid(obj) and obj:IsA("Player") and obj == localPlayer then
        TIP_JAR_TRIGGER.isInteractable = true
        inTrigger = true
    end
end

local function UpdateLeaderboard()
    local updater = Task.Spawn(function()
        if Leaderboards.HasLeaderboards() then
            local list = Leaderboards.GetLeaderboard(TOP_TIPPERS_LEADERBOARD, LeaderboardType.GLOBAL)

            if list ~= nil then
                for index, value in ipairs(list) do
                    local entry = LEADERBOARD_ENTRIES:GetChildren()[index]

                    if entry ~= nil then
                        entry:FindDescendantByName("Name").text = value.name
                        entry:FindDescendantByName("Amount").text = string.format("%0.f", value.score)
                    end
                end
            end
        end
    end)

    updater.repeatInterval = 10
    updater.repeatCount = -1
end

TIP_JAR_BUTTON.clickedEvent:Connect(CloseUI)

TIP_JAR_TRIGGER.interactedEvent:Connect(OnInteracted)
TIP_JAR_TRIGGER.endOverlapEvent:Connect(OnExitTrigger)
TIP_JAR_TRIGGER.beginOverlapEvent:Connect(OnEnterTrigger)

UpdateLeaderboard()
Test the Game
Test the game and make sure the following work:
- Leaderboard entries are loaded (if there are entries).
- Leaderboards update (currently 10 seconds per refresh).
Creating a Player Sprint Boost
In this section you will be creating a sprint boost perk that can be purchased by the player. Not only will the player who purchases the perk receive the boost, but it will also apply to all other players in the game. As an extra incentive to the player to purchase the boost, that player's boost time will be extended if they already have a boost active that they originally purchased.
Add Sprint Boost Template to Hierarchy
The assets you imported from Community Content contain a sprint boost template that you can use to follow along with the tutorial.
- Click the Project Content tab.
- Click My Templates under All Content.
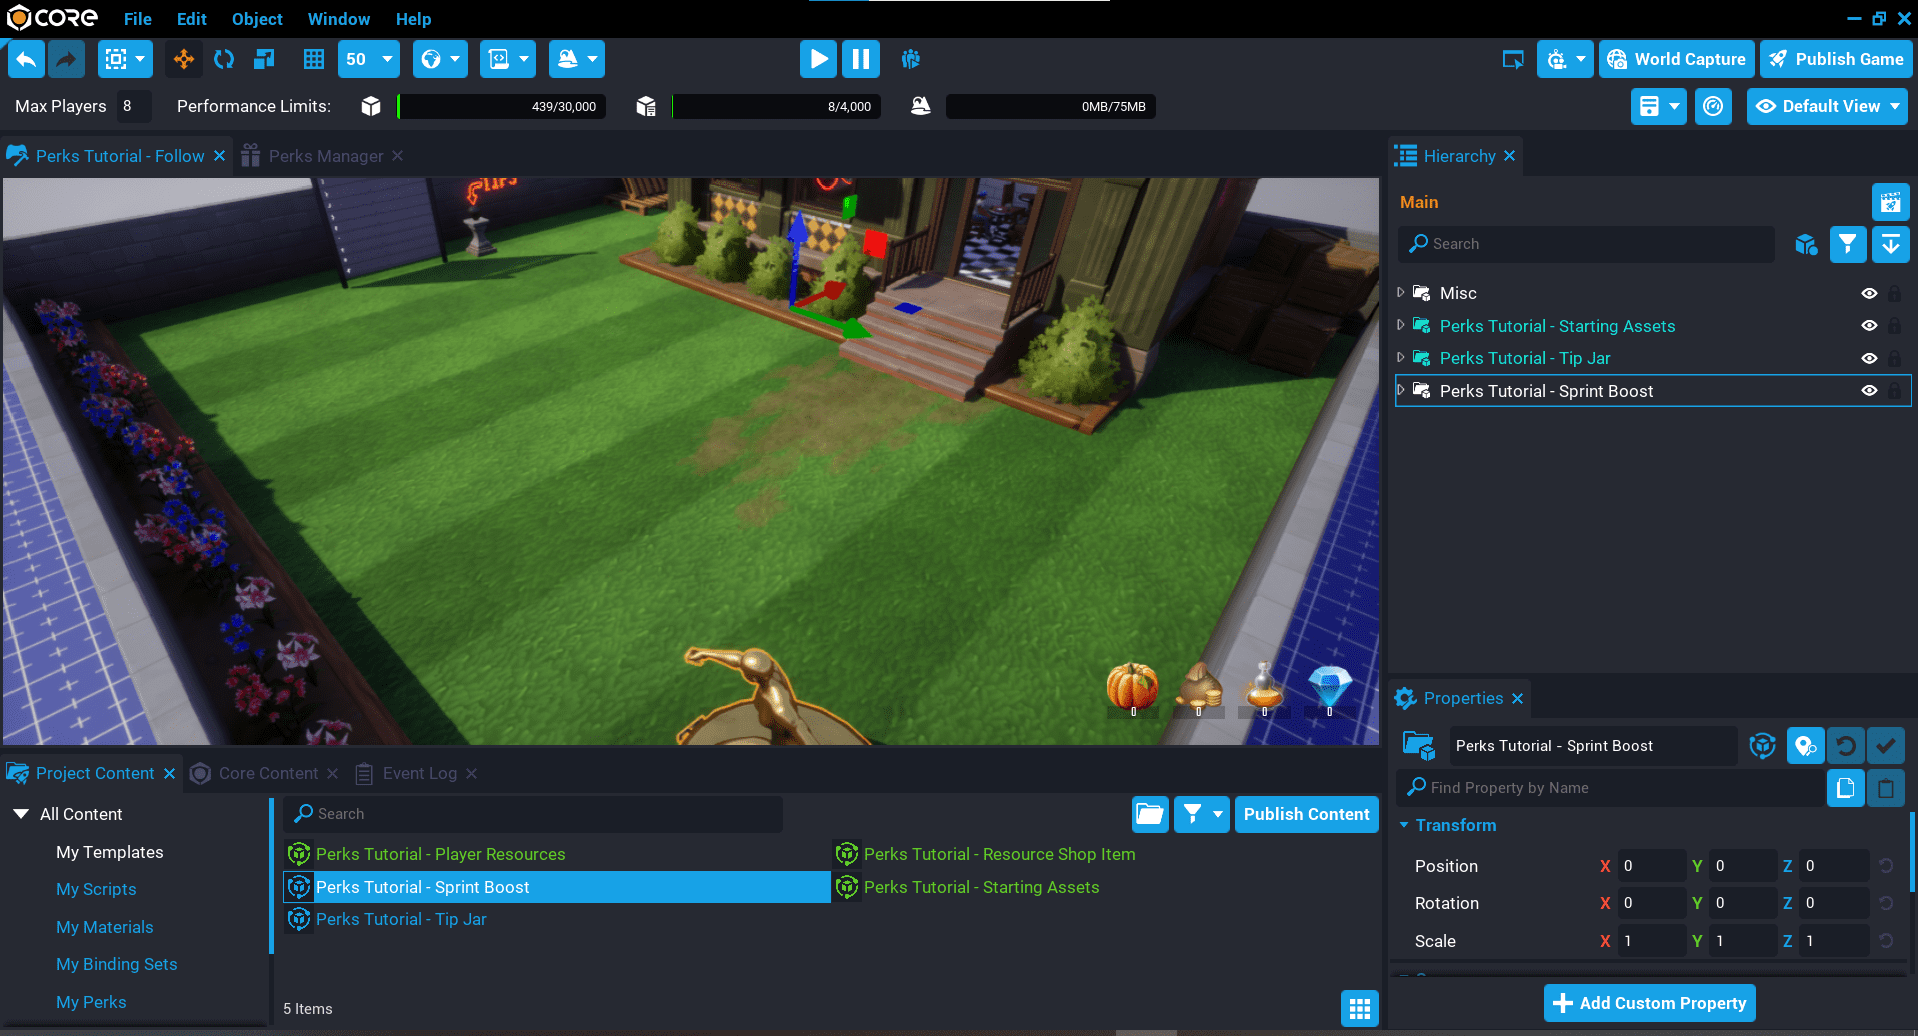
- Add the template Perks Tutorial - Sprint Boost into the Hierarchy.
- Deinstance the Perks Tutorial - Sprint Boost template in the Hierarchy.
Create Sprint Boost Trigger
A trigger will need to be added so you can detect when the player has entered the trigger volume, so the interaction label is visible for the player for them to open the sprint boost UI.
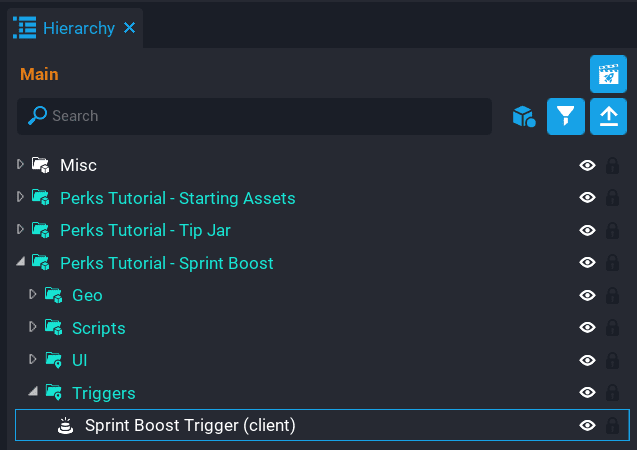
- Create a Trigger, and place it inside the Triggers group in the Hierarchy.
- Rename the trigger to Sprint Boost Trigger.
Force Collision On
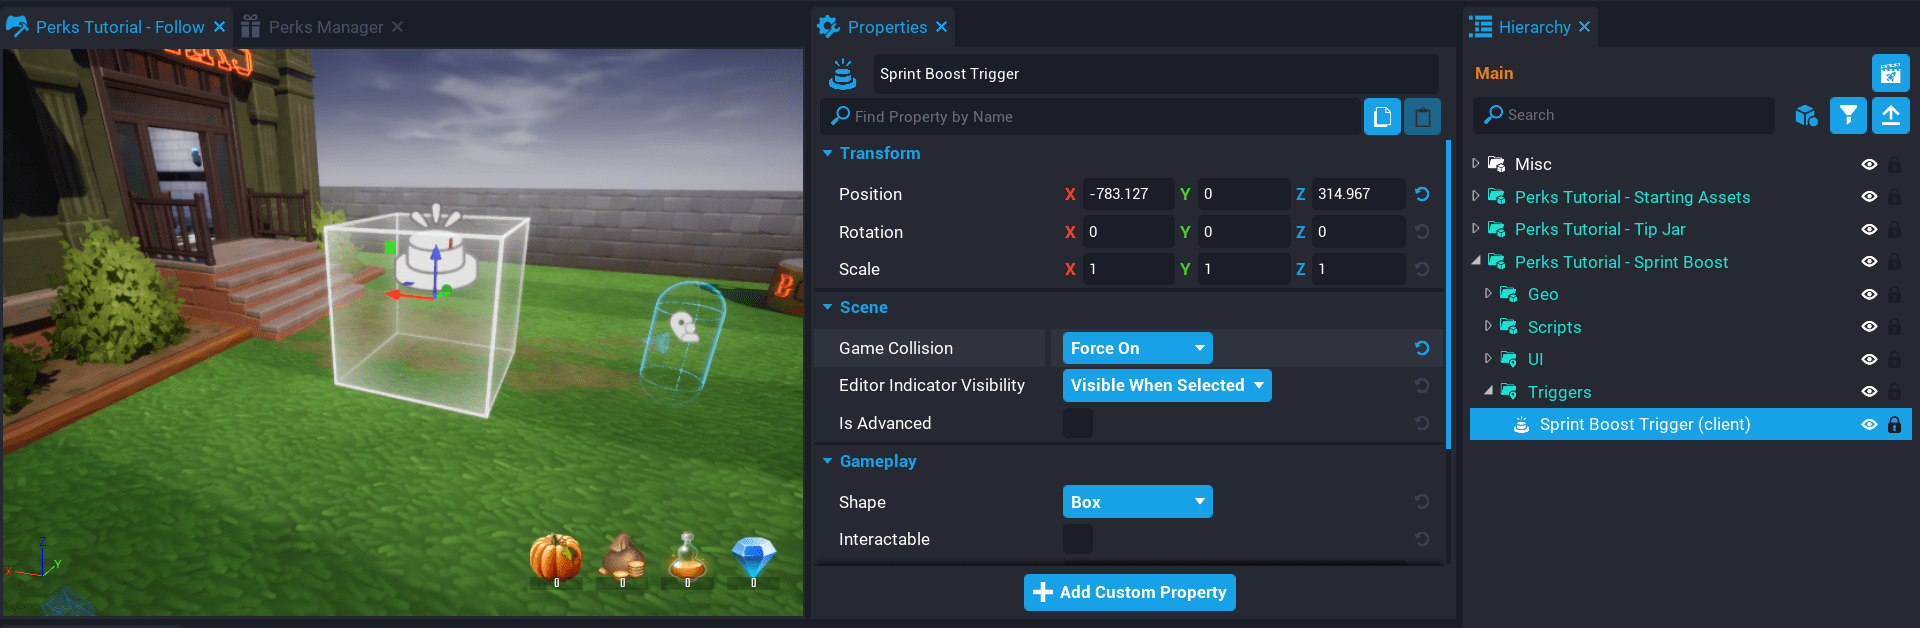
Because the trigger is in a client context, you need to force collision on, otherwise you will not be able to detect when a player has entered the trigger volume.
Click on the Sprint Boost Trigger, and set the Game Collision property to Force On in the Properties window. In doing so, the gizmo for the trigger volume will now show up in the scene view.
Position and Resize Trigger
The Sprint Boost Trigger needs to be moved into the correct position, and resized to make sure the player can enter the Sprint Boost Trigger volume.
Press V to turn on gizmo visibility to view the bounding volume of the Sprint Boost Trigger.
Move the Sprint Boost Trigger in front of the base of the sprint boost object, and resize it.
Set Trigger Label
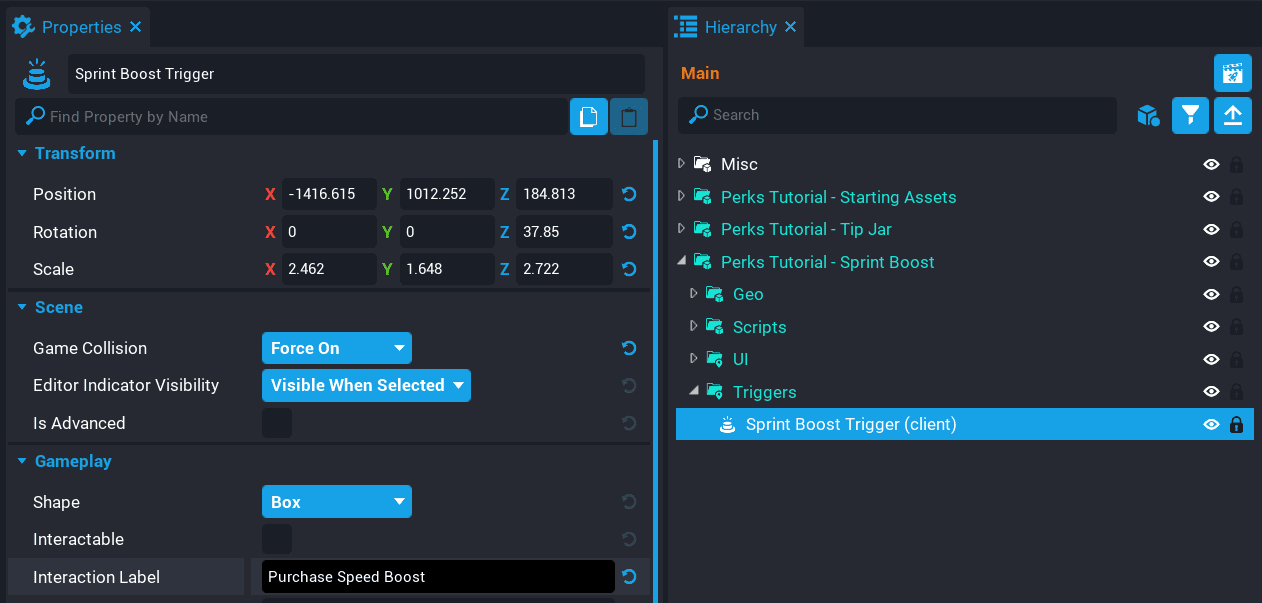
When the Sprint Boost Trigger has the interactable property set to true, the label of the Sprint Boost Trigger will be shown to the player when they enter the Sprint Boost Trigger volume.
Set the Interaction Label property for the Sprint Boost Trigger to Purchase Sprint Boost in the Properties window.
Create Perk
Create a repeatable perk for the sprint boost.
Create UI Perk Button
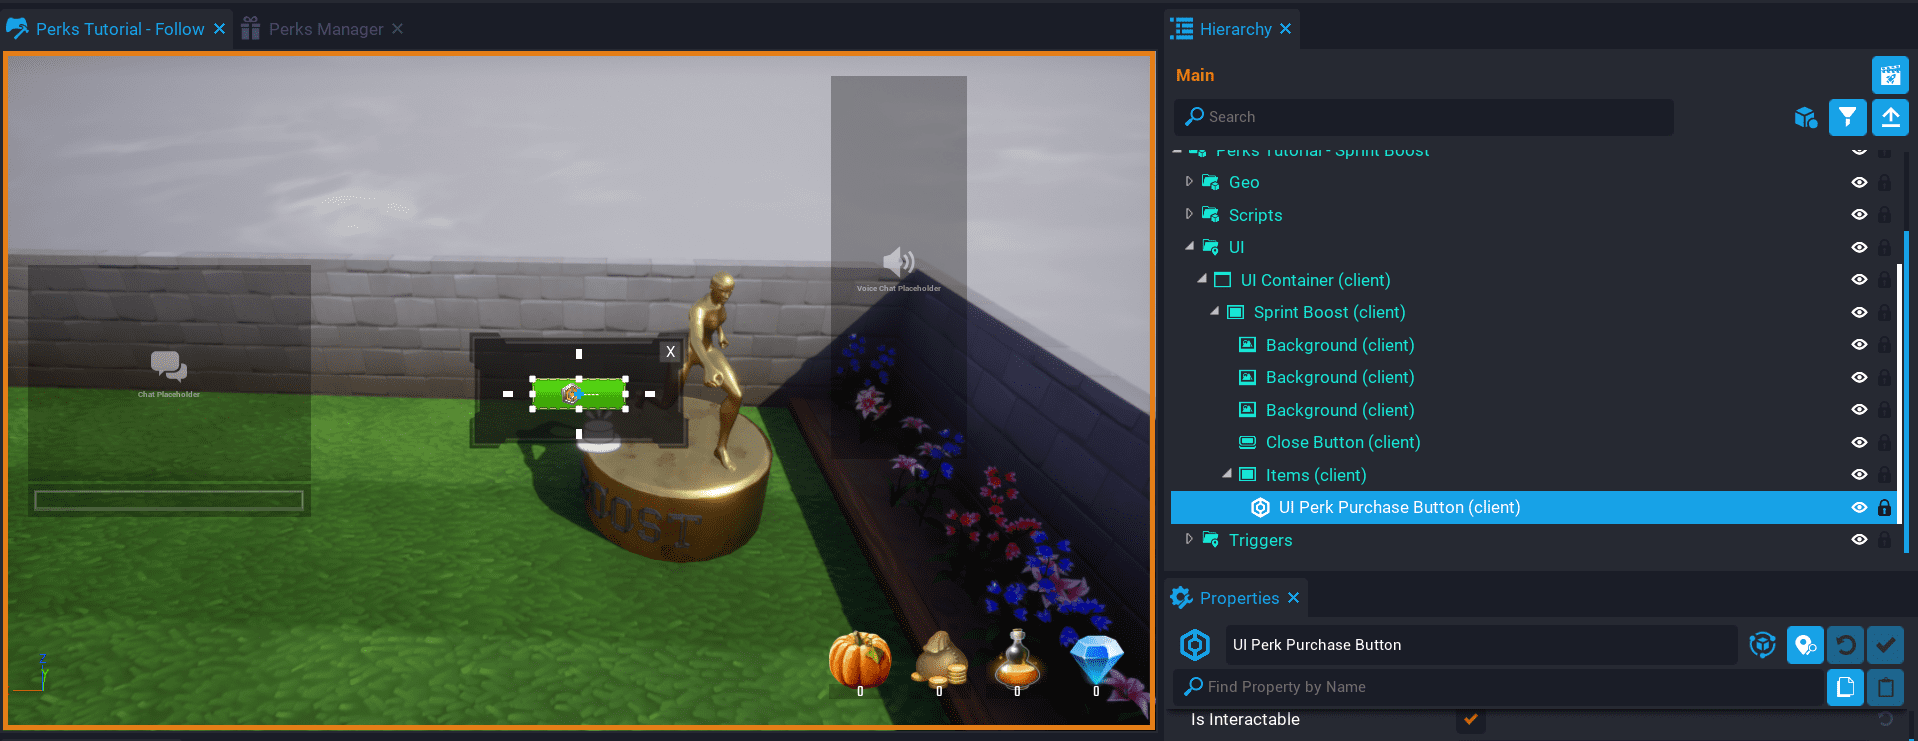
The sprint boost template comes with some UI already set up. You will need to create the perk button and set up the perk reference.
Create one perk button inside the Items group in the Sprint Boost group. You can drag the UI Perk Purchase Button from Perk Tools in Project Content into your Hierarchy.
Add the sprint boost perk to the Perk Reference property in the Properties window.
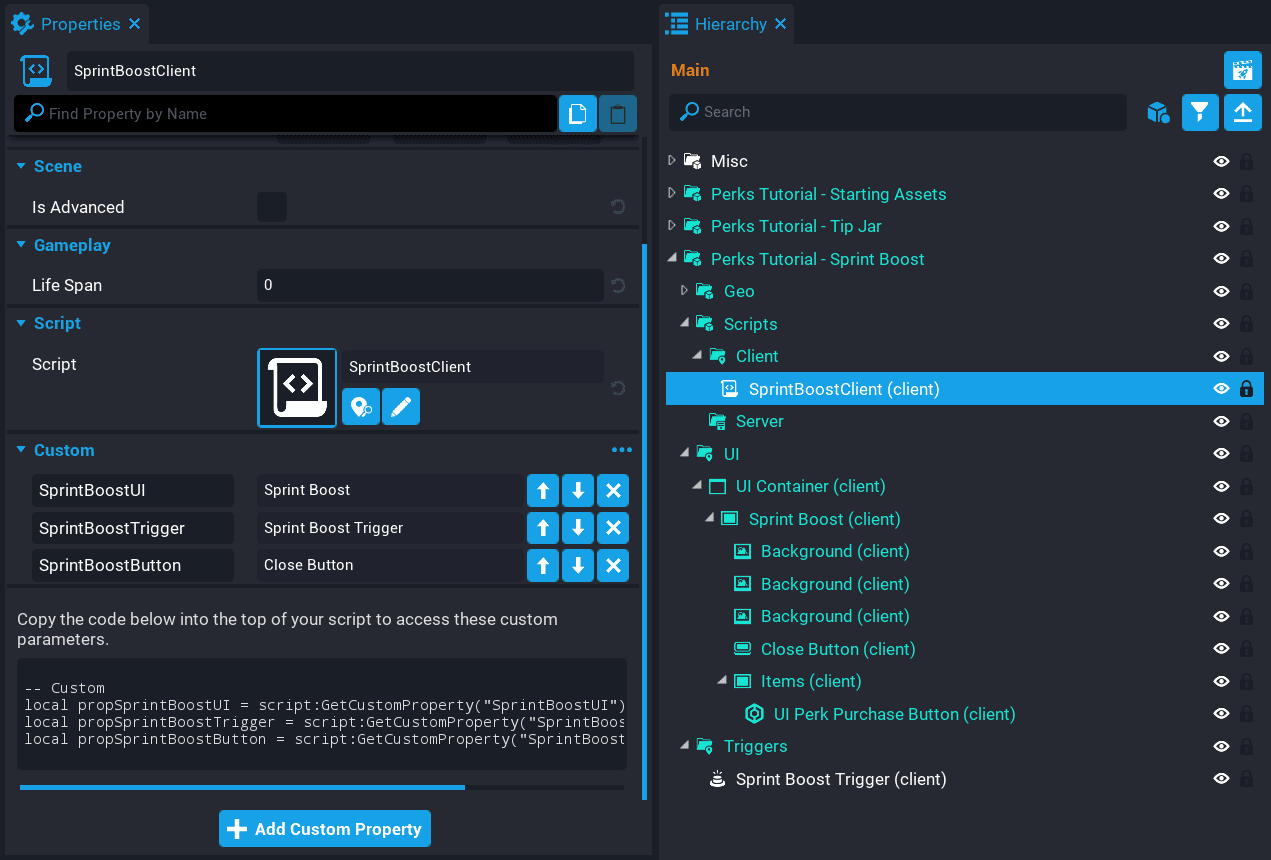
Create SprintBoostClient Script
Create a new script called SprintBoostClient, and place it into the Client group, in the Scripts group. The SprintBoostClient script will be responsible for opening and closing the UI.
- Add the Sprint Boost panel as a custom property. Rename the property
SprintBoostUI. - Add the Sprint Boost Trigger as a custom property. Rename the property
SprintBoostTrigger. - Add the Close Button as a custom property. Rename the property
SprintBoostButton.
Create Sprint Boost Variables
Open the SprintBoostClient script.
Create references to the sprint boost UI. You will also need a reference to the local player that will be used to see if the player in the trigger is the local player.
The inTrigger variable will be used to determine if the player is in the trigger or not.
local SPRINT_BOOST_UI = script:GetCustomProperty("SprintBoostUI"):WaitForObject()
local SPRINT_BOOST_TRIGGER = script:GetCustomProperty("SprintBoostTrigger"):WaitForObject()
local SPRINT_BOOST_BUTTON = script:GetCustomProperty("SprintBoostButton"):WaitForObject()

local localPlayer = Game.GetLocalPlayer()
local inTrigger = false
Create CloseUI Function
The CloseUI function will called when the clickedEvent for SPRINT_BOOST_BUTTON is fired, and when the player leaves the SPRINT_BOOST_TRIGGER volume.
local function CloseUI()
    SPRINT_BOOST_UI.visibility = Visibility.FORCE_OFF

    if inTrigger then
        SPRINT_BOOST_TRIGGER.isInteractable = true
    else
        SPRINT_BOOST_TRIGGER.isInteractable = false
    end

    UI.SetCursorVisible(false)
    UI.SetCanCursorInteractWithUI(false)
end
Create OnInteracted Function
The OnInteracted function will be called when the player interacts with the SPRINT_BOOST_TRIGGER.
local function OnInteracted(trigger, obj)
    if inTrigger and Object.IsValid(obj) and obj:IsA("Player") and obj == localPlayer then
        SPRINT_BOOST_UI.visibility = Visibility.FORCE_ON
        SPRINT_BOOST_TRIGGER.isInteractable = false

        UI.SetCursorVisible(true)
        UI.SetCanCursorInteractWithUI(true)
    end
end
Create OnExitTrigger Function
The OnExitTrigger function will check if the local player has exited the SPRINT_BOOST_TRIGGER volume, and close the sprint boost UI.
local function OnExitTrigger(trigger, obj)
    if Object.IsValid(obj) and obj:IsA("Player") and obj == localPlayer then
        inTrigger = false
        CloseUI()
    end
end
Create OnEnterTrigger Function
The OnEnterTrigger function will check when the local player has entered the SPRINT_BOOST_TRIGGER volume and turn on interaction so the label will show up for the player.
local function OnEnterTrigger(trigger, obj)
    if Object.IsValid(obj) and obj:IsA("Player") and obj == localPlayer then
        SPRINT_BOOST_TRIGGER.isInteractable = true
        inTrigger = true
    end
end
Connect Events
Connect the CloseUI function to the clickedEvent for the SPRINT_BOOST_BUTTON. When the SPRINT_BOOST_BUTTON is clicked by the player, it will close the UI.
SPRINT_BOOST_BUTTON.clickedEvent:Connect(CloseUI)
Connect the OnInteracted function to the interactedEvent for the SPRINT_BOOST_TRIGGER. When trigger is interacted with, it will show or hide the UI for the player.
SPRINT_BOOST_TRIGGER.interactedEvent:Connect(OnInteracted)
Connect the OnExitTrigger function to the endOverlapEvent for the SPRINT_BOOST_TRIGGER. When the player exits the trigger volume, it will automatically close the UI for the player.
SPRINT_BOOST_TRIGGER.endOverlapEvent:Connect(OnExitTrigger)
Connect the OnEnterTrigger function to the beginOverlapEvent for the SPRINT_BOOST_TRIGGER. When the player enters the trigger volume, it will enable the interaction label for the player, so they can open the UI.
SPRINT_BOOST_TRIGGER.beginOverlapEvent:Connect(OnEnterTrigger)
The SprintBoostClient Script
SprintBoostClient
local SPRINT_BOOST_UI = script:GetCustomProperty("SprintBoostUI"):WaitForObject()
local SPRINT_BOOST_TRIGGER = script:GetCustomProperty("SprintBoostTrigger"):WaitForObject()
local SPRINT_BOOST_BUTTON = script:GetCustomProperty("SprintBoostButton"):WaitForObject()

local localPlayer = Game.GetLocalPlayer()
local inTrigger = false

local function CloseUI()
    SPRINT_BOOST_UI.visibility = Visibility.FORCE_OFF

    if inTrigger then
        SPRINT_BOOST_TRIGGER.isInteractable = true
    else
        SPRINT_BOOST_TRIGGER.isInteractable = false
    end

    UI.SetCursorVisible(false)
    UI.SetCanCursorInteractWithUI(false)
end

local function OnInteracted(trigger, obj)
    if inTrigger and Object.IsValid(obj) and obj:IsA("Player") and obj == localPlayer then
        SPRINT_BOOST_UI.visibility = Visibility.FORCE_ON
        SPRINT_BOOST_TRIGGER.isInteractable = false

        UI.SetCursorVisible(true)
        UI.SetCanCursorInteractWithUI(true)
    end
end

local function OnExitTrigger(trigger, obj)
    if Object.IsValid(obj) and obj:IsA("Player") and obj == localPlayer then
        inTrigger = false
        CloseUI()
    end
end

local function OnEnterTrigger(trigger, obj)
    if Object.IsValid(obj) and obj:IsA("Player") and obj == localPlayer then
        SPRINT_BOOST_TRIGGER.isInteractable = true
        inTrigger = true
    end
end

SPRINT_BOOST_BUTTON.clickedEvent:Connect(CloseUI)

SPRINT_BOOST_TRIGGER.interactedEvent:Connect(OnInteracted)
SPRINT_BOOST_TRIGGER.endOverlapEvent:Connect(OnExitTrigger)
SPRINT_BOOST_TRIGGER.beginOverlapEvent:Connect(OnEnterTrigger)
Test the Game
Test the game and make sure the following work:
- Trigger interaction label is visible when entering the trigger volume.
- Trigger interaction label is not visible when exiting the trigger volume.
- Sprint boost UI opens when pressing F.
- Sprint boost UI closes when clicking on the close button.
- Sprint boost UI closes when the player leaves the trigger volume.
- Sprint boost item can be purchased.
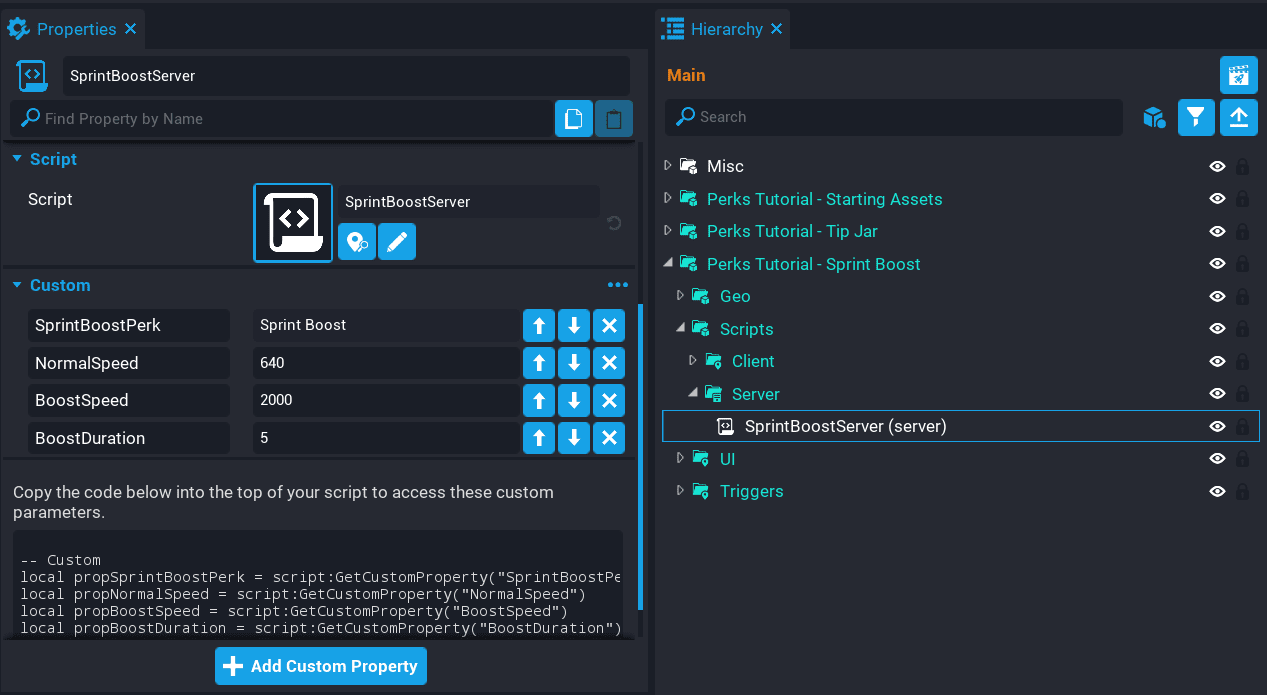
Create SprintBoostServer Script
Create a new script called SprintBoostServer, and place it into the Server group, in the Scripts group. The SprintBoostServer script will be responsible for applying the sprint boost to the player who purchased the perk, and also apply the sprint boost to all players on the server.
- Add the Sprint Boost perk as a custom property. Name the property
SprintBoostPerk. - Add a new Float custom property. Name the property
NormalSpeed, and set it to640. - Add a new Float custom property. Name the property
BoostSpeed, and set it to2000. - Add a new Float custom property. Name the property
BoostDuration, and set it to5.
Create Sprint Boost Variables
Open the SprintBoostServer script.
The players variable holds an empty table for now. When a player joins the game, they will be added to this table so you can keep track if they have a speed boost or not.
local NORMAL_SPEED = script:GetCustomProperty("NormalSpeed")
local BOOST_SPEED = script:GetCustomProperty("BoostSpeed")
local BOOST_DURATION = script:GetCustomProperty("BoostDuration")
local SPRINT_BOOST_PERK = script:GetCustomProperty("SprintBoostPerk")

local players = {}
Create PerkChanged Function
The PerkChanged function will check if the perk that was purchased by the player, is the sprint boost perk. If it is, then it will apply the speed boost to that player and all other players on the server.
local function PerkChanged(buyer, perk)
    if perk == SPRINT_BOOST_PERK then
        buyer.maxWalkSpeed = BOOST_SPEED

        if players[buyer.id].hasBoost then
            players[buyer.id].endTime = players[buyer.id].endTime + BOOST_DURATION
        else
            players[buyer.id].hasBoost = true
            players[buyer.id].endTime = time() + BOOST_DURATION
        end

        for i, player in ipairs(Game.GetPlayers()) do
            if players[player.id] ~= nil and player.id ~= buyer.id then
                player.maxWalkSpeed = BOOST_SPEED
                players[player.id].hasBoost = true
                players[player.id].endTime = time() + BOOST_DURATION
            end
        end
    end
end
If a player purchases the speed boost perk again while an existing speed boost is active, then the time of the speed boost is extended, instead of it being just the BOOST_DURATION. This only applies to the player who purchases the perk.
if players[buyer.id].hasBoost then
    players[buyer.id].endTime = players[buyer.id].endTime + BOOST_DURATION
else
    players[buyer.id].hasBoost = true
    players[buyer.id].endTime = time() + BOOST_DURATION
end
When a player purchases the speed boost perk, a loop is done over all players in the game, and any player that is not the player who purchased the perk, will receive the speed boost.
If the perk is purchased again while other players still have a speed boost, then their end time will only be the BOOST_DURATION, and will not be extended. This gives the player who purchased the perk a slight benefit.
for i, player in ipairs(Game.GetPlayers()) do
    if players[player.id] ~= nil and player.id ~= buyer.id then
        player.maxWalkSpeed = BOOST_SPEED
        players[player.id].hasBoost = true
        players[player.id].endTime = time() + BOOST_DURATION
    end
end
Create OnJoined Function
The OnJoined function will add the player who joined to the players table to keep track if they have a boost or not. At the same time, the perkChangedEvent is connected so that when that player purchases a perk, the PerkChanged function will be called.
local function OnJoined(player)
    players[player.id] = {

        hasBoost = false,
        endTime = 0
    }

    player.perkChangedEvent:Connect(PerkChanged)
end
The OnLeft function will remove the player from the players table. Setting the value to nil will remove that entry from the table.
local function OnLeft(player)
    if players[player.id] ~= nil then
        players[player.id] = nil
    end
end
Create Tick Function
Create the Tick function at the end of the script. The Tick function will loop over all players in the game to check if the endTime is less that the current up time of the server (time()). If the endTime is lower than time(), then the player's maxWalkSpeed is reset back to the NORMAL_SPEED.
The Tick function will run every frame, though in this case you don't need it to run every frame, so it can be slowed down using Task.Wait(1). This means that it will wait 1 second until the next frame.
function Tick()
    for i, player in ipairs(Game.GetPlayers()) do
        if players[player.id] ~= nil and players[player.id].hasBoost and players[player.id].endTime < time() then
            player.maxWalkSpeed = NORMAL_SPEED
            players[player.id].hasBoost = false
        end
    end

    Task.Wait(1)
end
Connect Events
Connect up the events at the end of the script. These events will fire when the player joins and leaves the game.
Game.playerJoinedEvent:Connect(OnJoined)
Game.playerLeftEvent:Connect(OnLeft)
The SprintBoostServer Script
SprintBoostServer
local NORMAL_SPEED = script:GetCustomProperty("NormalSpeed")
local BOOST_SPEED = script:GetCustomProperty("BoostSpeed")
local BOOST_DURATION = script:GetCustomProperty("BoostDuration")
local SPRINT_BOOST_PERK = script:GetCustomProperty("SprintBoostPerk")

local players = {}

local function PerkChanged(buyer, perk)
    if perk == SPRINT_BOOST_PERK then
        buyer.maxWalkSpeed = BOOST_SPEED

        if players[buyer.id].hasBoost then
            players[buyer.id].endTime = players[buyer.id].endTime + BOOST_DURATION
        else
            players[buyer.id].hasBoost = true
            players[buyer.id].endTime = time() + BOOST_DURATION
        end

        for i, player in ipairs(Game.GetPlayers()) do
            if players[player.id] ~= nil and player.id ~= buyer.id then
                player.maxWalkSpeed = BOOST_SPEED
                players[player.id].hasBoost = true
                players[player.id].endTime = time() + BOOST_DURATION
            end
        end
    end
end

local function OnJoined(player)
    players[player.id] = {

        hasBoost = false,
        endTime = 0
    }

    player.perkChangedEvent:Connect(PerkChanged)
end

local function OnLeft(player)
    if players[player.id] ~= nil then
        players[player.id] = nil
    end
end

function Tick()
    for i, player in ipairs(Game.GetPlayers()) do
        if players[player.id] ~= nil and players[player.id].hasBoost and players[player.id].endTime < time() then
            player.maxWalkSpeed = NORMAL_SPEED
            players[player.id].hasBoost = false
        end
    end

    Task.Wait(1)
end

Game.playerJoinedEvent:Connect(OnJoined)
Game.playerLeftEvent:Connect(OnLeft)
Test the Game
Test the game and make sure the following work:
- Sprint boost is applied when purchasing the perk.
- Sprint boost is applied other players.
- Sprint boost extends the duration just for the player who purchased the perk.
- Sprint boost expires and sprint speed is returned to normal.
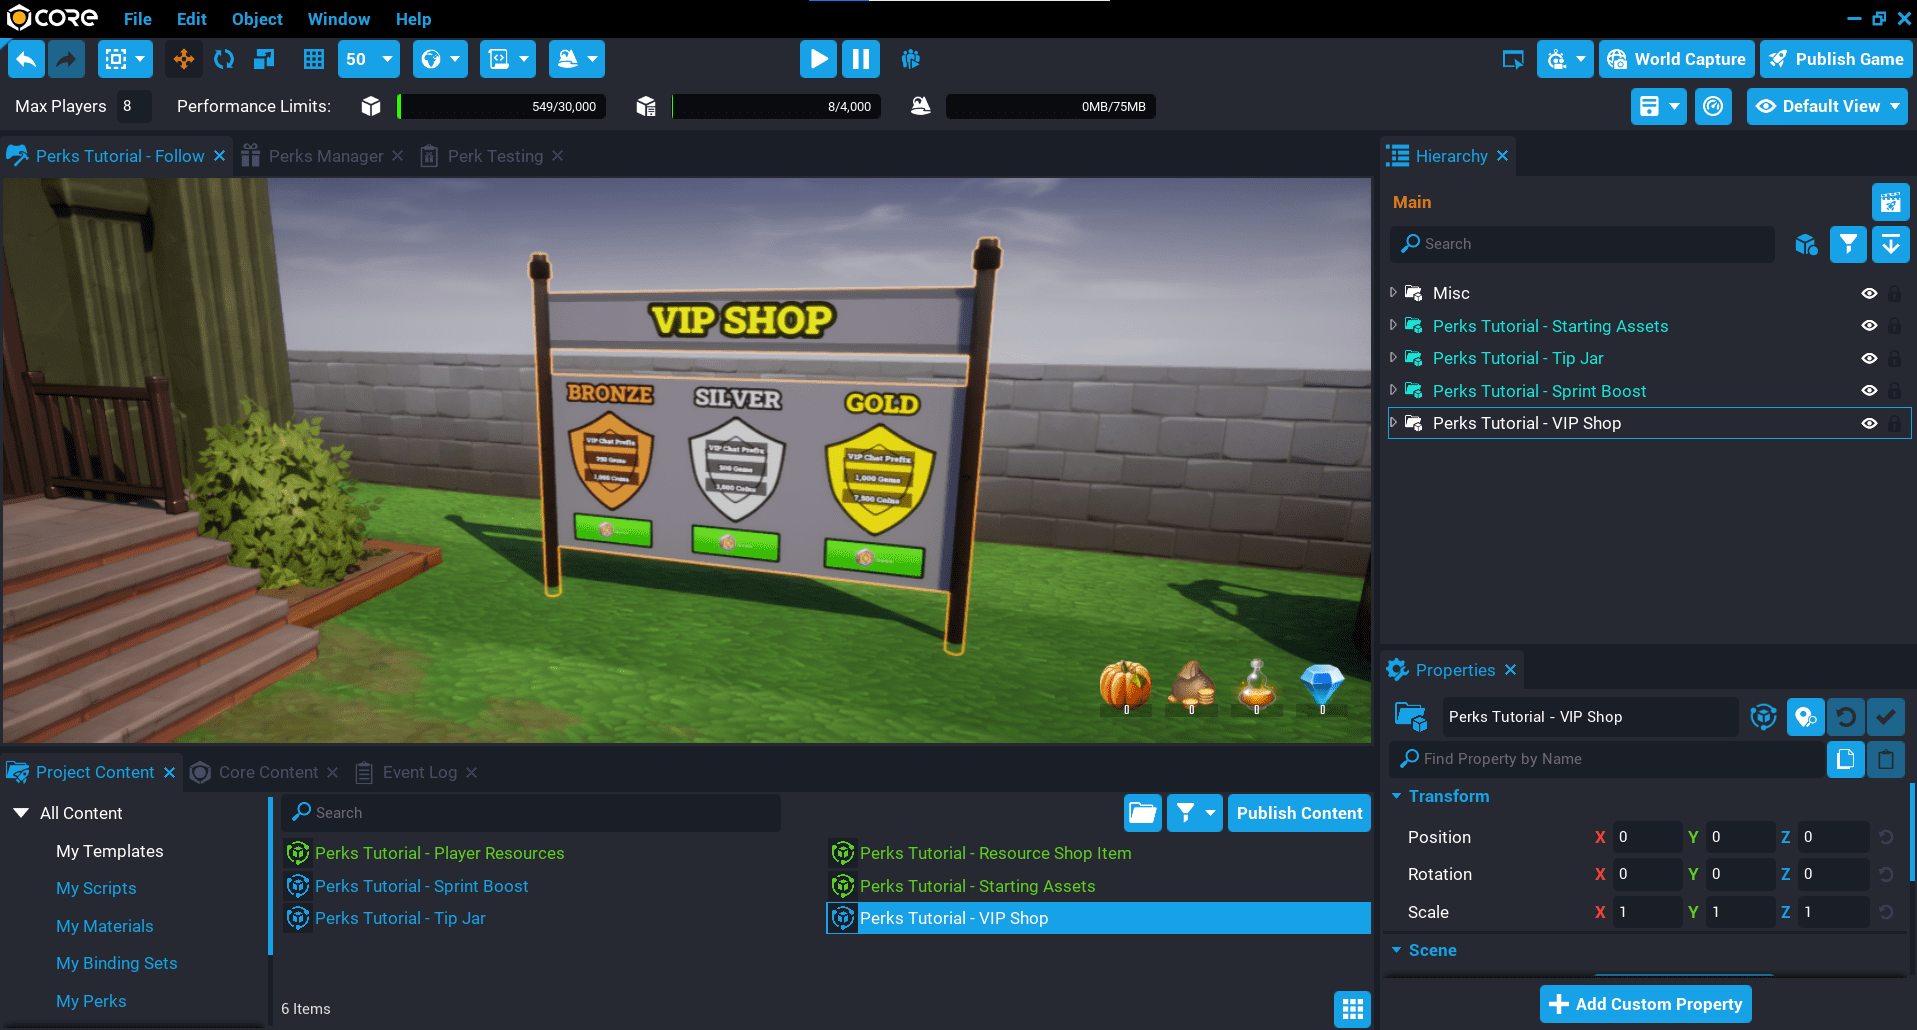
Creating a VIP Shop
In this section you will be creating a VIP (Very Important Player) shop that will have perk packages players can purchase that will last for a limited amount of time. Each package will give the player a special chat status, gems, and coins.
Add VIP Shop Template to Hierarchy
- Click the Project Content tab.
- Click My Templates under All Content.
- Add the template Perks Tutorial - VIP Shop into the Hierarchy.
- Deinstance the Perks Tutorial - VIP Shop template in the Hierarchy.
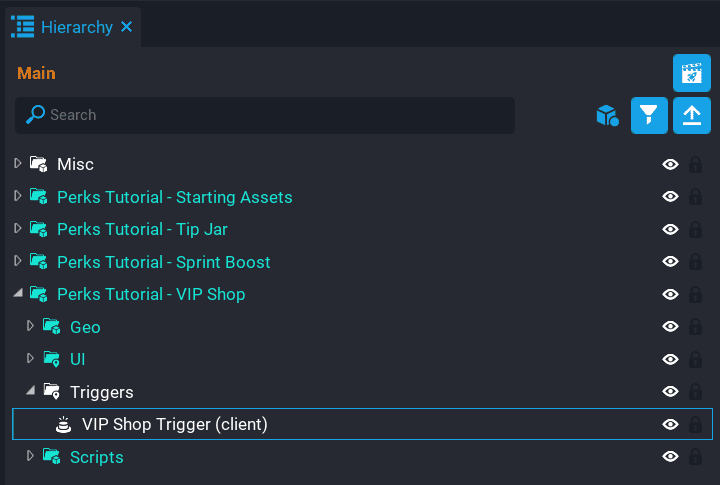
Create VIP Shop Trigger
A trigger will need to be added so you can detect when the player has entered the trigger volume so the interaction label is visible for the player for them to open the VIP shop UI.
- Create a Trigger, and place it inside the Triggers group in the Hierarchy.
- Rename the trigger to VIP Shop Trigger.
Force Collision On
Because the trigger is in a client context, you need to force collision on, otherwise you will not be able to detect when a player has entered the trigger volume.
Click on the VIP Shop Trigger, and set the Game Collision property to Force On in the Properties window. In doing so, the gizmo for the trigger volume will now show up in the scene view.
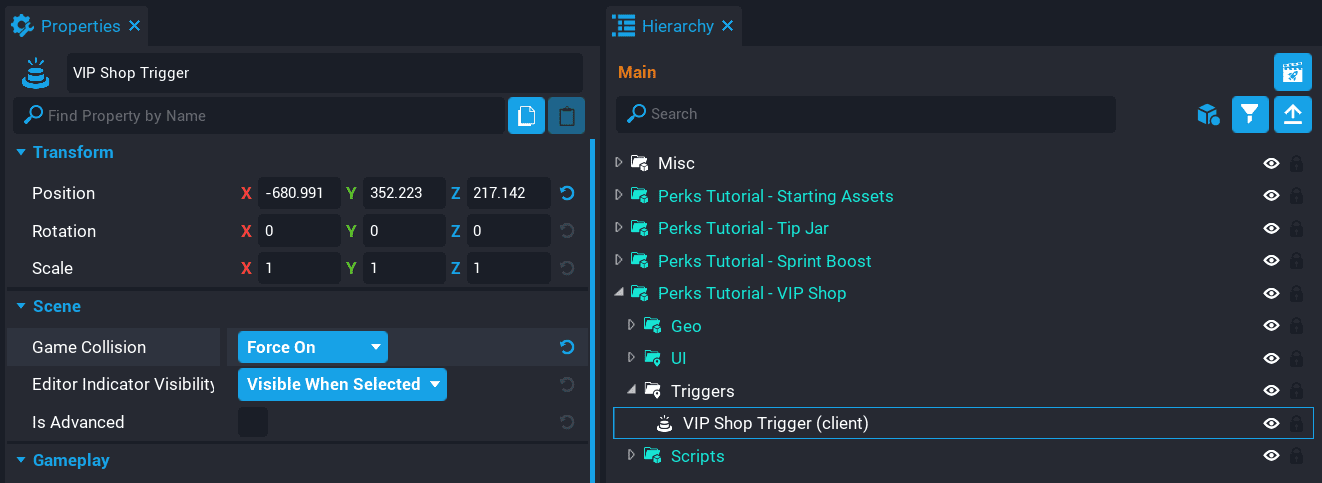
Position and Resize Trigger
The VIP Shop Trigger needs to be moved into the correct position, and resized to make sure the player can enter the VIP Shop Trigger volume.
Press V to turn on gizmo visibility to view the bounding volume of the VIP Shop Trigger.
Move the VIP Shop Trigger in front of the base of the Geo objects, and resize it.
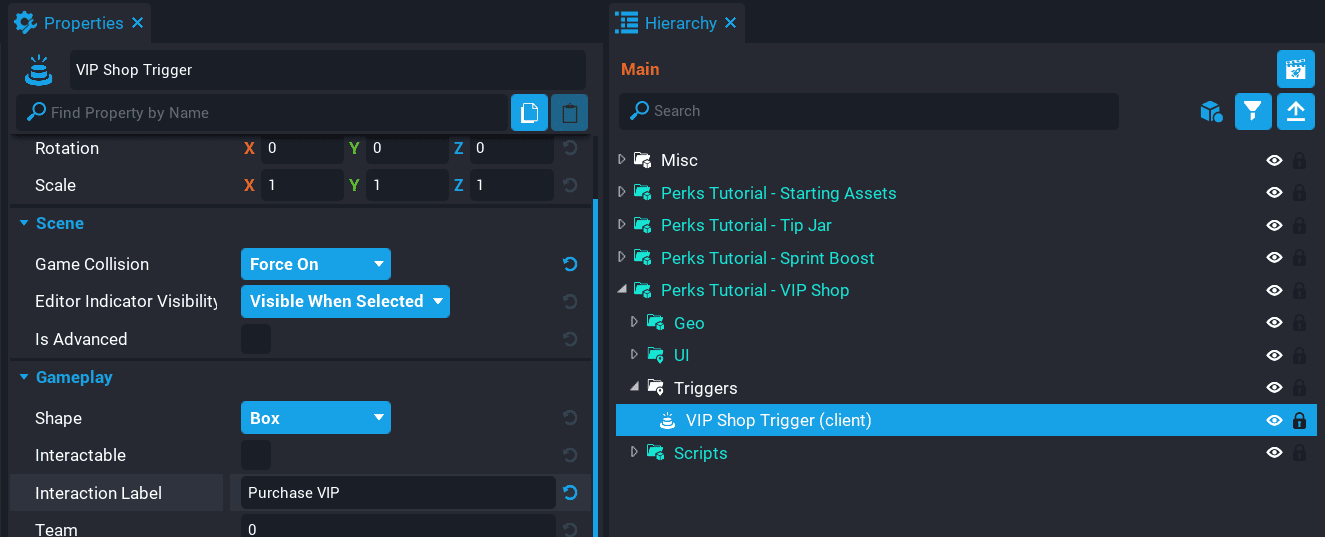
Set Trigger Label
When the VIP Shop Trigger has the interactable property set to true, the label of the VIP Shop Trigger will be shown to the player when they enter the VIP Shop Trigger volume.
Set the Interaction Label property for the VIP Shop Trigger to Purchase VIP in the Properties panel.
Create Perks
Create 3 limit time perks.

Set UI Perk References
The VIP shop template comes with some UI already set up. There are 2 UI containers for the VIP shop.
- 2D UI that can be opened by the player.
- World UI that is displayed in world to view by the player.
Both UI containers have their own set of perk buttons that need to have the Perk Reference property set.
Set 2D UI Perk References
In the UI group, set the Perk Reference property in the Properties window for each VIP perk found in the Items group.
Do this for Bronze, Silver, and Gold, by opening the group in the Hierarchy and finding UI Perk Purchase Button.

Set World UI Perk References
The World UI also has perk buttons that need the Perk Reference set for each one.
In the World UI group, set the Perk Reference property in the Properties window for each VIP perk.
Do this for Bronze, Silver, and Gold, by opening the group in the Hierarchy and finding UI Perk Purchase Button.
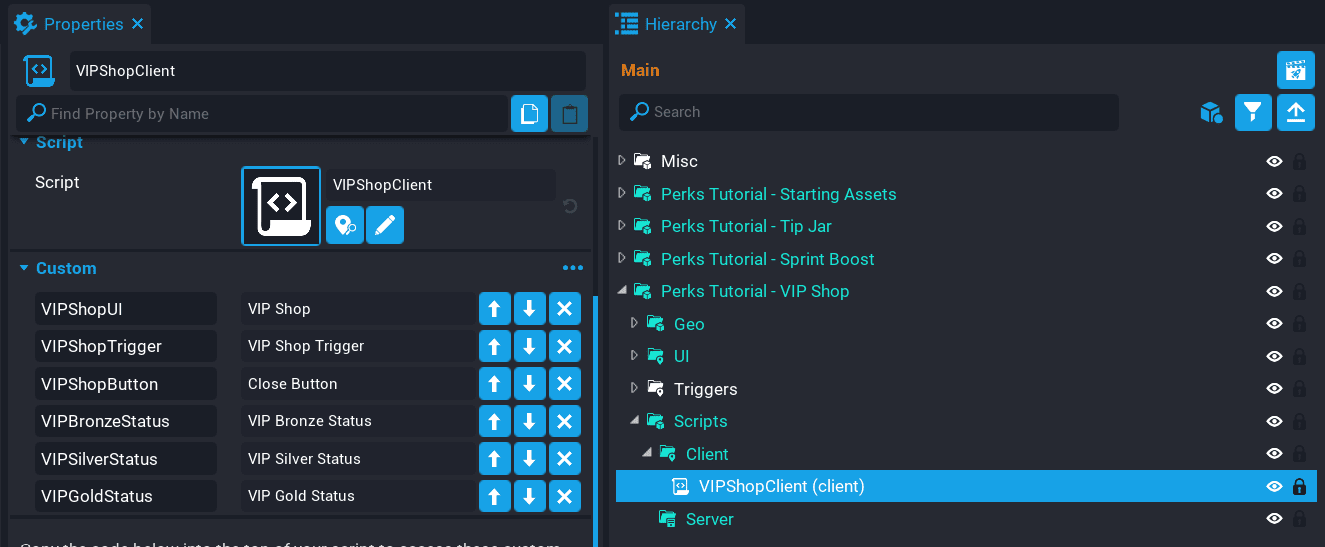
Create VIPShopClient Script
Create a new script called VIPShopClient, and place it into the Client group, in the Scripts group. The VIPShopClient script will be responsible for opening and closing the UI, and displaying the VIP status to the player.
- Add the VIP Shop panel as a custom property. Rename the property
VIPShopUI. - Add the VIP Shop Trigger as a custom property. Rename the property
VIPShopTrigger. - Add the Close Button as a custom property. Rename the property
VIPShopButton.
In the VIP Status panel, add each VIP status as a custom property. The VIP status will be shown in the UI to the player to indicate the current package (and highest) the player currently has.
- Add the VIP Bronze Status as a custom property. Rename the property
VIPBronzeStatus. - Add the VIP Silver Status as a custom property. Rename the property
VIPSilverStatus. - Add the VIP Gold Status as a custom property. Rename the property
VIPGoldStatus.
Create VIP Shop Variables
Open the VIPShopClient script.
Create the variables so you have a reference to the various UI components, and the status UI.
local VIP_SHOP_UI = script:GetCustomProperty("VIPShopUI"):WaitForObject()
local VIP_SHOP_TRIGGER = script:GetCustomProperty("VIPShopTrigger"):WaitForObject()
local VIP_SHOP_BUTTON = script:GetCustomProperty("VIPShopButton"):WaitForObject()

local VIP_BRONZE_STATUS = script:GetCustomProperty("VIPBronzeStatus"):WaitForObject()
local VIP_SILVER_STATUS = script:GetCustomProperty("VIPSilverStatus"):WaitForObject()
local VIP_GOLD_STATUS = script:GetCustomProperty("VIPGoldStatus"):WaitForObject()

local vipStatuses = { VIP_BRONZE_STATUS, VIP_SILVER_STATUS, VIP_GOLD_STATUS }
local localPlayer = Game.GetLocalPlayer()
local inTrigger = false
Each VIP status is added to the vipStatuses table to make it easier show or hide in the UI the highest status the player has purchased.
local vipStatuses = { VIP_BRONZE_STATUS, VIP_SILVER_STATUS, VIP_GOLD_STATUS }
Create CloseUI Function
The CloseUI function will be called when the clickedEvent for VIP_SHOP_BUTTON is fired, and when the player leaves the VIP_SHOP_TRIGGER volume.
local function CloseUI()
    VIP_SHOP_UI.visibility = Visibility.FORCE_OFF

    if inTrigger then
        VIP_SHOP_TRIGGER.isInteractable = true
    else
        VIP_SHOP_TRIGGER.isInteractable = false
    end

    UI.SetCursorVisible(false)
    UI.SetCanCursorInteractWithUI(false)
end
Create OnInteracted Function
The OnInteracted function will be called when the player interacts with the VIP_SHOP_TRIGGER.
local function OnInteracted(trigger, obj)
    if inTrigger and Object.IsValid(obj) and obj:IsA("Player") and obj == localPlayer then
        VIP_SHOP_UI.visibility = Visibility.FORCE_ON
        VIP_SHOP_TRIGGER.isInteractable = false

        UI.SetCursorVisible(true)
        UI.SetCanCursorInteractWithUI(true)
    end
end
Create OnExitTrigger Function
The OnExitTrigger function will check if the local player has exited the VIP_SHOP_TRIGGER volume, and close the VIP shop UI.
local function OnExitTrigger(trigger, obj)
    if Object.IsValid(obj) and obj:IsA("Player") and obj == localPlayer then
        inTrigger = false
        CloseUI()
    end
end
Create OnEnterTrigger Function
The OnEnterTrigger function will check when the local player has entered the VIP_SHOP_TRIGGER volume and turn on interaction so the label will show up for the player.
local function OnEnterTrigger(trigger, obj)
    if Object.IsValid(obj) and obj:IsA("Player") and obj == localPlayer then
        VIP_SHOP_TRIGGER.isInteractable = true
        inTrigger = true
    end
end
Create ShowVIPStatus Function
The ShowVIPStatus function is a helper function to try and reduce writing duplicate code for turn on and off each VIP status visibility.
When a VIP status needs to be shown, all other VIP statuses need to have their visibility turn off. You can loop over the vipStatuses array, and compare the statusToShow value for each iteration. If there is a match, then that status is shown in the UI to the player.
local function ShowVIPStatus(statusToShow)
    for index, status in ipairs(vipStatuses) do
        if status == statusToShow then
            status.visibility = Visibility.FORCE_ON
        else
            status.visibility = Visibility.FORCE_OFF
        end
    end
end
Create UpdateStatus Function
The UpdateStatus function will be called when the player's resource gets updated. It will check to see if the resource is either of the VIP statuses, and if the value if the status is 1, then the highest status purchased by the player is shown in the UI by calling ShowVIPStatus.
local function UpdateStatus(player, resource, amount)
    if resource == "bronzevip" or resource == "silvervip" or resource == "goldvip" then
        local bronzeStatus = localPlayer:GetResource("bronzevip")
        local silverStatus = localPlayer:GetResource("silvervip")
        local goldStatus = localPlayer:GetResource("goldvip")

        if goldStatus == 1 then
            ShowVIPStatus(VIP_GOLD_STATUS)
        elseif silverStatus == 1 then
            ShowVIPStatus(VIP_SILVER_STATUS)
        elseif bronzeStatus == 1 then
            ShowVIPStatus(VIP_BRONZE_STATUS)
        end
    end
end
Connect Events
Connect the CloseUI function to the clickedEvent for the VIP_SHOP_BUTTON. When the VIP_SHOP_BUTTON is clicked by the player, it will close the UI.
VIP_SHOP_BUTTON.clickedEvent:Connect(CloseUI)
Connect the OnInteracted function to the interactedEvent for the VIP_SHOP_TRIGGER. When trigger is interacted with, it will show or hide the UI for the player.
VIP_SHOP_TRIGGER.interactedEvent:Connect(OnInteracted)
Connect the OnExitTrigger function to the endOverlapEvent for the VIP_SHOP_TRIGGER. When the player exits the trigger volume, it will automatically close the UI for the player.
VIP_SHOP_TRIGGER.endOverlapEvent:Connect(OnExitTrigger)
Connect the OnEnterTrigger function to the beginOverlapEvent for the VIP_SHOP_TRIGGER. When the player enters the trigger volume, it will enable the interaction label for the player, so they can open the UI.
VIP_SHOP_TRIGGER.beginOverlapEvent:Connect(OnEnterTrigger)
Connect resourceChangedEvent
This code will loop over all the local player's resources. The reason for this, is that when the resources get set on the server when the player joins the game, the resourceChangeEvent for the client may not be connected yet.
localPlayer.resourceChangedEvent:Connect(UpdateStatus)

for key, value in pairs(localPlayer:GetResources()) do
    UpdateStatus(localPlayer, key, value)
end
The VIPShopClient Script
VIPShopClient
local VIP_SHOP_UI = script:GetCustomProperty("VIPShopUI"):WaitForObject()
local VIP_SHOP_TRIGGER = script:GetCustomProperty("VIPShopTrigger"):WaitForObject()
local VIP_SHOP_BUTTON = script:GetCustomProperty("VIPShopButton"):WaitForObject()

local VIP_BRONZE_STATUS = script:GetCustomProperty("VIPBronzeStatus"):WaitForObject()
local VIP_SILVER_STATUS = script:GetCustomProperty("VIPSilverStatus"):WaitForObject()
local VIP_GOLD_STATUS = script:GetCustomProperty("VIPGoldStatus"):WaitForObject()

local vipStatuses = { VIP_BRONZE_STATUS, VIP_SILVER_STATUS, VIP_GOLD_STATUS }
local localPlayer = Game.GetLocalPlayer()
local inTrigger = false

local function CloseUI()
    VIP_SHOP_UI.visibility = Visibility.FORCE_OFF

    if inTrigger then
        VIP_SHOP_TRIGGER.isInteractable = true
    else
        VIP_SHOP_TRIGGER.isInteractable = false
    end

    UI.SetCursorVisible(false)
    UI.SetCanCursorInteractWithUI(false)
end

local function OnInteracted(trigger, obj)
    if inTrigger and Object.IsValid(obj) and obj:IsA("Player") and obj == localPlayer then
        VIP_SHOP_UI.visibility = Visibility.FORCE_ON
        VIP_SHOP_TRIGGER.isInteractable = false

        UI.SetCursorVisible(true)
        UI.SetCanCursorInteractWithUI(true)
    end
end

local function OnExitTrigger(trigger, obj)
    if Object.IsValid(obj) and obj:IsA("Player") and obj == localPlayer then
        inTrigger = false
        CloseUI()
    end
end

local function OnEnterTrigger(trigger, obj)
    if Object.IsValid(obj) and obj:IsA("Player") and obj == localPlayer then
        VIP_SHOP_TRIGGER.isInteractable = true
        inTrigger = true
    end
end

local function ShowVIPStatus(statusToShow)
    for index, status in ipairs(vipStatuses) do
        if status == statusToShow then
            status.visibility = Visibility.FORCE_ON
        else
            status.visibility = Visibility.FORCE_OFF
        end
    end
end

local function UpdateStatus(player, resource, amount)
    if resource == "bronzevip" or resource == "silvervip" or resource == "goldvip" then
        local bronzeStatus = localPlayer:GetResource("bronzevip")
        local silverStatus = localPlayer:GetResource("silvervip")
        local goldStatus = localPlayer:GetResource("goldvip")

        if goldStatus == 1 then
            ShowVIPStatus(VIP_GOLD_STATUS)
        elseif silverStatus == 1 then
            ShowVIPStatus(VIP_SILVER_STATUS)
        elseif bronzeStatus == 1 then
            ShowVIPStatus(VIP_BRONZE_STATUS)
        end
    end
end

VIP_SHOP_BUTTON.clickedEvent:Connect(CloseUI)

VIP_SHOP_TRIGGER.interactedEvent:Connect(OnInteracted)
VIP_SHOP_TRIGGER.endOverlapEvent:Connect(OnExitTrigger)
VIP_SHOP_TRIGGER.beginOverlapEvent:Connect(OnEnterTrigger)

localPlayer.resourceChangedEvent:Connect(UpdateStatus)

for key, value in pairs(localPlayer:GetResources()) do
    UpdateStatus(localPlayer, key, value)
end
Test the Game
Test the game and make sure the following work:
- Trigger interaction label is visible when entering the trigger volume.
- Trigger interaction label is not visible when exiting the trigger volume.
- VIP shop UI opens when pressing F.
- VIP shop UI closes when clicking on the close button.
- VIP shop UI closes when the player leaves the trigger volume.
- VIP shop packages can be purchased.
Create VIPShopServer Script
Create a new script called VIPShopServer, and place it into the Server group, in the Scripts group. The VIPShopServer script will be responsible for setting the player to VIP, and giving them the coins and resources when they purchase a VIP perk.
- Add the VIP Bronze perk as a custom property. Name the property
VIPBronze. - Add the VIP Silver perk as a custom property. Name the property
VIPSilver. - Add the VIP Gold perk as a custom property. Name the property
VIPGold.
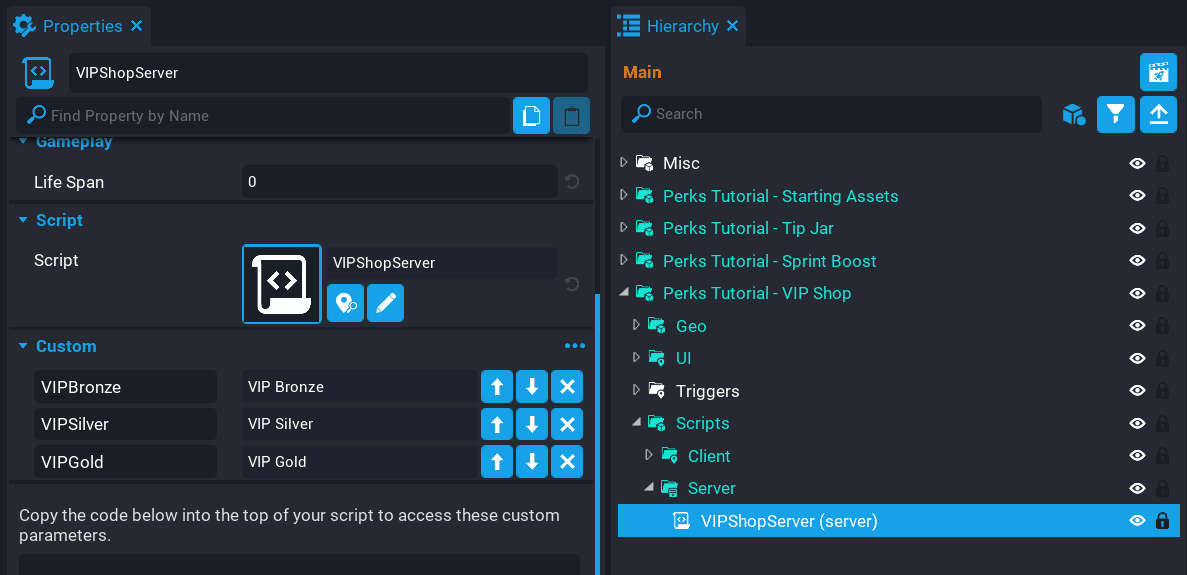
Create VIP Perk Variables
Open the VIPShopServer script.
Create these variables so you have a reference to each VIP perk.
local VIP_BRONZE_PERK = script:GetCustomProperty("VIPBronze")
local VIP_SILVER_PERK = script:GetCustomProperty("VIPSilver")
local VIP_GOLD_PERK = script:GetCustomProperty("VIPGold")
Create PerkChanged Function
The PerkChanged function is responsible for checking which perk the player has purchased, awarding the resources, and updating the player's storage.
local function PerkChanged(buyer, perk)
    local gemsAmount = 0
    local coinsAmount = 0

    if perk == VIP_BRONZE_PERK then
        buyer:SetResource("bronzevip", 1)
        gemsAmount = 250
        coinsAmount = 1000
    elseif perk == VIP_SILVER_PERK then
        buyer:SetResource("silvervip", 1)
        gemsAmount = 500
        coinsAmount = 3000
    elseif perk == VIP_GOLD_PERK  then
        buyer:SetResource("goldvip", 1)
        gemsAmount = 1000
        coinsAmount = 7500
    end

    local playerData = Storage.GetPlayerData(buyer)

    buyer:AddResource("gems", gemsAmount)
    buyer:AddResource("coins", coinsAmount)

    -- g (Gems)
    if not playerData["g"] then
        playerData["g"] = 0
    end

    -- c (Coins)
    if not playerData["c"] then
        playerData["c"] = 0
    end

    playerData["g"] = playerData["g"] + gemsAmount
    playerData["c"] = playerData["c"] + coinsAmount

    Storage.SetPlayerData(buyer, playerData)
end
Create OnJoined Function
The OnJoined function will check to see which VIP perks the player has purchased by using the HasPerk function. If the player does own a VIP perk, then the resource will get set. This is used so you can check on the client if the player is a VIP or not so the VIP badge can be displayed to the player.
local function OnJoined(player)
    player.perkChangedEvent:Connect(PerkChanged)

    if player:HasPerk(VIP_BRONZE_PERK) then
        player:SetResource("bronzevip", 1)
    end

    if player:HasPerk(VIP_SILVER_PERK) then
        player:SetResource("silvervip", 1)
    end

    if player:HasPerk(VIP_GOLD_PERK) then
        player:SetResource("goldvip", 1)
    end
end
Create OnChatMessage Function
The OnChatMessage function will be called anytime a message has been received by a player. It will check if the speaker has a perk, and if so, will add the VIP status to the front of their name for everyone else in game to see.
local function OnChatMessage(speaker, params)
    if speaker:HasPerk(VIP_GOLD_PERK) then
        params.speakerName = "[Gold VIP] " .. params.speakerName
    elseif speaker:HasPerk(VIP_SILVER_PERK) then
        params.speakerName = "[Silver VIP] " .. params.speakerName
    elseif speaker:HasPerk(VIP_BRONZE_PERK) then
        params.speakerName = "[Bronze VIP] " .. params.speakerName
    end
end
Connect Events
Connect up the events at the end of the script.
Game.playerJoinedEvent:Connect(OnJoined)
Chat.receiveMessageHook:Connect(OnChatMessage)
The VIPServer Script
VIPServer
local VIP_BRONZE_PERK = script:GetCustomProperty("VIPBronze")
local VIP_SILVER_PERK = script:GetCustomProperty("VIPSilver")
local VIP_GOLD_PERK = script:GetCustomProperty("VIPGold")

local function PerkChanged(buyer, perk)
    local gemsAmount = 0
    local coinsAmount = 0

    if perk == VIP_BRONZE_PERK then
        buyer:SetResource("bronzevip", 1)
        gemsAmount = 250
        coinsAmount = 1000
    elseif perk == VIP_SILVER_PERK then
        buyer:SetResource("silvervip", 1)
        gemsAmount = 500
        coinsAmount = 3000
    elseif perk == VIP_GOLD_PERK  then
        buyer:SetResource("goldvip", 1)
        gemsAmount = 1000
        coinsAmount = 7500
    end

    local playerData = Storage.GetPlayerData(buyer)

    buyer:AddResource("gems", gemsAmount)
    buyer:AddResource("coins", coinsAmount)

    -- g (Gems)
    if not playerData["g"] then
        playerData["g"] = 0
    end

    -- c (Coins)
    if not playerData["c"] then
        playerData["c"] = 0
    end

    playerData["g"] = playerData["g"] + gemsAmount
    playerData["c"] = playerData["c"] + coinsAmount

    Storage.SetPlayerData(buyer, playerData)
end

local function OnJoined(player)
    player.perkChangedEvent:Connect(PerkChanged)

    if player:HasPerk(VIP_BRONZE_PERK) then
        player:SetResource("bronzevip", 1)
    end

    if player:HasPerk(VIP_SILVER_PERK) then
        player:SetResource("silvervip", 1)
    end

    if player:HasPerk(VIP_GOLD_PERK) then
        player:SetResource("goldvip", 1)
    end
end

local function OnChatMessage(speaker, params)
    if speaker:HasPerk(VIP_GOLD_PERK) then
        params.speakerName = "[Gold VIP] " .. params.speakerName
    elseif speaker:HasPerk(VIP_SILVER_PERK) then
        params.speakerName = "[Silver VIP] " .. params.speakerName
    elseif speaker:HasPerk(VIP_BRONZE_PERK) then
        params.speakerName = "[Bronze VIP] " .. params.speakerName
    end
end

Game.playerJoinedEvent:Connect(OnJoined)
Chat.receiveMessageHook:Connect(OnChatMessage)
Test the Game
Test the game and make sure the following work:
- Purchasing a VIP package give gems and coins.
- VIP status is shown in the chat when sending messages.
- VIP badge in the UI is shown.
- Purchasing a lower VIP package doesn't overwrite higher VIP package.
Summary
While working through the tutorial, you may have noticed how similar each system was. The way the triggers are setup, the UI, etc. This is good, because then you can take what you have learned, and apply it to another idea for selling perks to players.
Feedback and Questions
For feedback and questions, join the discussion on this tutorial's forum thread.
Learn More
Perks Program | UI Perk Purchase Button | UI Perk Purchase Button | Resource Change Event