Weapons Reference
Introduction
Weapons, the fun devices of destruction found across many Core games, are a specific type of Core Object that includes features like ammo, reloading, and calculating where a projectile hits.
Types of Weapons
Not everything that can be used as a weapon is actually a Weapon object in Core. In Core Content, the Game Components section has a category called Weapons with a variety of different types of weapons that you can drag and drop into your game.
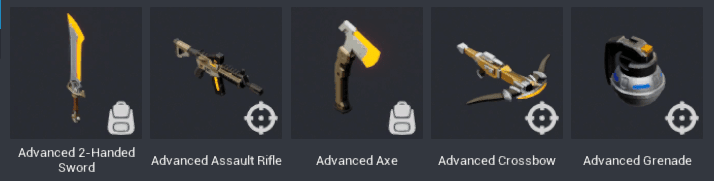
In the Game Components weapon templates, the weapons that use projectiles, like the guns and the grenades use the ![]() Weapon icon, and melee weapons, that do damage based on whether or not the weapon collides with the player, use the
Weapon icon, and melee weapons, that do damage based on whether or not the weapon collides with the player, use the ![]() Equipment icon.
Equipment icon.
This reference covers the Weapon type of object, but it is not the only way to create a tool used for combat, and a Weapon can be used to do many things besides damage.
Scripting Weapons
Weapons have specialized properties, functions, and events that allow creators to script behavior based on the ammunition available and projectile behavior. To learn more, see the Weapons section of the Core API
The Empty Weapon Object
There are two ways to create weapons in Core: modifying one of the weapon templates that is included in Core Content, or using an empty Weapon Gameplay Object and creating one from scratch.
The empty Weapon object can be found in Core Content in the Gameplay Objects section.
To learn how to make a weapon from scratch using this gameplay object, see the Basic Weapons Tutorial, which will cover how to create a weapon that can be picked up and used. To make this weapon also damage players, see the Advanced Abilities Tutorial.
Making a weapon this way allows you to create unique and creative weapon behavior. For more conventional video game guns, however, it is much more efficient to modify an existing weapon template.
Modifying a Weapon Template
Using a Core Weapon template as a starting point is a great way to ensure that weapons will have all the features players expect, while allowing you to change the appearance, behavior, and visual and sound effects of the weapon.
Basic and Advanced Weapon Templates
To find the weapon templates, open the Core Content window, and find the Game Components section, which contains a Weapons section. Each of the Weapons here will be either Basic or Advanced.
Basic weapons include appropriate ability timings, animations, and ammo for the type of weapon, but do not have the scripts that let them damage players. To create a weapon that damages the players, use the Advanced weapon templates instead.
Parts of an Advanced Weapon
This section will explain the purpose of each part of an Advanced weapon, using the Advanced Pistol as an example.
Server Context
This section contains scripts that will help calculate where projectiles actually hit based on the player's position and movement at the time, and calculate the damage that they should do.
Client Context
This folder contains two subfolders. Scripts contains scripts that control the player's experience of using the weapon, like playing the effects for when a player shoots, or picks up the weapon.
The Geo folder contains the actual model (the "geometry") for the gun. You can place a new model in this folder to easily swap out the appearance for a completely different weapon.
Using the Properties Window
With the outermost folder of the weapon selected, in this case Advanced Pistol (networked), you can see the all the properties available to change to customize the weapon, divided into different sections.
Tip
Hover the mouse over any property to see a tooltip explaining what it does.
- Projectile, controls the way the projectile moves once it is spawned.
- VisualEffects contains Effects templates that are spawned at different stages of using the weapon. This can include both visual and audio effects.
- Ammo has properties that change how often the player will need to reload, and has the visual and sound effects for these actions.
- Spread has different options to change the accuracy of the weapon.
- Ability has references to the two abilities that are part of the weapon, Shoot and Reload.
- Custom will contain different properties depending on the weapon, but will allow you different options like whether or not players automatically reload, the keys players use to zoom and aim, and the visual and sound effects that play when the weapon gets picked up.
Changing a Weapon Template and Other Game Behavior
Automatically Pick Up Weapons
By default, a player equips a weapon by walking into its PickupTrigger and pressing the interact key. You can change this to instead give the weapon to the player as soon as they enter the trigger.
- In the weapon template in the Hierarchy, select the
 trigger object, usually called Pickup Trigger.
 - To change the message it shows the player before the interact to pick up the weapon, change the Interaction Label property.
- To make the weapon automatically equip instead, uncheck the box for Interactable.
Stop Player Movement while Reloading
Reloading is controlled by an ability called Reload, and you can change the animation that is played, what they player can do at the same time, and how long it takes to reload.
- In the weapon template in the Hierarchy, select the
 Reload ability, and open the Properties window.
 - Scroll down to the Execute section, and uncheck the boxes for Can Move and Can Jump.
Chance the Appearance of the Weapon
Changing a weapon's appearance is as easy as putting a new model in the Geo folder of the Client Context folder, but it can be useful to keep the current geometry to make sure your weapon is lined up correctly.
- In the weapon template in the Hierarchy, select the Client Context folder, and the Geo folder inside of it.
- Select all the objects inside of this folder, and temporarily add them to a group by right-clicking and select New Group Containing These.
- Add your new model to the folder, and rotate, reposition, and scale it until it matches the original weapon geometry.
- Test the appearance by toggling visibility on the group for the first model, and when you are finished positioning it, select that group and press the Del key to remove it.
Change the Visual and Sound Effects
Visual and Audio effects are grouped together into Networked Templates to be spawned by the weapon when it is used. You will create this group, make it into a Networked template, and then add it to the Weapon.
Create the FX Template
- Select the effects you would like to use for a particular part of the weapon use from the Effects and Audio sections of Core Content, and drag them into the Hierarchy.
Tip
You can preview an audio effect by selecting it in Core Content and pressing the Play button that appears in the Properties window.
- Select all the effects to be added to your group, then right click and select Create Network Context and New Client Context Containing These
- Right click the Client Context folder that is created, and select New Group Containing This, and give it a name so it is easy to determine which part of the weapon actions should use it, like
CustomMuzzleFlashfor a muzzle flash VFX and SFX. - Make sure each of the effects in the Client Context has the Auto Play property checked, so that it will play when the whole group is spawned by the weapon.
- Right click the outer group and select Enable Networking, so that the template can be spawned.
- Right click again and select Create New Template From This.
Adding the FX Template to the Weapon
- Delete the FX template from the Hierarchy once you have made it a template. It can now be found in the Project Content window.
- Select your weapon in the Hierarchy, and scroll down to the VisualEffects section to find property that contains the template you are replacing, like Muzzle Flash Template.
- Drag the template from Project Content over the
 Template icon to replace the current template with your newly created one.
Change the Reticle
The reticle is another template that can be changed using the same process as with the visual effects, except that it uses a UI icon.
Creating the Reticle Template
- In Core Content, open the UI Textures tab to find the Reticles section, and select and drag a new reticle into the Main Viewport or Hierarchy.
- Select the reticle inside of UI Container in the Hierarchy, and open the Properties window.
- Change the Anchor and Dock properties to Middle Center to move the reticle to the center of the screen.
- Change the Width, Height, and Color properties to change the reticle size and color.
- Right click the UI Container for the reticle in the Hierarchy and select Enable Networking.
- Right click the Client Context folder that is created, and select New Group Containing This, and give it a name so it is easy to determine which part of the weapon actions should use it, like
CustomMuzzleFlashfor a muzzle flash VFX and SFX. - Right click again and select Create New Template From This.
Adding the Reticle Template to the Weapon
- Delete the reticle template from the Hierarchy once you have made it a template. It can now be found in the Project Content window.
- Select your weapon in the Hierarchy, and scroll down to the bottom of the Custom section to find the ReticleTemplate property.
- Drag the template from Project Content over the Template icon to replace the current template with your newly created one.
Give Players a Weapon When Joining the Game
There are several ways to make sure players start with weapons. This example will use the Static Player Equipment game component. Just like with the effects and UI, you will need to create a template, this time for the entire weapon to make it a property on the Static Player Equipment component
- Right click the weapon in Hierarchy, select Create New Template From This, and name your new weapon.
- You can now find the weapon in Project Content, so you can delete it from the Hierarchy.
- In Core Content, open the Game Components section, then the Logic section, and finally the General section.
- Find the Static Player Equipment object and drag it into the Hierarchy.
- Select the Static Player Equipment object and open the Properties window.
- Drag the weapon template from Project Content to the EquipmentTemplate property.
Learn More
Basic Weapons Tutorial | Abilities and Equipment Tutorial | Advanced Abilities Tutorial