Damageable Object Basics
Overview
In this tutorial you will be learning how to create Damageable Objects from the very basics, to creating more complex objects. You will gain the knowledge to be able to create assets that can be placed in the world which can be destroyed in many ways. For example, a training dummy that can have pieces of it be destroyed.
- Completion Time: ~1 hour
- Knowledge Level: None needed.
- Skills you will learn:
- Where to find damageable objects in Core Content.
- What the damageable object properties are for.
- Creating basic damageable objects.
- Nested damageable objects.
- Changing damageable object properties from a Lua script.
Import Asset from Community Content
You will be importing an asset from Community Content that will contain assets to help build up the different components for the dummies. These assets have been designed for ease of use so you can get straight in to learning all about Damageable Objects.
- Open the Community Content window.
- Search for
Damageable Objectsby CoreAcademy. - Click Import.
Damageable Object Templates
Before you dive into learning how to create your own damageable objects, let us take a look at the default damageable objects that Core provides for you in Core Content. This will give you an idea of what damageable objects can do.
Add Damageable Objects
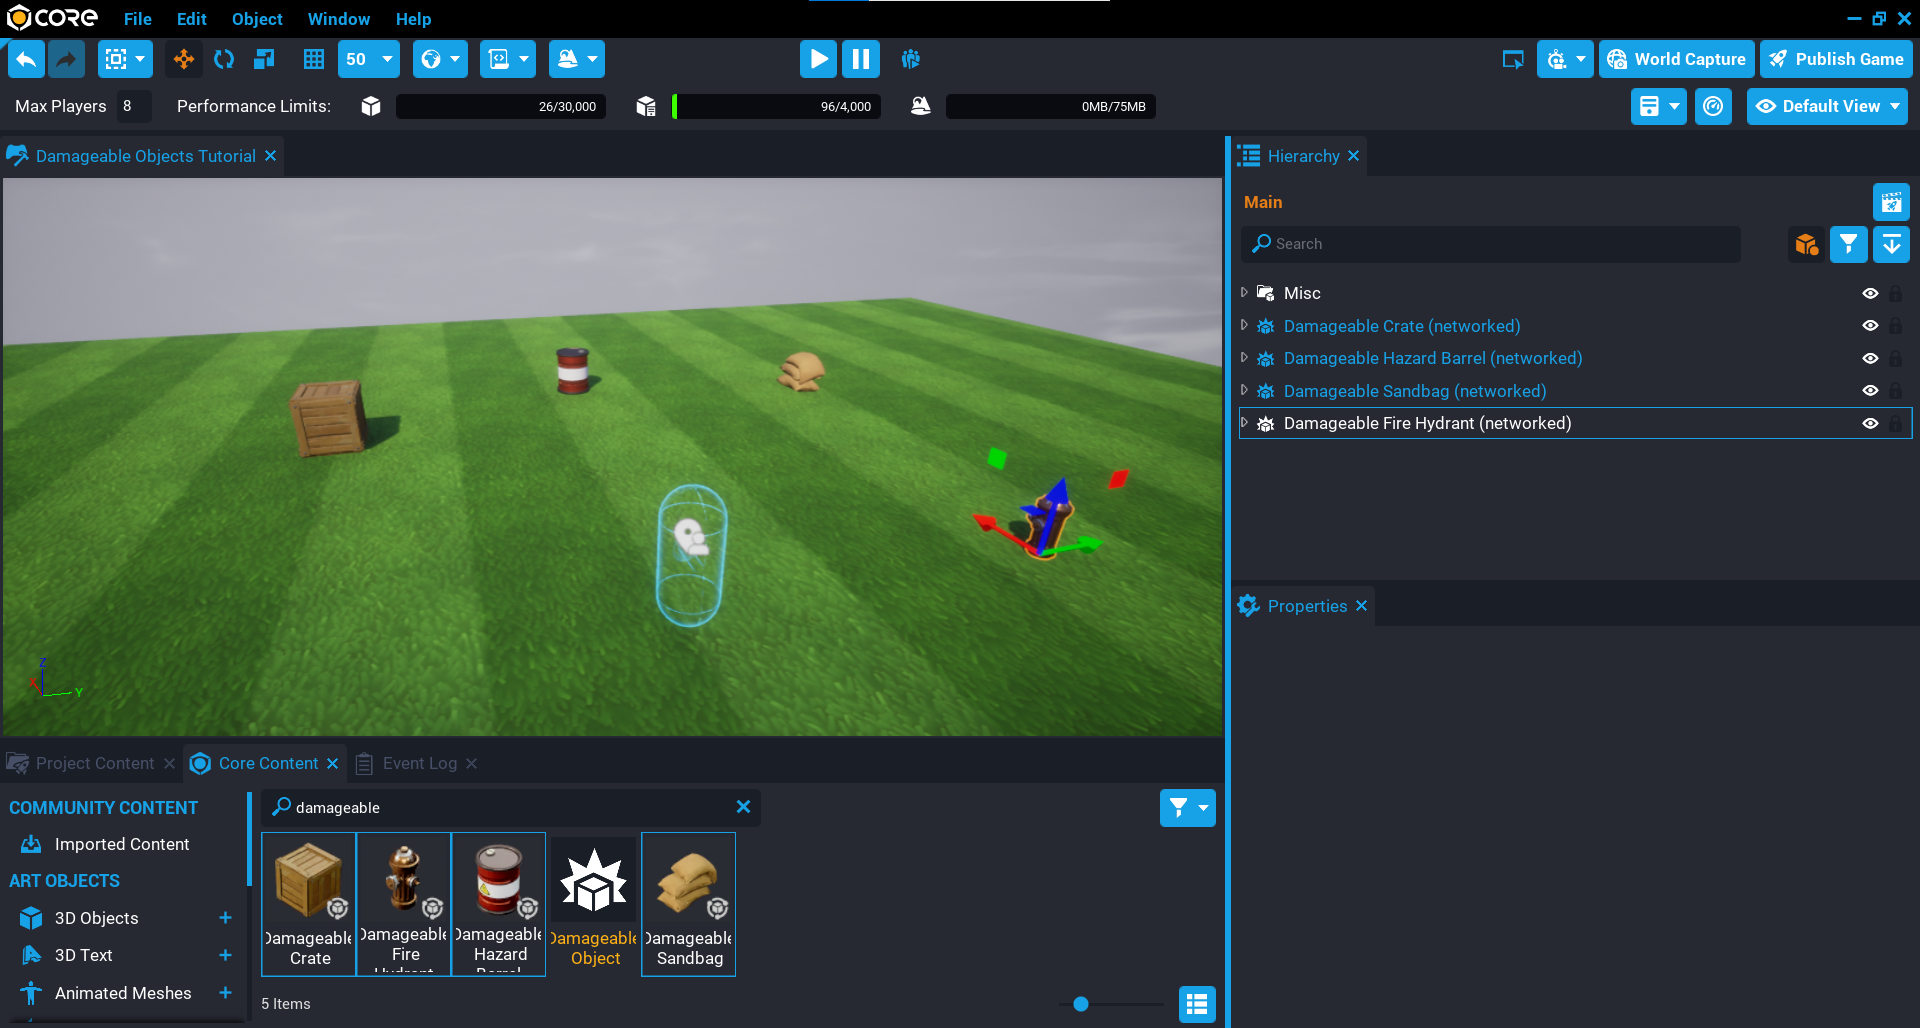
Damageable objects can be found in the Core Content window. All of the damageable objects can be placed into the Hierarchy, however, there is one damageable object that is special which we will talk about in the next section.
In the Core Content window, search for damageable to find the damageable objects. Drag any of the following into your Hierarchy. Make sure to spread them out so they have space between each other. Feel free to place as many as you like.
- Damageable Crate
- Damageable Hazard Barrel
- Damageable Sandbag
- Damageable Fire Hydrant
Damage Damageable Objects
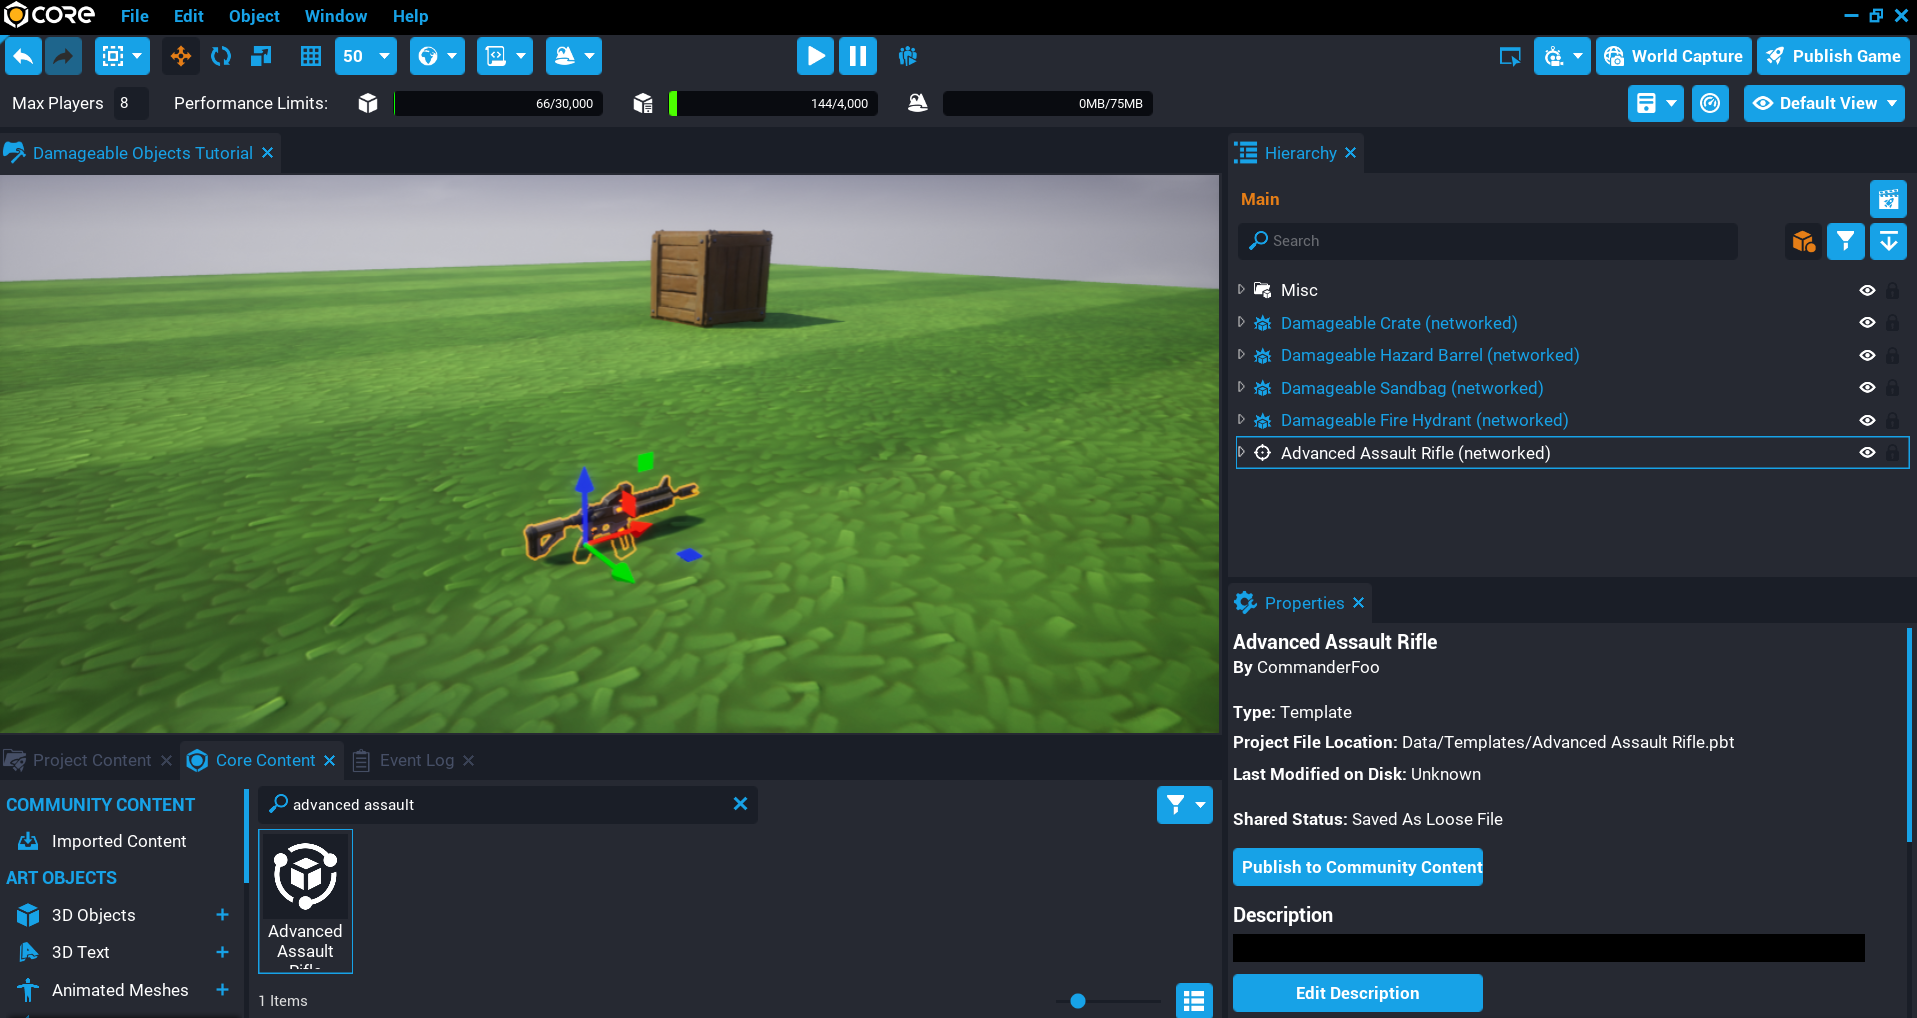
Damageable objects from Core Content will not do anything when you play the game. Those damageable objects need to take damage so when their health reaches 0, they will be destroyed. A good way to do damage to damageable objects is by adding a weapon to the Hierarchy that you can pickup and use to shoot the damageable objects.
- In Core Content, search for
advanced assaultto find Advanced Assault Rifle. - Drag the Advanced Assault Rifle template into the Hierarchy.
Test the Game
Test the game by picking up the Advanced Assault Rifle and shooting the damageable objects. You will see they will be destroyed, and when they are destroyed, audio, and effects are played.
Notice the Damageable Sandbag object can have the individual sandbags destroyed.
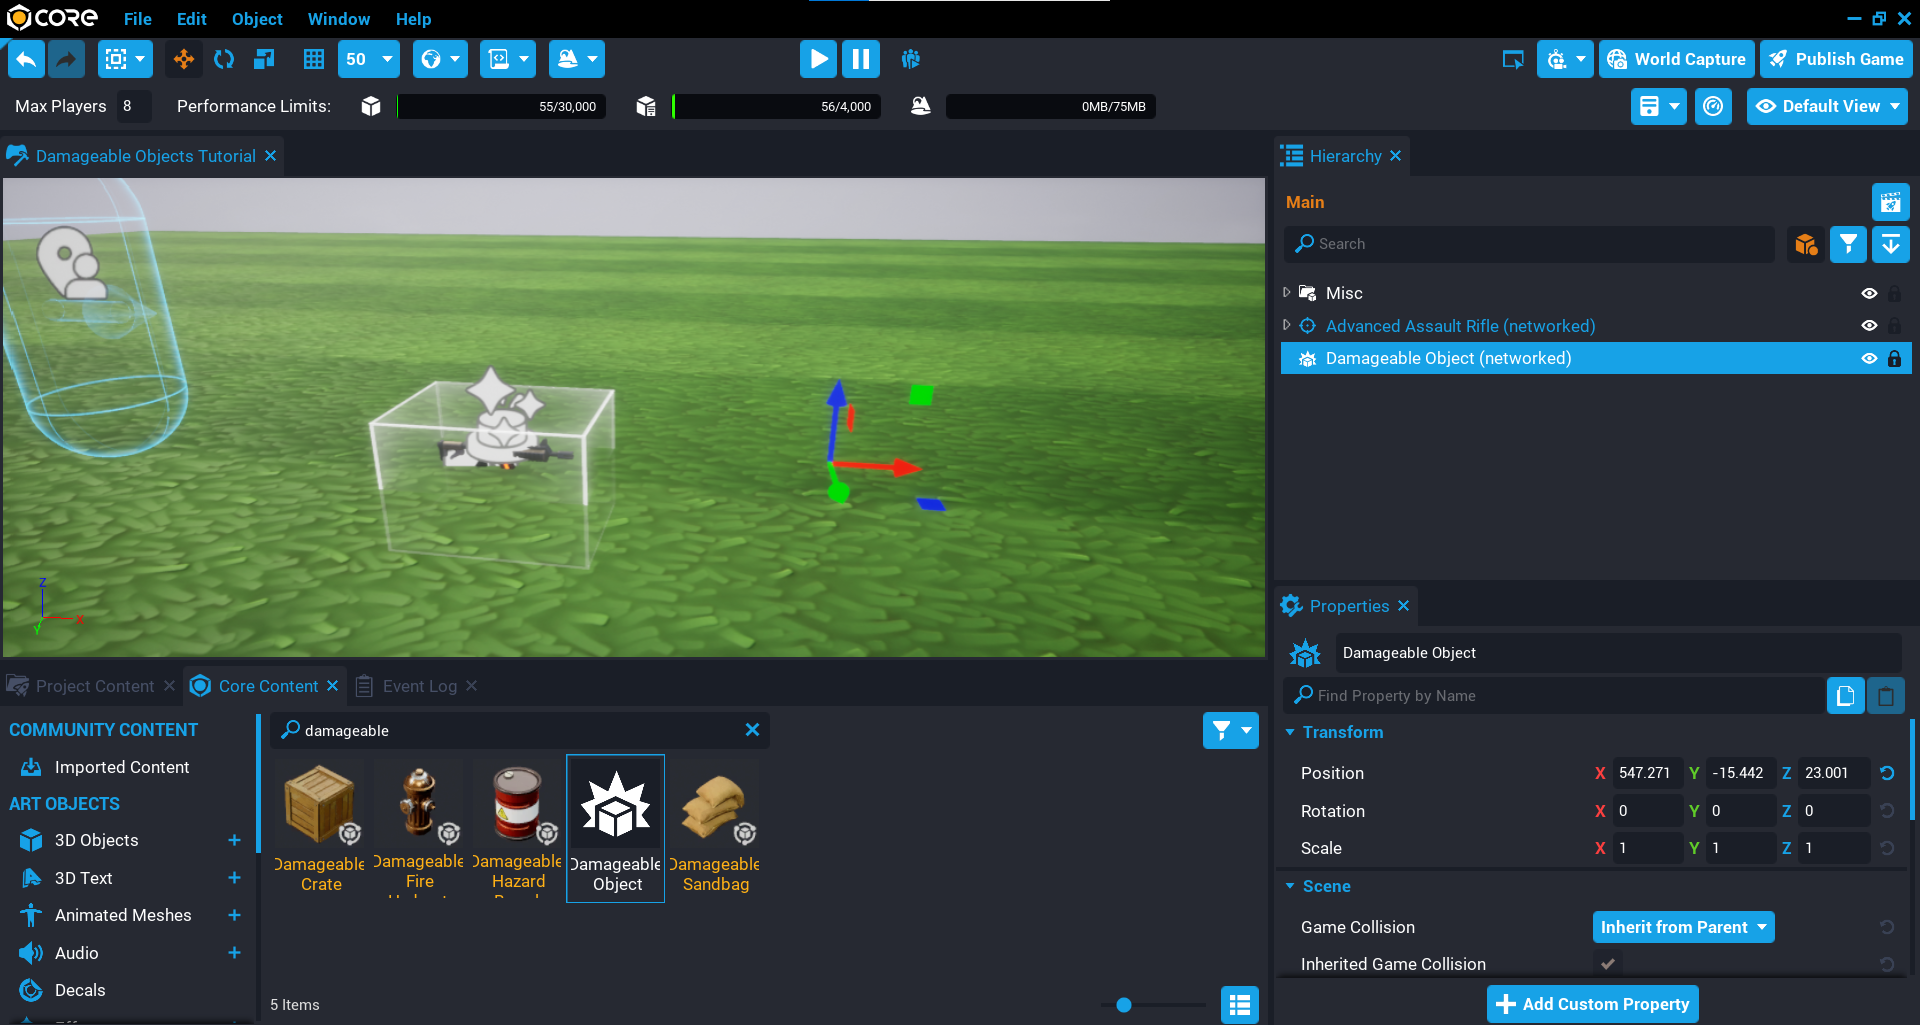
Basic Damageable Object
In the previous section, you may have spotted the Damageable Object when searching for damageable in the Core Content window. This object on its own is not too useful, it will have no visual geometry, and can not be destroyed. For a damageable object to take damage and be destroyed, it requires geometry inside the damageable object that has collision. When these objects get hit (for example, by bullets, or other forms of damage), the damage is applied to the closest damageable object parent.
In this section you will learn about all the properties the damageable object has, and what they do.
Networked Damageable Object
For a damageable object to work correctly, it needs to be networked. By default the damageable objects in Core Content are networked, including the basic Damageable Object. A networked object means that it will be sent to other players in the game so they can also see and react to it. This keeps things in sync between players.
Damageable Object Properties
The damageable object has a Damageable group in the Properties window that contain all the properties that apply to objects that implement the Damageable Interface. What this means, is that objects that have health and can be killed will have these properties. For example, Vehicles can be setup to be destroyed because they have the Damageable properties.
Understanding the properties will give you a lot of options to create damageable objects. You can do a lot of interesting things with damageable objects without any Lua knowledge, but learning even a little bit can increase the things you can do with damageable objects.
All damageable properties can be changed from a Lua script at runtime when the game is running.
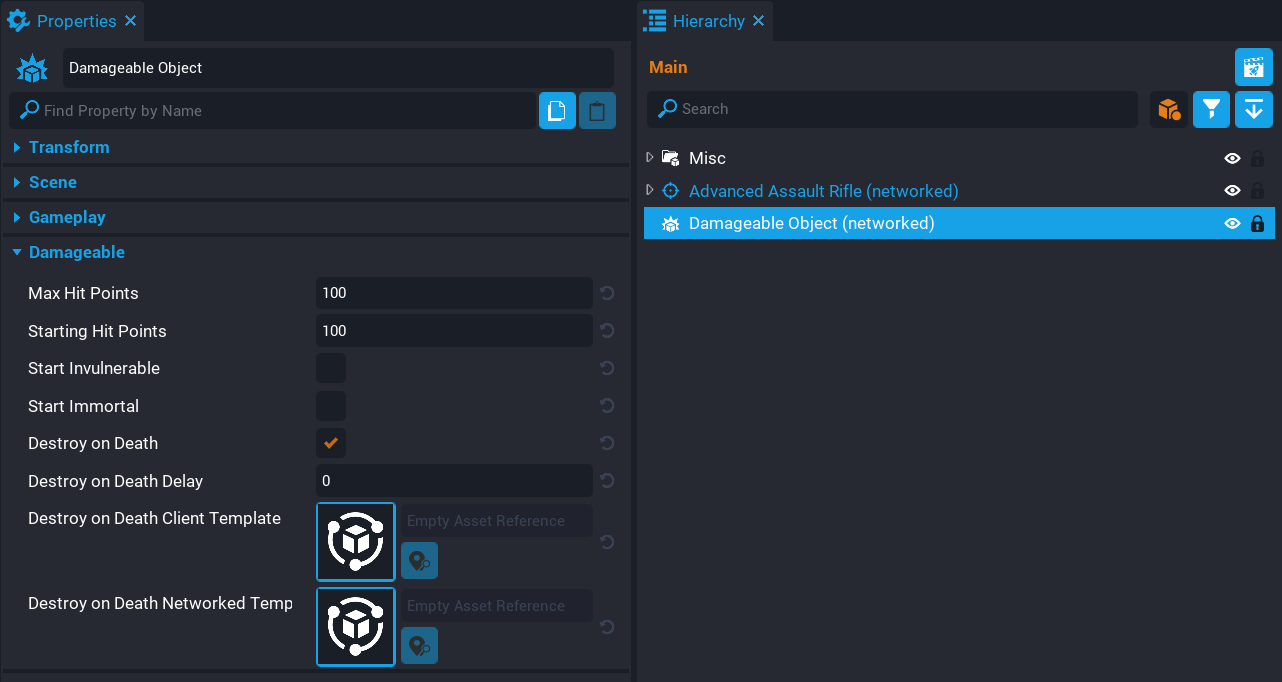
Max Hit Points
The Max Hit Points property determines the maximum hit points of the object. Any value that is 0 or lower will be ignored, and the damageable object will be instantly destroyed when the game is played.
Starting Hit Points
The Starting Hit Points property determines the hit points of the object when the object is spawned. This value can not be greater than the Max Hit Points.
This property could be useful if you want your damageable object to start at a lower health, and slowly regenerate the health until it reaches Max Hit Points.
Start Invulnerable
When the Start Invulnerable property is enabled (checked), the damageable object will not take any damage. Meaning, the health will not go down when it receives damage.
Notice in the video below that no matter how much the damageable object is shot, its health does not go down, and can't be destroyed.
Start Immortal
When the Start Immortal property is enabled (checked), the damageable object does not automatically die when the hit points reach 0 or lower. So it can still receive damage, but can not be killed.
Destroy on Death
When the Destroy on Death property is enabled (checked), when the damageable object is killed (health reaches 0 or lower), then the damageable object will be destroyed. This is useful because the damageable object will take care of removing its self from the world.
Destroy on Death Delay
The Destroy on Death Delay will delay the destroying of the damageable object based on the property value that is set (in seconds).
Destroy on Death Client Template
The Destroy on Death Client Template will spawn a template on the client at the location of the damageable object after the Destroy on Death Delay. This is an efficient way of spawning visual effects, and anything else for the client. For example, when a damageable object is destroyed, smoke effect is spawned.
In the video below, you will see a template is set for the property that will be spawned when the damageable object is destroyed.
Destroy on Death Networked Template
The Destroy on Death Networked Template will spawn a networked template at the location of the damageable object after the Destroy on Death Delay. This is useful for spawning other gameplay objects from a damageable object that is destroyed. For example, when a damage object is destroy, it could spawn a pickup for all players to collect.
In the video people, you will see a template is set for the property that will be spawned when the damageable object is destroyed.
Make sure that the template you use for this property is Networked.
Template Spawn Location
When using either the Destroy on Death Client Template or Destroy on Death Networked Template properties, it is important to know where these will spawn so the templates are at the right position and rotation when the damageable object is destroyed. Both templates will spawn at the position and rotation of the nearest parent damageable object, meaning the spawned templates will inherit the transform data.
For example, in this video below, the damageable object is rotated, but the cube is moved up in the Z direction. This means that the template is spawned when the damageable object is destroyed, it will match the rotation and position.
Destructible Vase
In this section you will create a destructible vase that can be broken that will have a couple of stages, and then spawn a Gem.
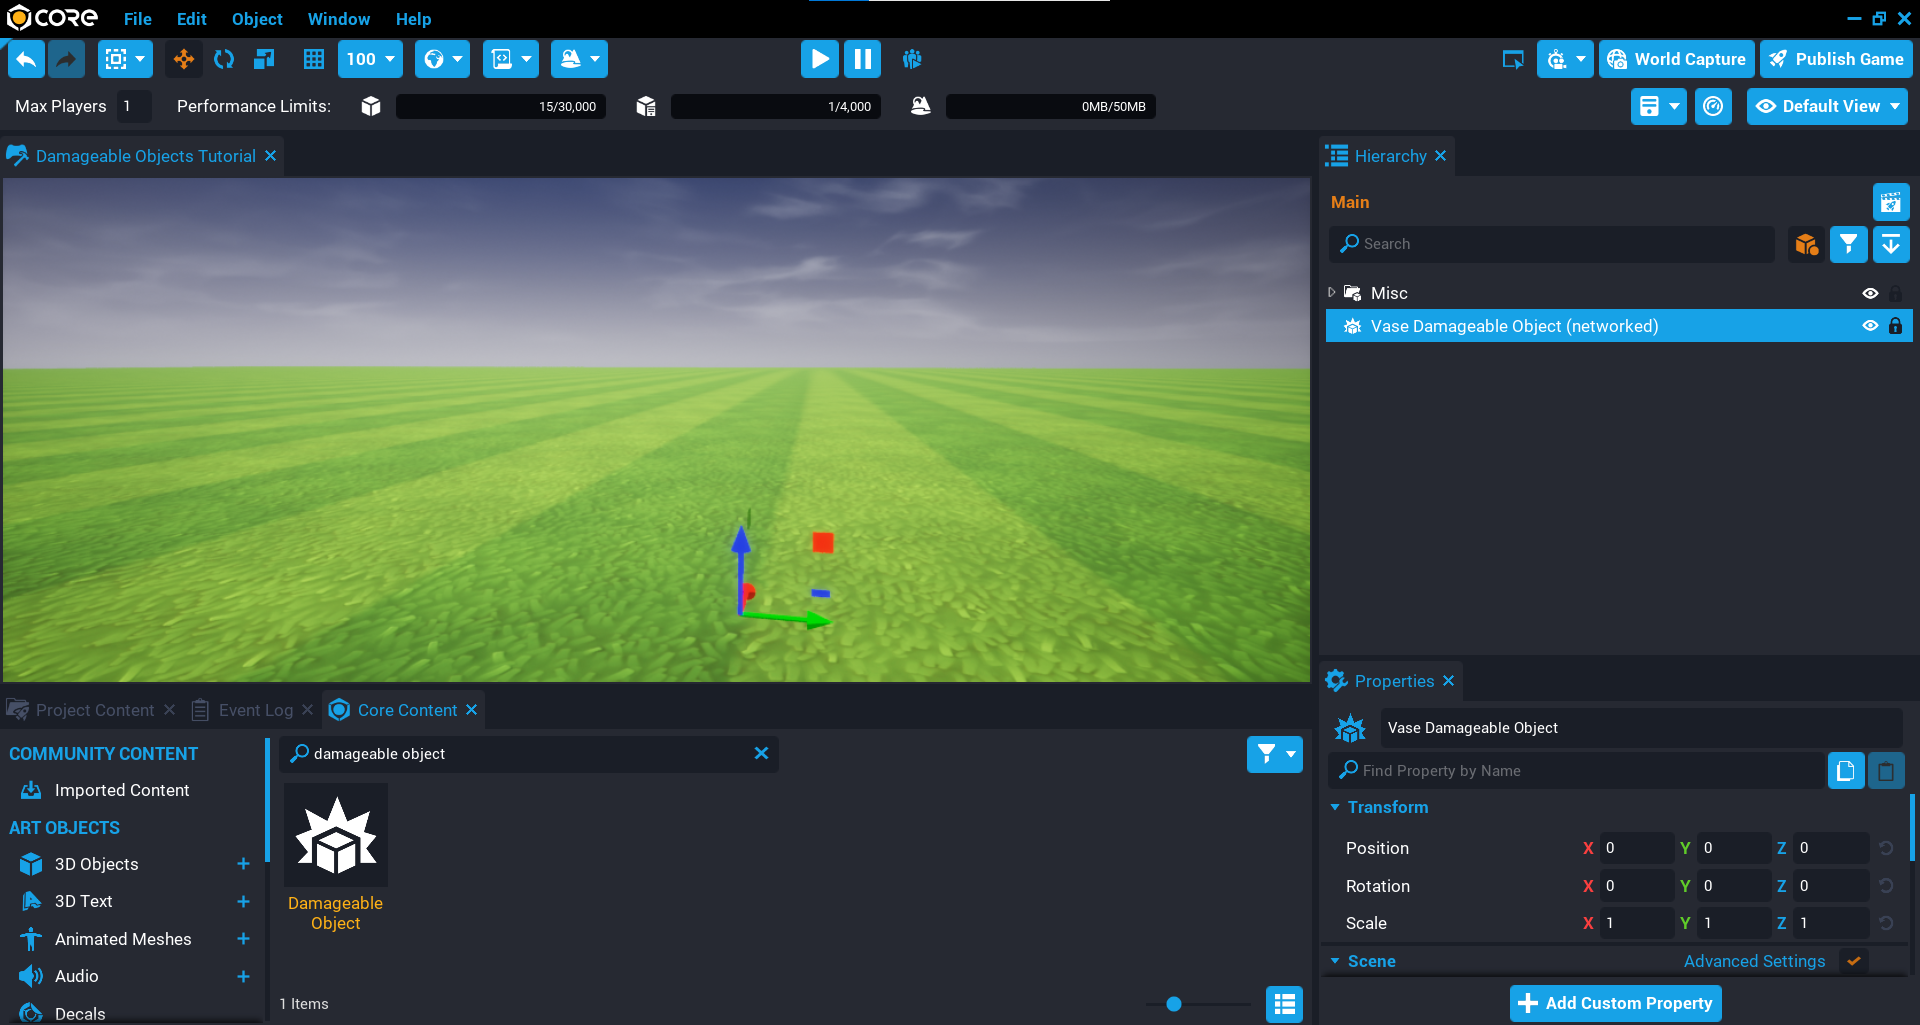
Create Vase Damageable Object
For an object to become destructible, it needs to have collision, and be a child of a Damageable Object. When the child of a damageable object gets hit by something that can apply damage, then this damage will be applied to the parent damageable object.
- In Core Content search for
Damageable Objectand add it to your Hierarchy. - Rename Damageable Object to
Vase Damageable Object.
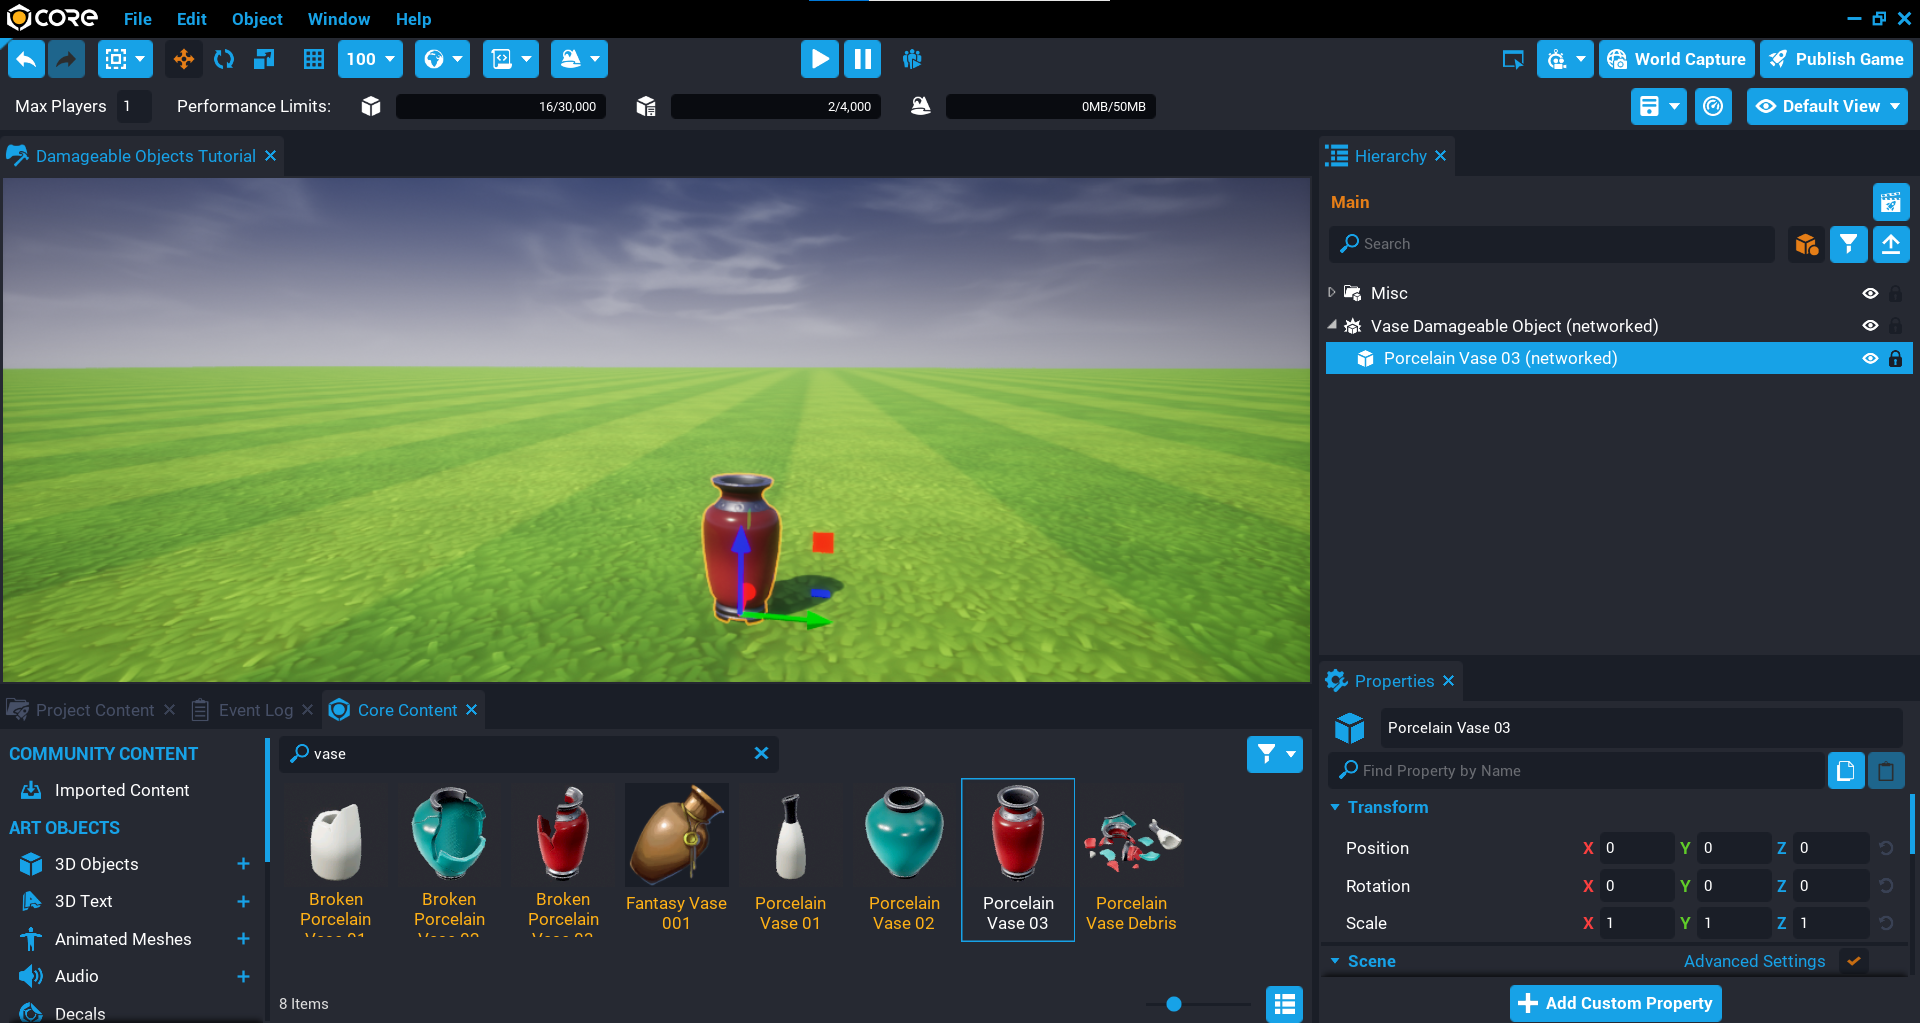
Add Vase Object
You will need to add an object as a child of the Vase Damageable Object that has collision.
In Core Content search for Vase to find the Porcelain Vase 03 object and place it as a child of the Vase Damageable Object in the Hierarchy. When this object takes damage (for example, from a weapon), it will look at the parent Vase Damageable Object and apply the damage to that.
When adding objects as children of a Damageable Object, you may be asked if you want to make the children Networked. For any object that will have collision on, then those objects should always be networked.
Create Vase Broken Damageable Object
Now that you have the main vase object, you will now create another damageable object that will be the broken version of the vase. For the moment this will stay in the Hierarchy because you will be modifying the properties later.
- In Core Content search for
Damageable Objectand add it to your Hierarchy. - Rename Damageable Object to
Vase Broken Damageable Object. - In Core Content search for
Vaseto find the Broken Porcelain Vase 03 object and place it as a child of the Vase Broken Damageable Object in the Hierarchy. - In the Hierarchy, right click on the Vase Broken Damageable Object and select Create a New Template From This.

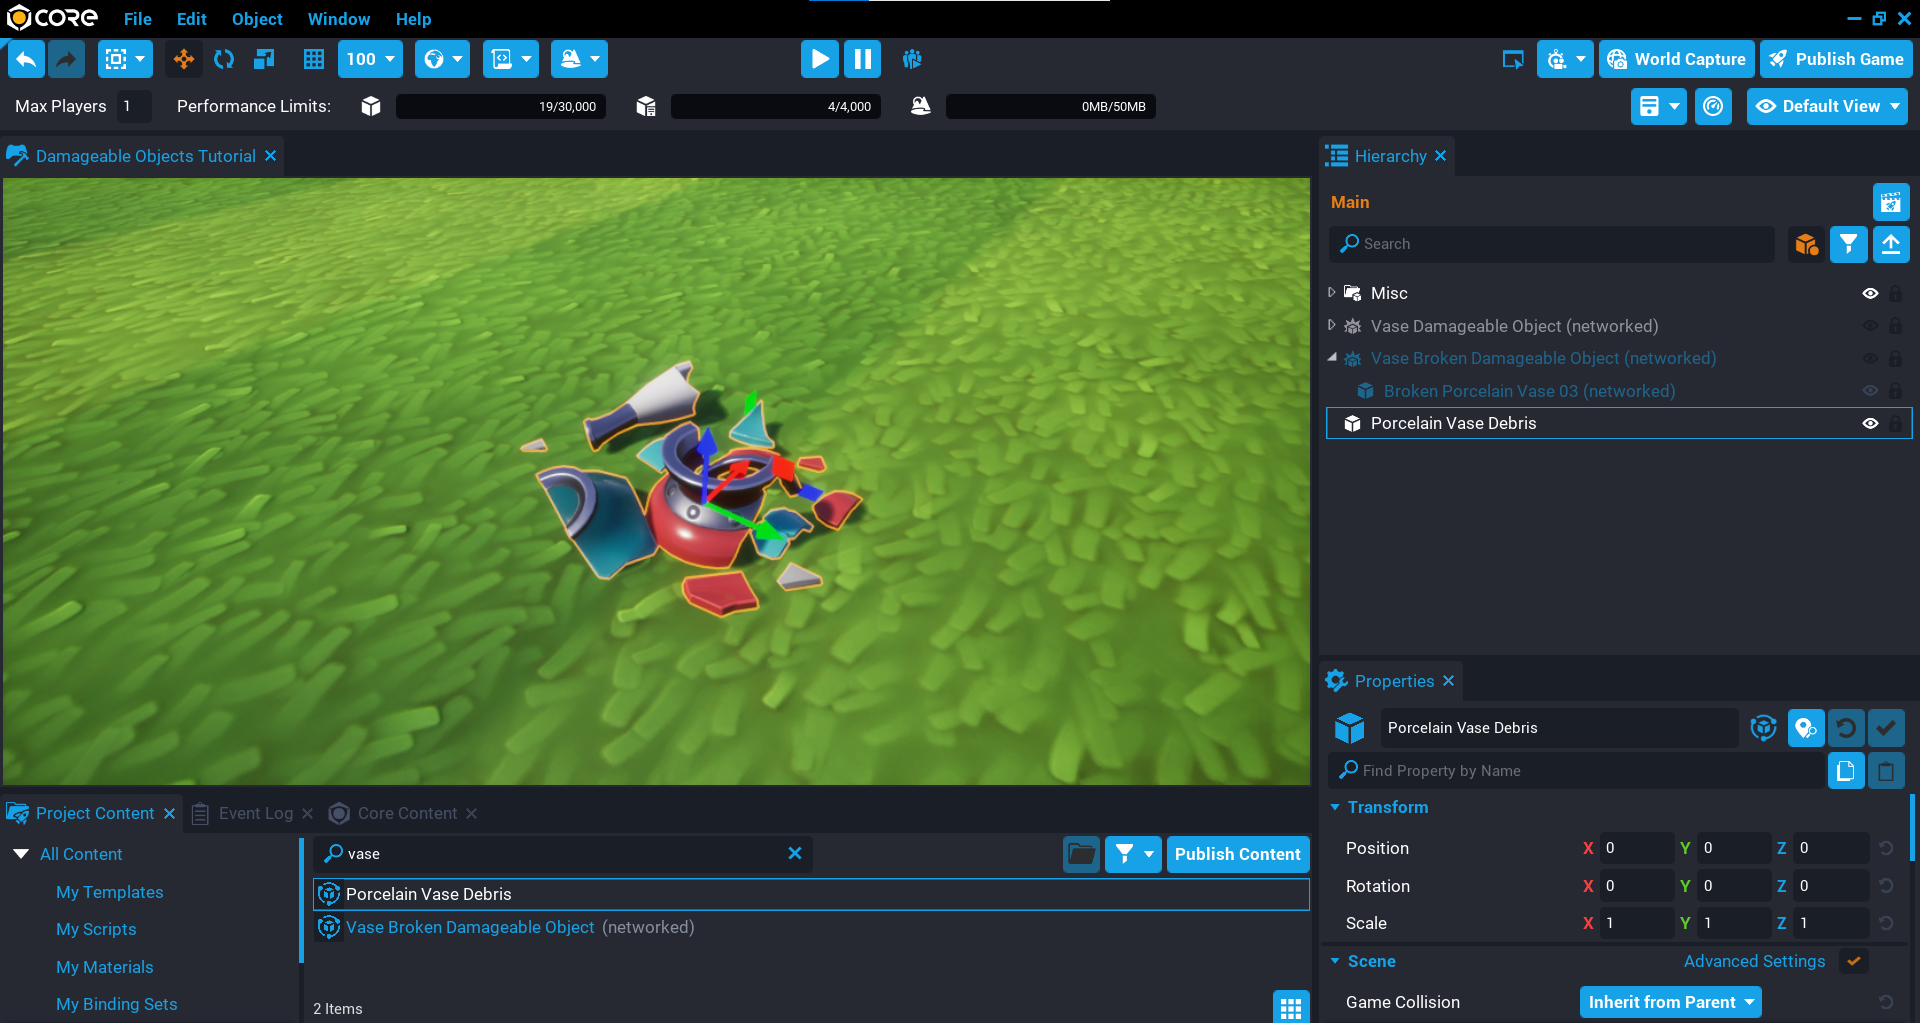
Create Vase Debris Template
For the final stage of the vase, a vase debris object will be spawned.
- In Core Content search for
Vaseto find the Porcelain Vase Debris object and place it in the Hierarchy. - In the Hierarchy, right click on the Porcelain Vase Debris object and select Create a New Template From This.
- Delete the Porcelain Vase Debris object from the Hierarchy.
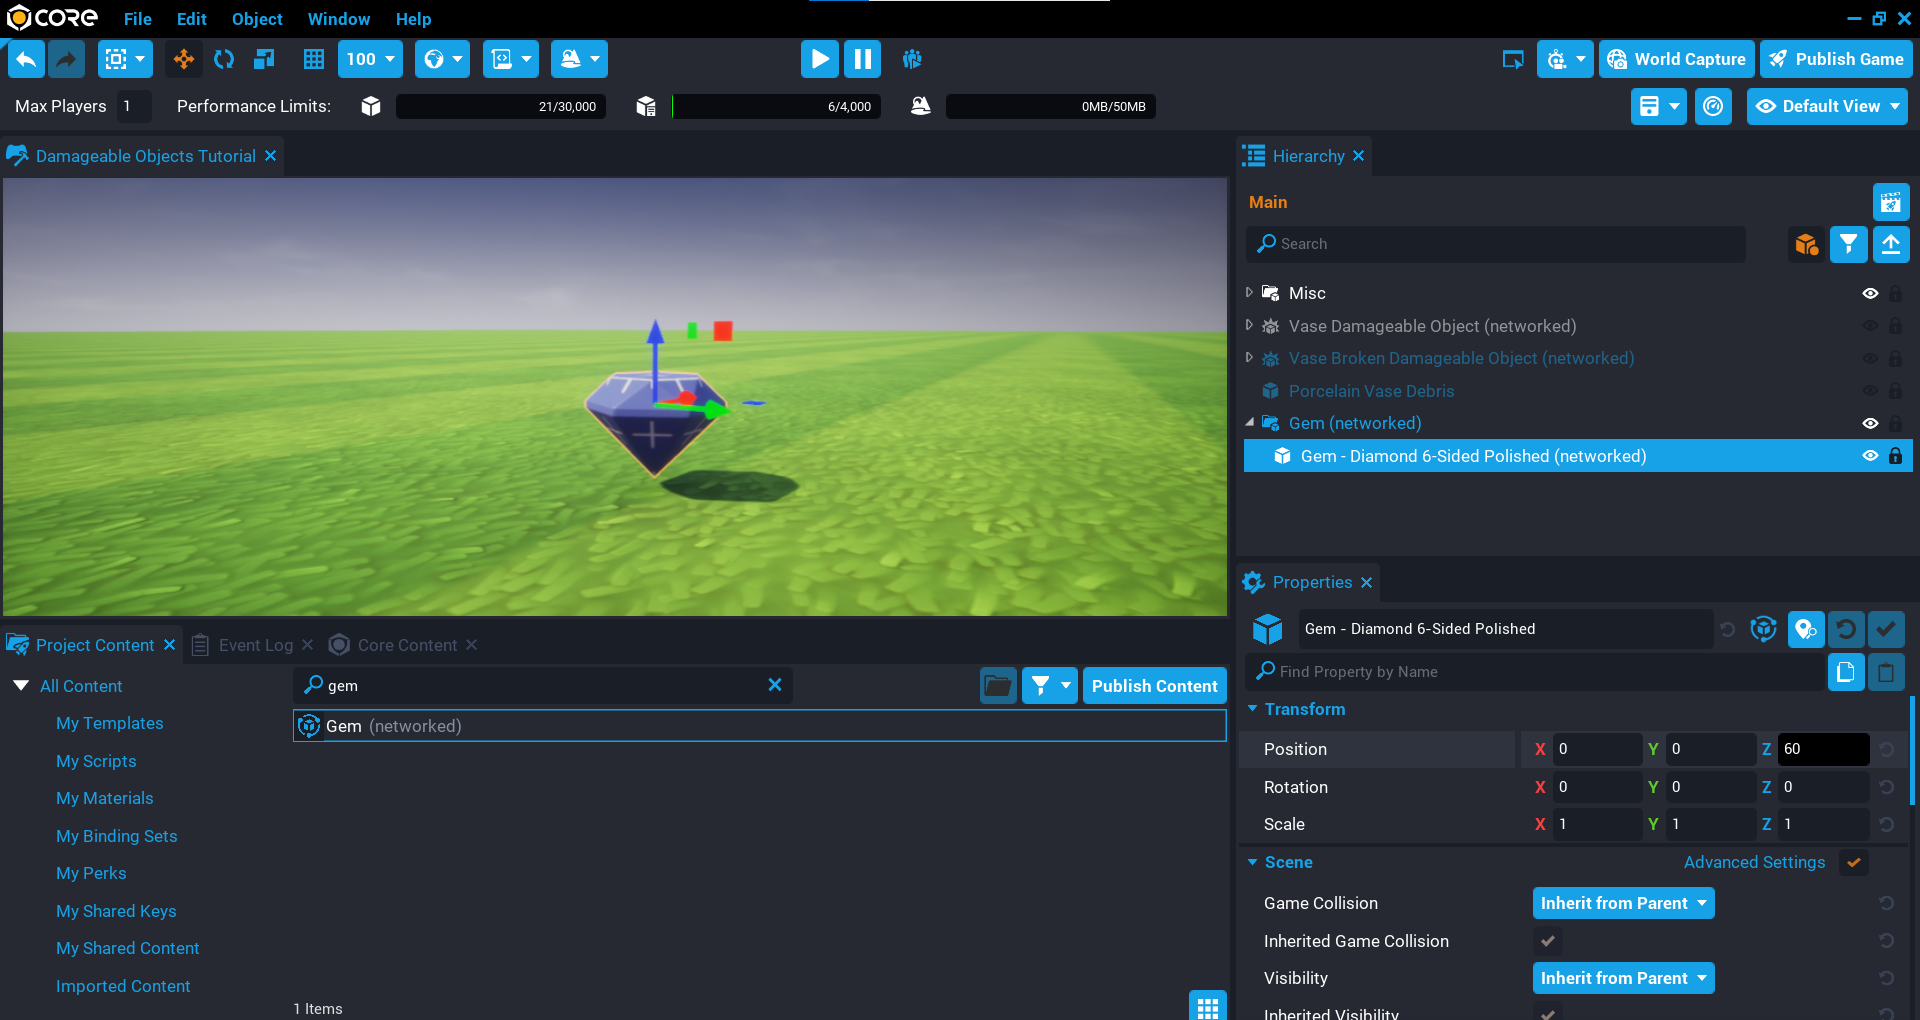
Create Gem Object
When the Vase Broken Damageable Object is destroyed, it will also spawn a gem object. This could be a pickup that players in your game can collect.
Objects that are spawned when a damageable object has been destroyed will inherit the position of the damageable object. This is good for most cases, but there are times where the spawned object needs to be offset. For example, spawning a gem may be too low into the ground. This is an easy problem to solve by using a group as the parent of the object, and then positioning the object in the group.
- Create a new Group in the Hierarchy and call it
Gem. - In Core Content search for
Diamond Gemto find Gem - Diamond 6-Sided Polished, and add it in the Gem group in the Hierarchy. - Move the object up on the Z position so it is not in the ground.
- In the Hierarchy, right click on the Gem group and select Enable Networking.
- In the Hierarchy, right click on the Gem group again and select Create a New Template From This.
- Delete the Gem group from the Hierarchy.
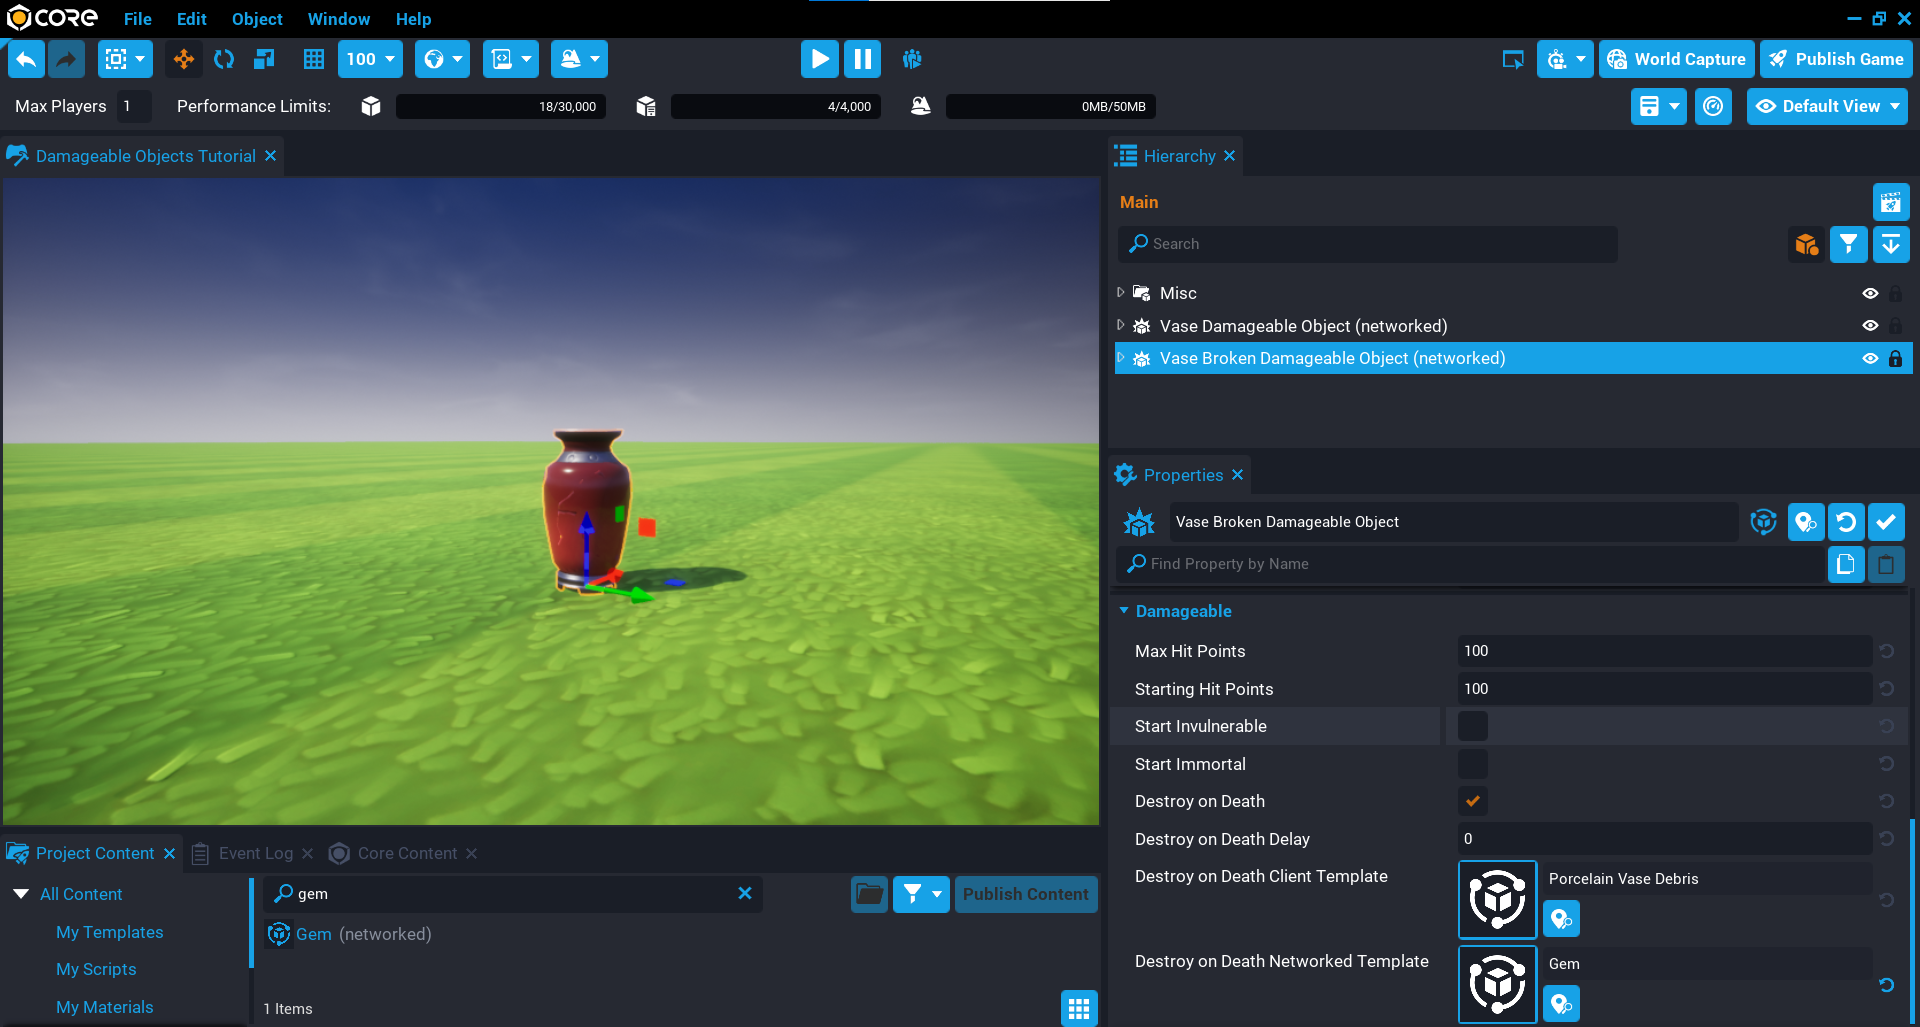
Update Vase Broken Damageable Object
The broken vase template needs to be updated so that it will spawn the templates when it has been destroyed.
Add Destroy on Death Client Template
When the broken vase damageable is destroyed, the client template will be spawned. This will be the debris version of the vase.
- In the Hierarchy, click on the Vase Broken Damageable Object so it is the active object.
- In Project Content search for
Vase Debristo find Porcelain Vase Debris. - Add the template Porcelain Vase Debris to the custom property Destroy on Death Client Template.
Add Destroy on Death Networked Template
When the broken vase damage is destroyed, the networked template will be spawned. This will be the Gem.
- In the Hierarchy, click on the Vase Broken Damageable Object so it is the active object.
- In Project Content search for
Gem. - Add the template Gem to the custom property Destroy on Death Networked Template.
Update Template
With the client and networked templates added, the Vase Broken Damageable Object in the Hierarchy can now be updated.
- In the Hierarchy select Vase Broken Damageable Object so it is the active object.
- Right click on Vase Broken Damageable Object and select Update Template From This.
- Deleted Vase Broken Damageable Object from the Hierarchy.
Update Vase Damageable Object
The final thing left to do, is add the Vase Broken Damageable Object template to the Vase Damageable Object in the Hierarchy so that when it is destroyed, it will spawn the broken vase.
- In the Hierarchy, click on the Vase Damageable Object so it is the active object.
- In Project Content search for
Vase Brokento find Vase Broken Damageable Object. - Add the template Vase Broken Damageable Object to the custom property Destroy on Death Networked Template.

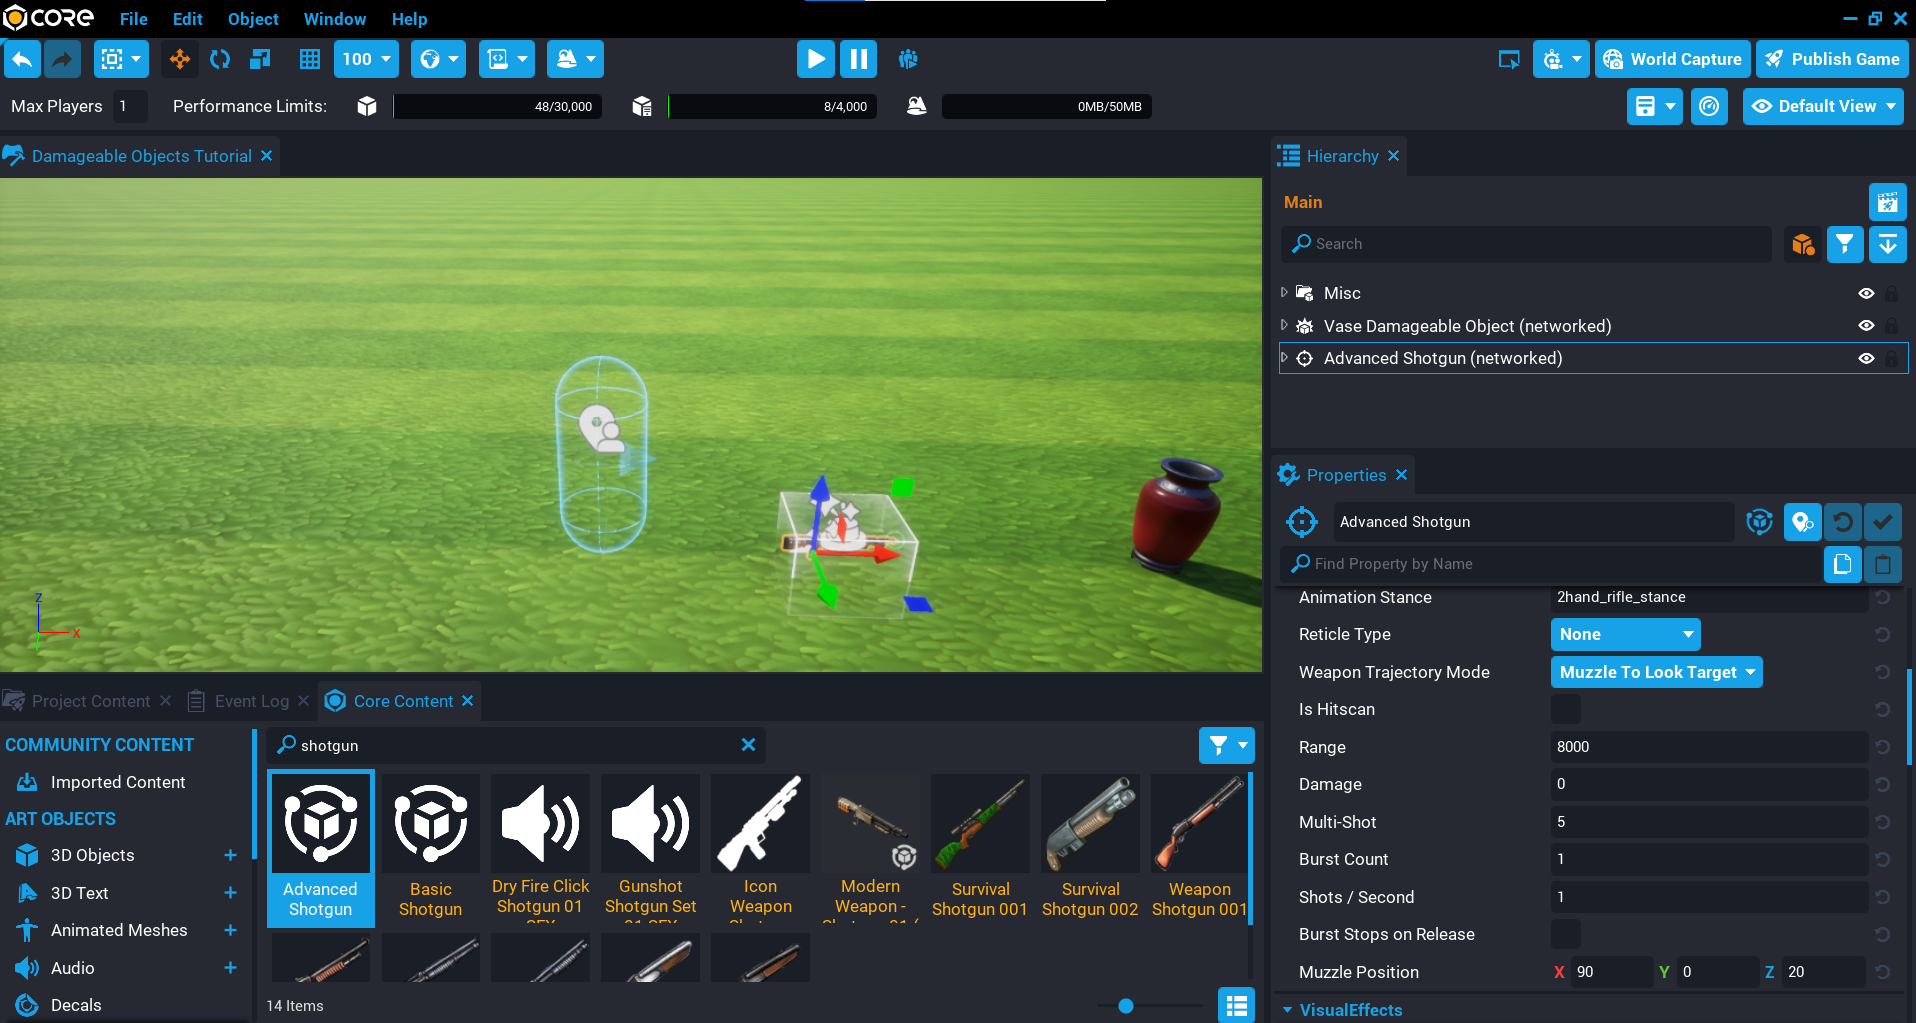
Add a Weapon
You will need to add a weapon to the game so that it can be picked up and used to destroy the vase.
- In Core Content search for
shotgunto find Advanced Shotgun. - Add the Advanced Shotgun template to the Hierarchy.
Test the Game
Test the game to make sure the following work:
- Broken vase is spawned when the vase has been damaged.
- Debris vase is spawned when the broken vase has been damaged.
- Gem is spawned.
Basic Dummy
In this section you will setup the most basic damageable object that will have some geometry and collision that can be destroyed, in future sections you will be adding additional layers to improve the dummy.
For the basic dummy, the properties on the damageable object will not be changed, which will show you how easy it can be to create objects that can be destroyed by the player.
Destroying Damageable Objects
To destroy any of the damageable objects throughout this tutorial, you will need to add a weapon from Core Content. For example, search for advanced assault to find the Advanced Assault Rifle and add it to your Hierarchy so you can pick it up when you play the game.
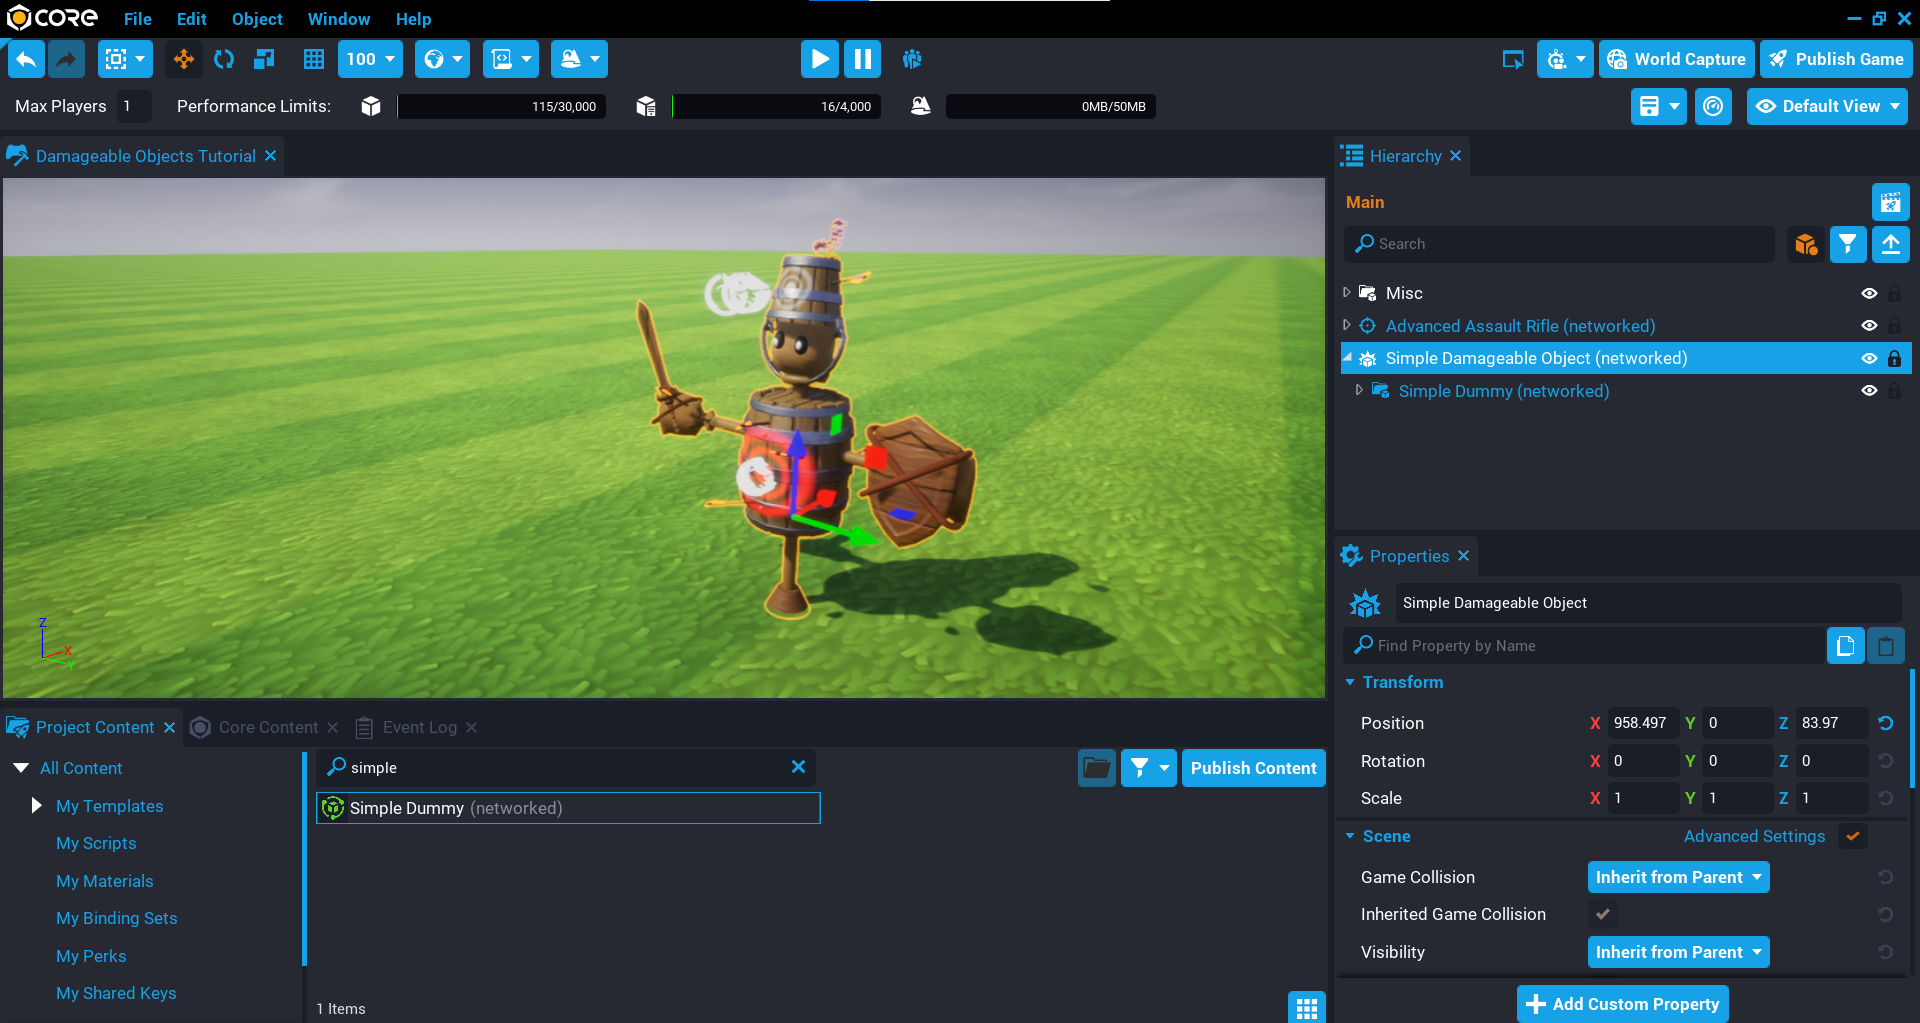
Create Damageable Object
When you want to create your own custom damageable objects, you will want to start with the basic Damageable Object from Core Content. On its own, it is not that useful because it has no visual, and no collision. All damageable objects need some collision for it to register damage, and in most cases you will want some geometry so you can see what to damage.
- In Core Content search for
Damageable Objectand add it to your Hierarchy. - Rename Damageable Object to
Simple Damageable Object. - In Project Content search for
Simple Dummyand add it as a child of Simple Damageable Object. - Move the Simple Damageable Object so it is not in the ground, and away from the player.
Test the Game
Enter player mode, pickup the weapon, and shoot the dummy. The Simple Damageable Object has 100 health, so after a few shots you will see the dummy disappear. It is not very satisfying, but it shows you how easy it is to make objects that can be destroyed.
Effects Dummy
In this section, you will be create a dummy that will spawn an effect when the dummy is destroyed. Damageable objects have a property called Destroy on Death Client Template, which will be spawned when the damageable object is destroyed (killed). This effect will be spawned for each player, which will make the death of the dummy far more satisfying.
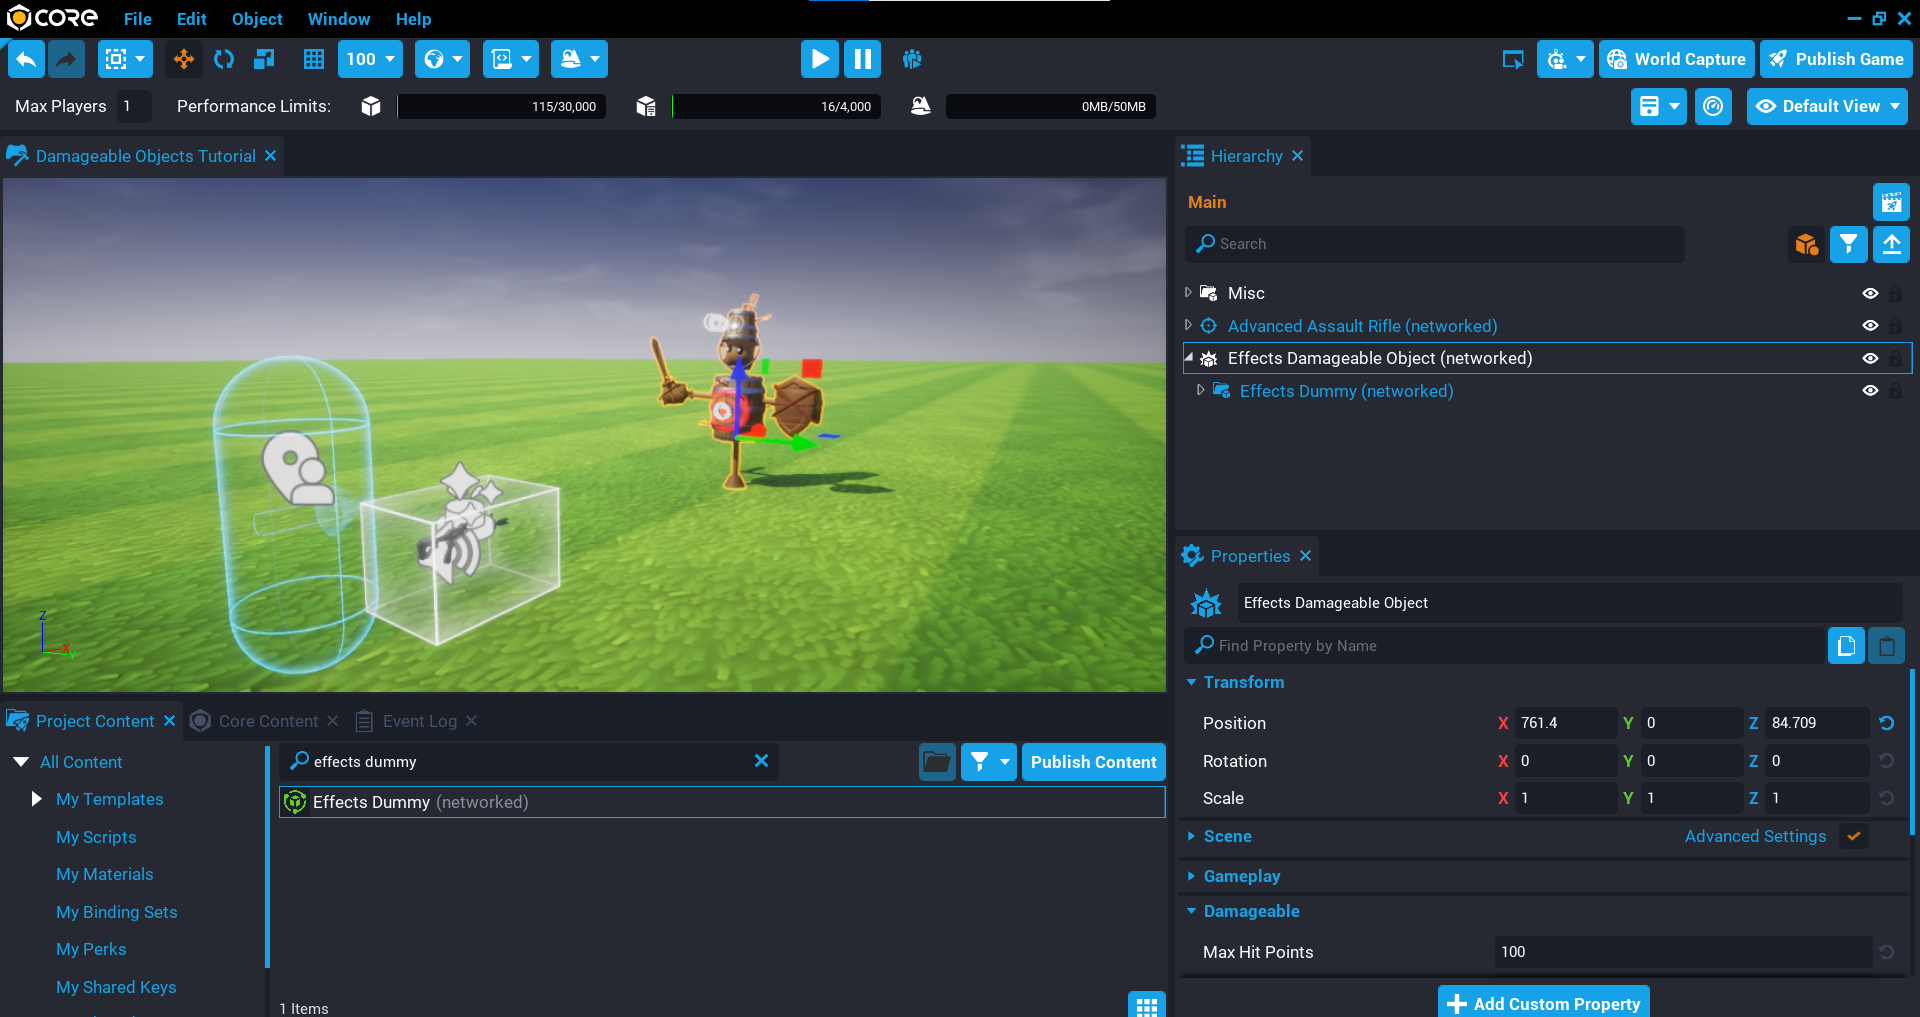
- In Core Content search for
Damageable Objectand add it to your Hierarchy. - Rename Damageable Object to
Effects Damageable Object. - In Project Content search for
Effects Dummyand add it as a child of Effects Damageable Object. - Move the Effects Damageable Object so it is not in the ground, and away from the player.
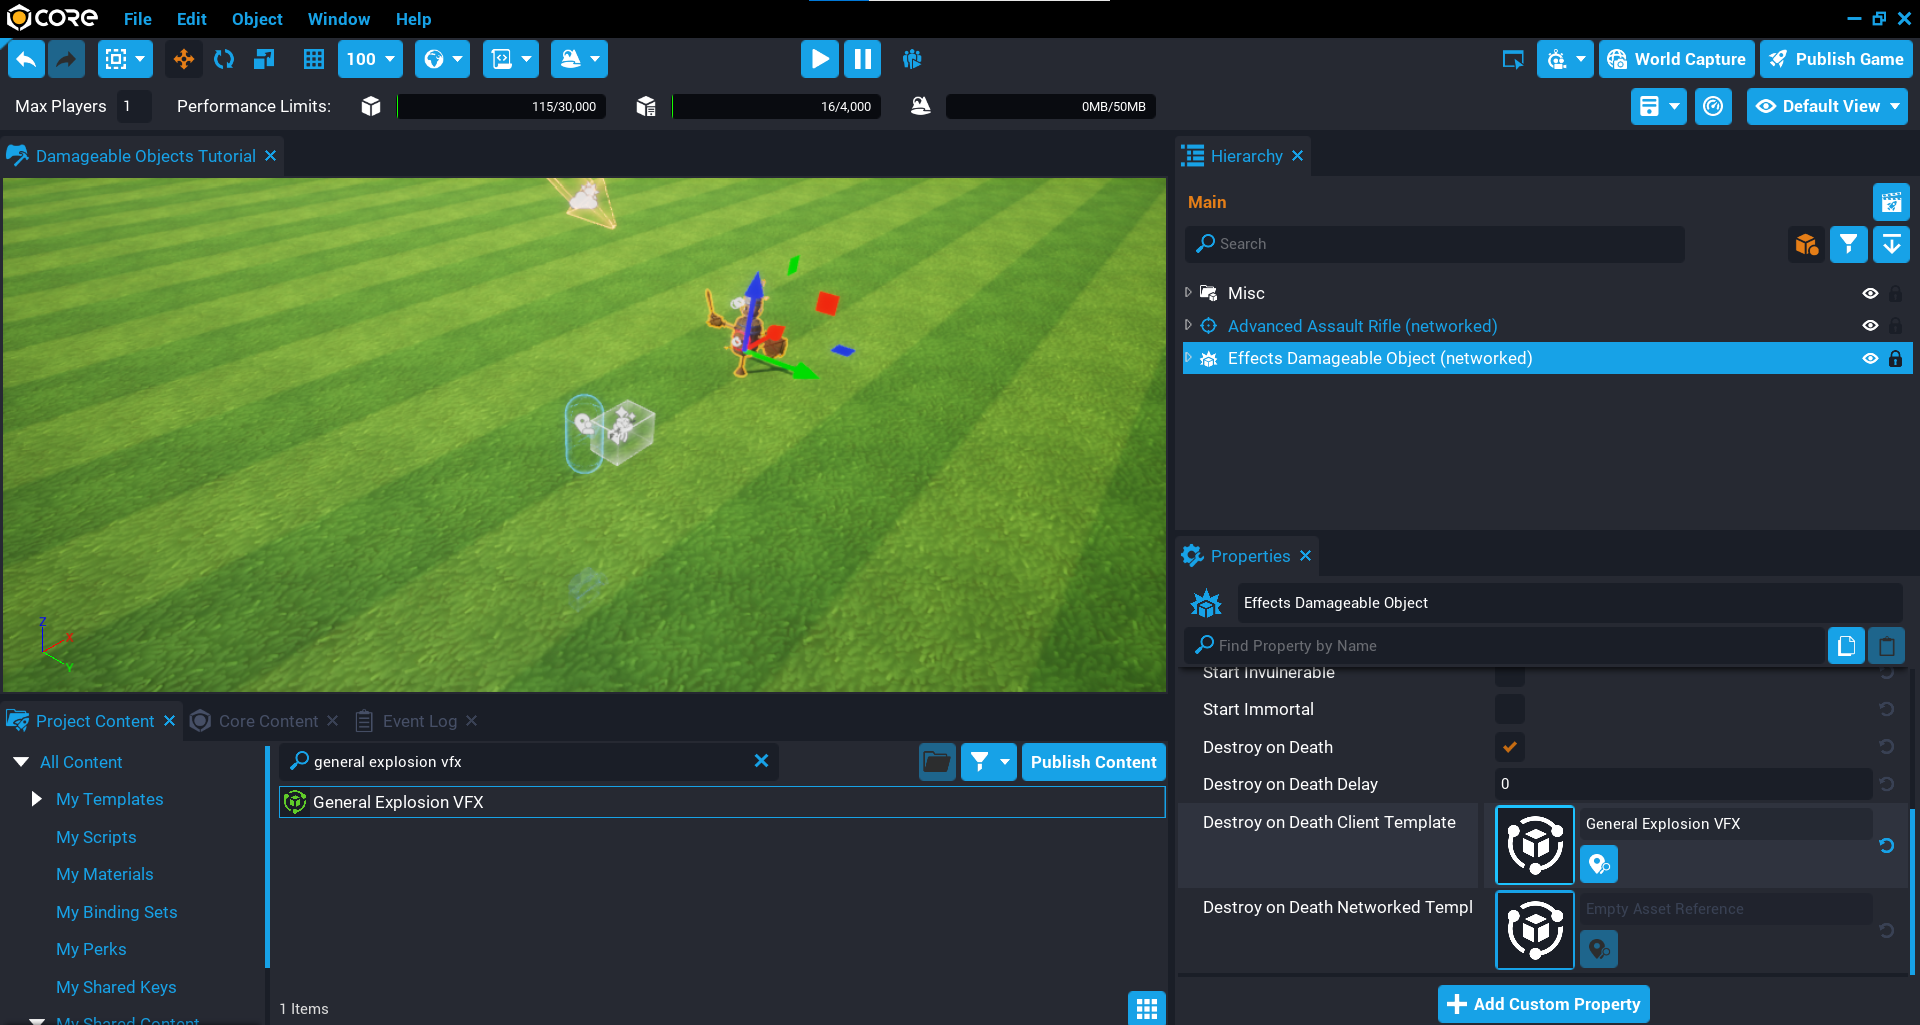
Add Destroy on Death Client Template
The Destroy on Death Client Template can be set to a template that will spawn when the dummy has been killed. You can setup your own death templates that can do anything you imagine.
- Select the Effects Damageable Object in the Hierarchy so it becomes the active object.
- In Project Content search for General Explosion VFX and drag it onto the Destroy on Death Client Template property.
Test the Game
Play the game and shoot the dummy. You should now see that when the dummy is killed, an explosion is played. Comparing to the Simple Dummy, it is far more satisfying to destroy, and this is done by setting one property on the damageable object.
Chained Dummy
In this section you will be creating a damageable object that will spawn a level 2 dummy after the first dummy is killed. This level 2 dummy could have more health or display different effects when it is killed. This allows you to chain damageable objects that are spawned when the previous one is killed.
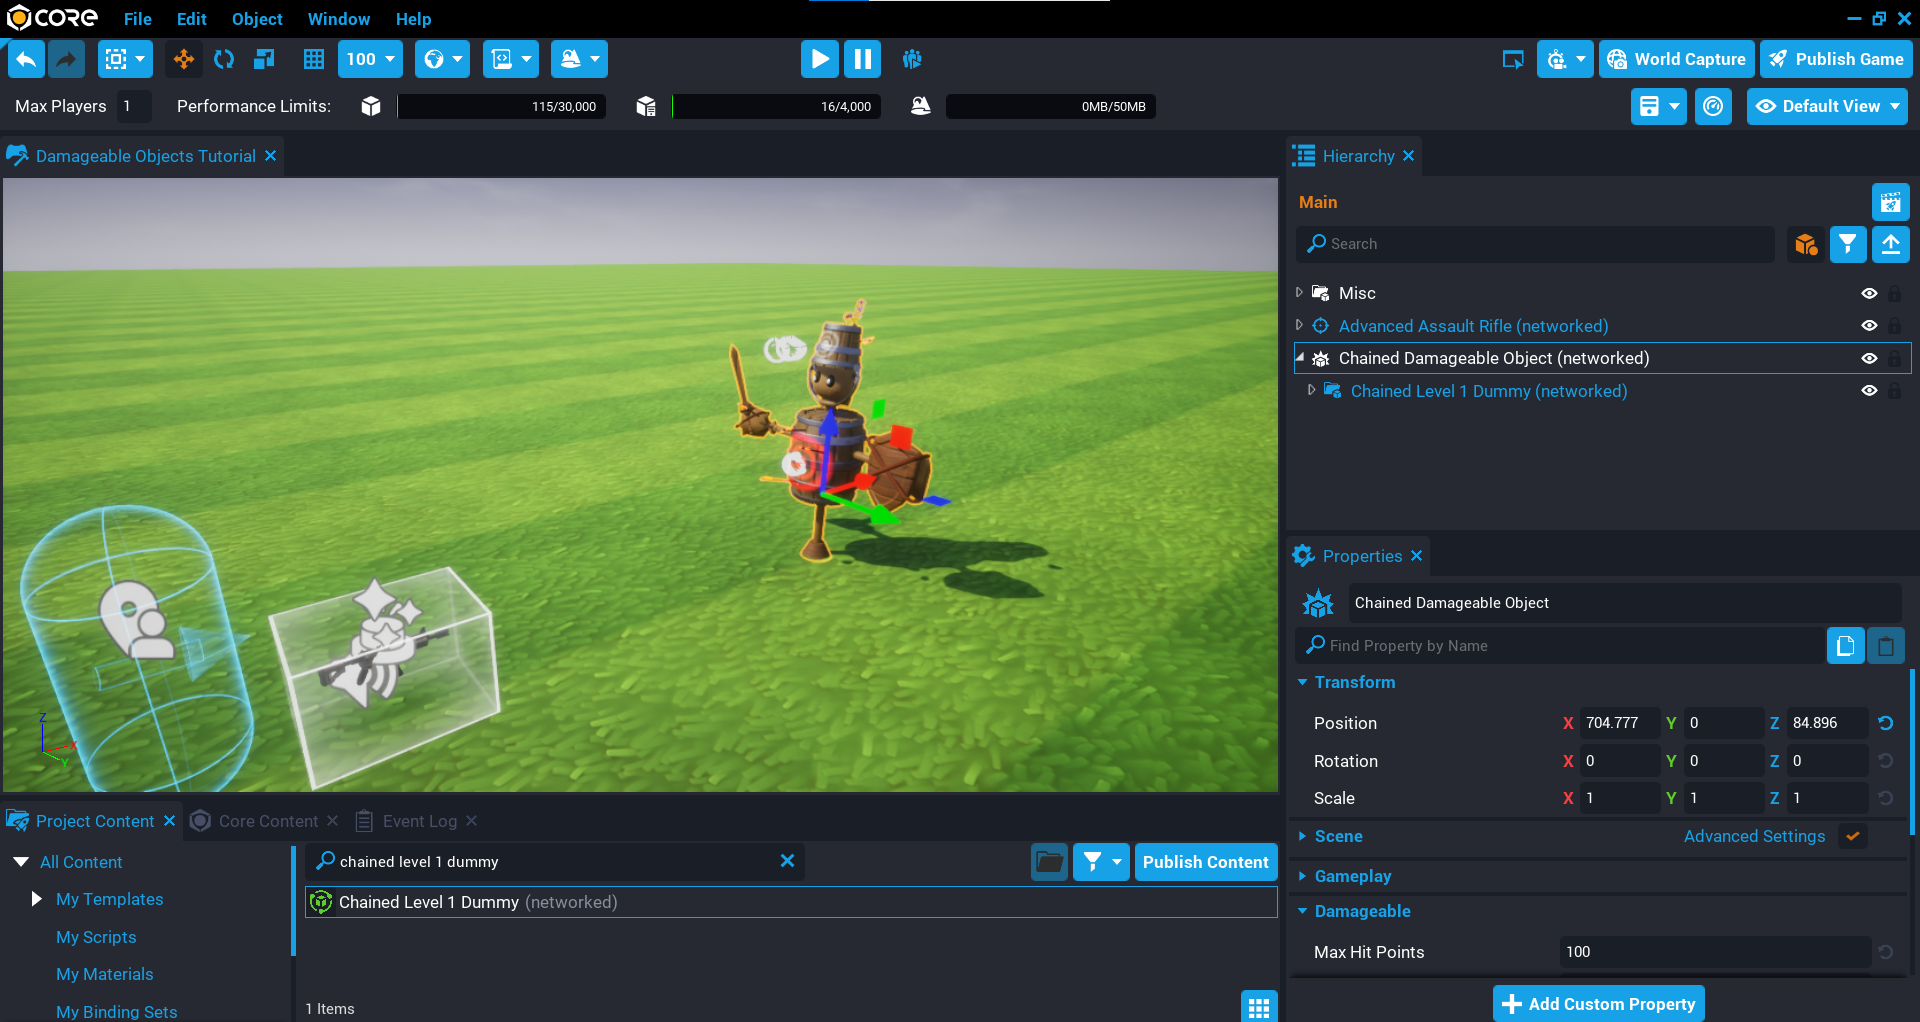
- In Core Content search for
Damageable Objectand add it to your Hierarchy. - Rename Damageable Object to
Chained Damageable Object. - In Project Content search for
Chained Level 1 Dummyand add it as a child of Chained Damageable Object. - Move the Chained Damageable Object so it is not in the ground, and away from the player.
Add Destroy on Death Client Template
The Destroy on Death Client Template will spawn an effect when the first dummy is killed.
- Select the Chained Damageable Object in the Hierarchy so it becomes the active object.
- In Project Content search for General Explosion VFX and drag it onto the Destroy on Death Client Template property.

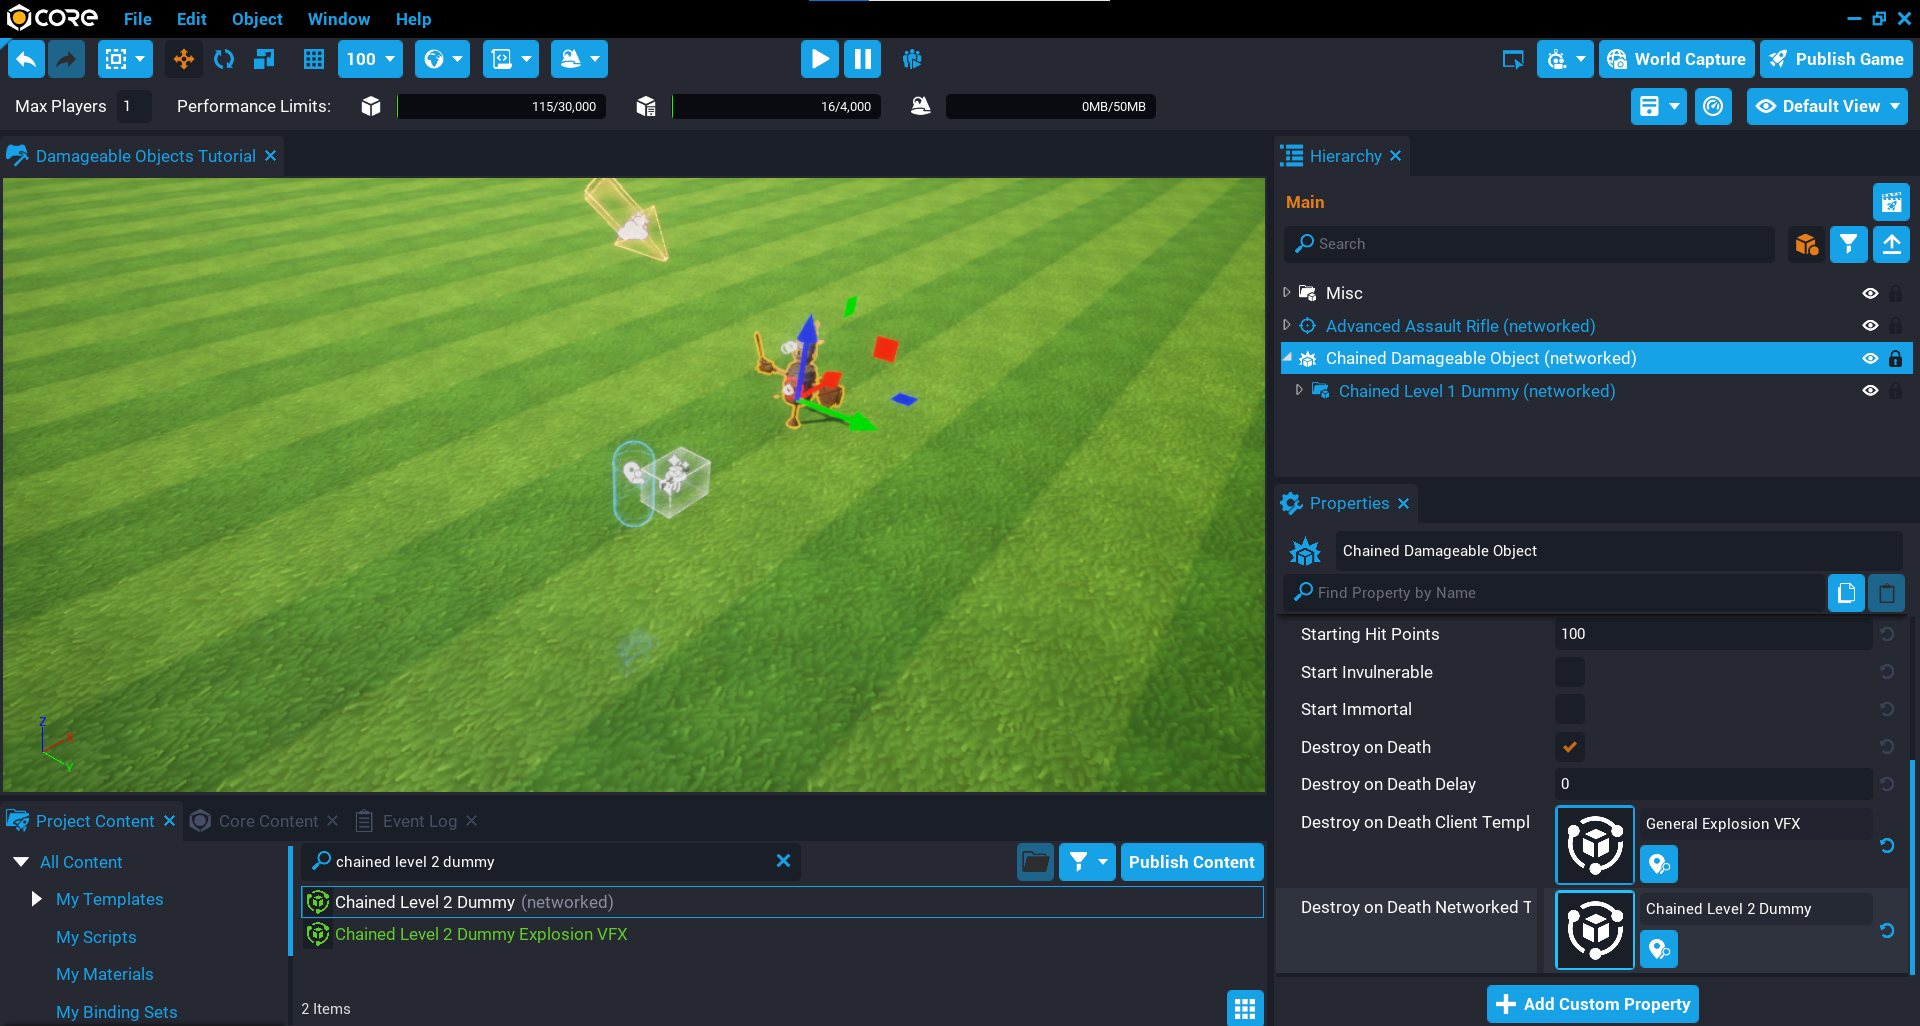
Add Destroy on Death Networked Template
The Destroy on Death Networked Template property can be used to spawn templates that have additional gameplay logic. For example, spawning a loot item that all players can see and pickup. Any template that you set for this property needs to be Networked so all players can see the object and get updates about it.
A level 2 dummy template has been created that you will be adding into the property, this object is also a damageable object. This level 2 dummy will have a different decal color and play a different colored explosion when killed.
- Select the Chained Damageable Object in the Hierarchy so it becomes the active object.
- In Project Content search for Chained Level 2 Dummy and drag it onto the Destroy on Death Networked Template property.
Test the Game
Play the game and test by killing the dummy.
- Make sure the first dummy can be killed and plays the general explosion effect.
- Make sure the second dummy is spawned, and can also be killed and plays a different explosion effect.
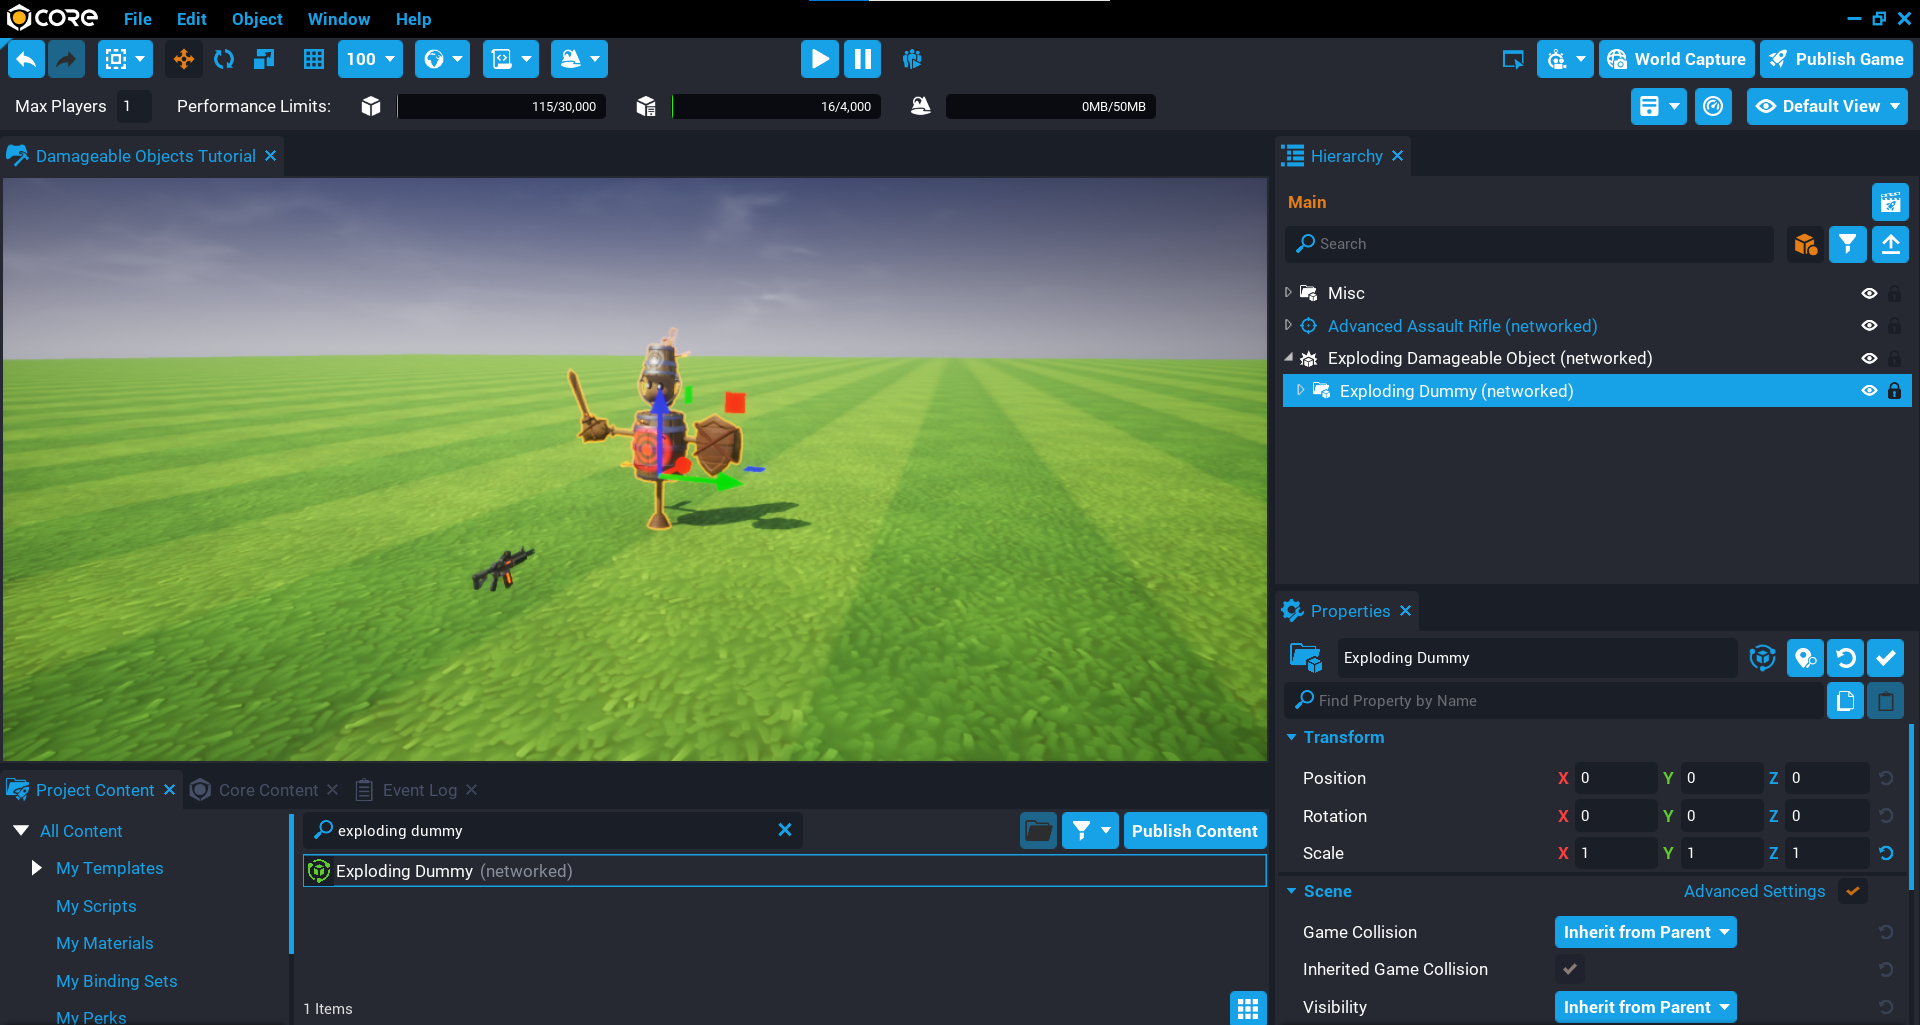
Exploding Dummy
So far the dummies have been very simple to setup, and with no Lua scripting you can create some interesting results just by using the properties. In this section you will be creating an exploding dummy. After the dummy has been killed, a networked template will be spawned using the Destroy on Death Networked Template property. The template that is spawned contains a dummy that is setup to be exploded into various pieces. This exploding effect is done by a small script that is inside the template, meaning it will run as soon as it is spawned.
- In Core Content search for
Damageable Objectand add it to your Hierarchy. - Rename Damageable Object to
Exploding Damageable Object. - In Project Content search for
Exploding Dummyand add it as a child of Exploding Damageable Object. - Move the Exploding Damageable Object so it is not in the ground, and away from the player.
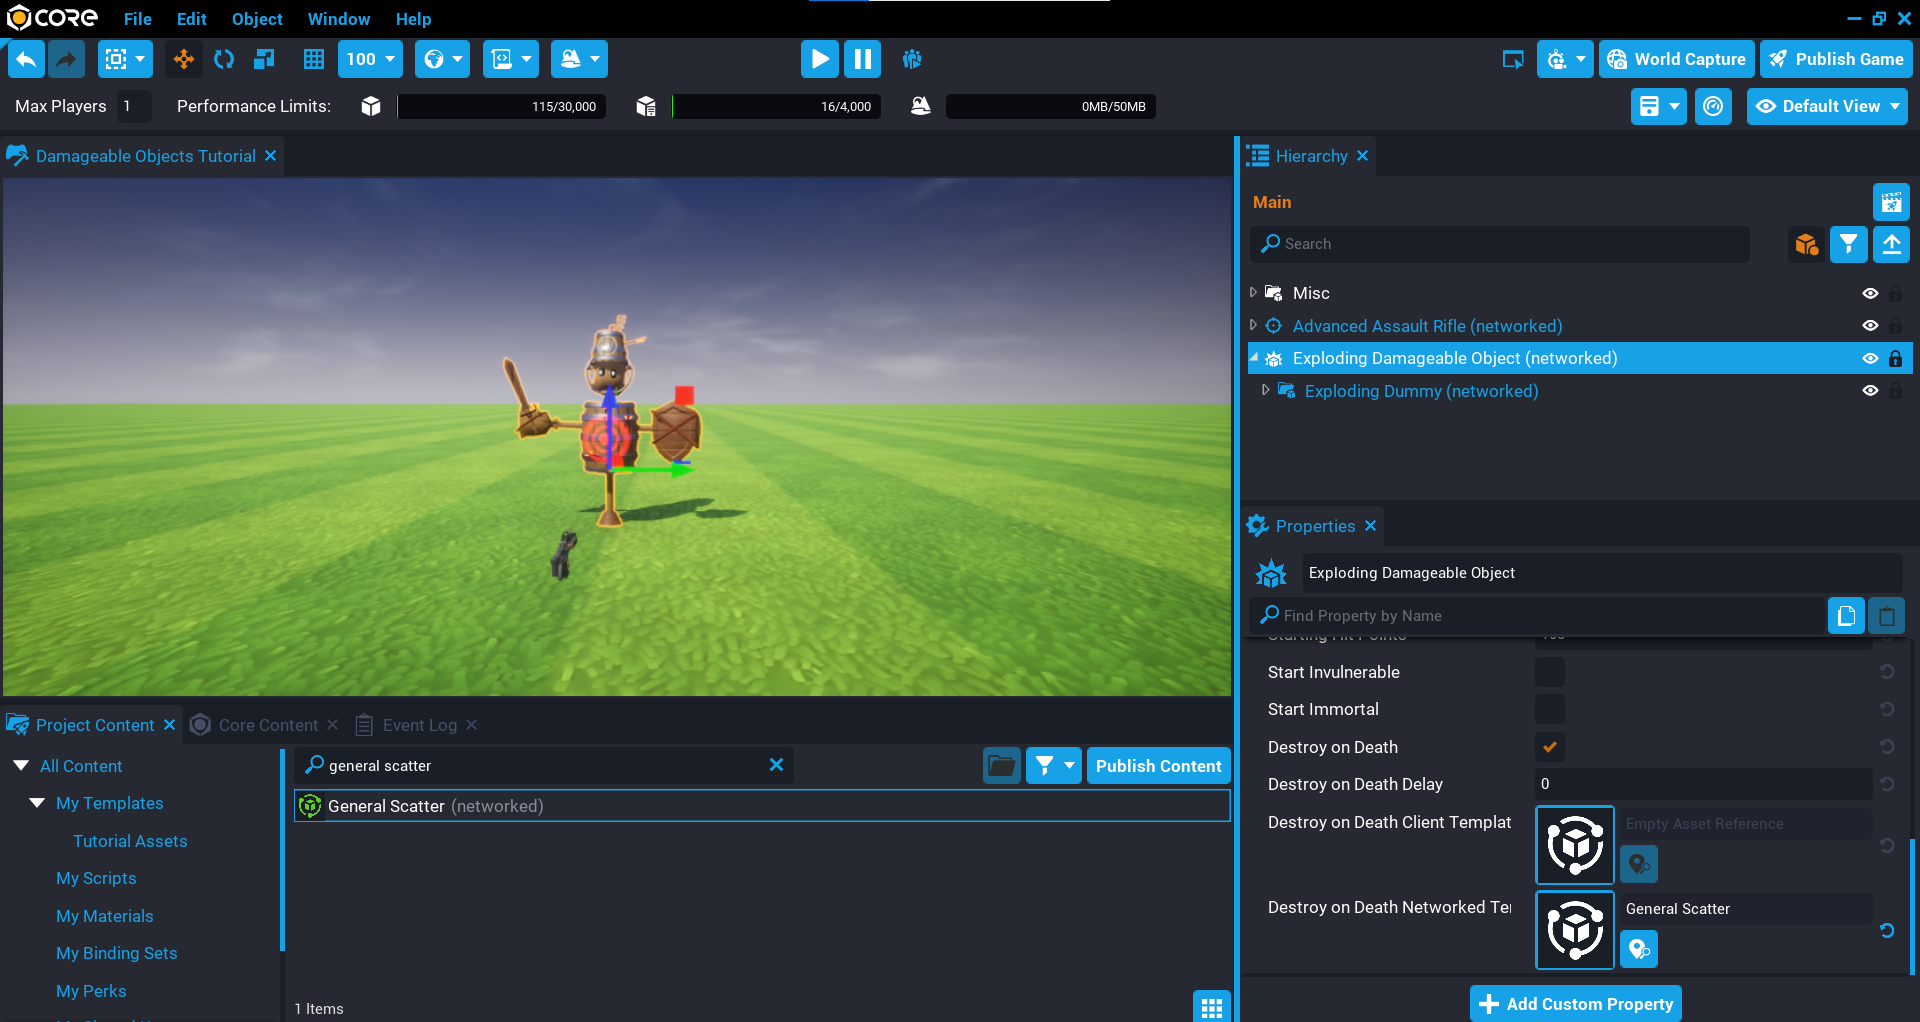
Add Destroy on Death Networked Template
When the Exploding Damageable Object is killed, a template will be spawned that contains a Lua script that will loop over all the meshes that support Debris Physics by setting isSimulatingDebrisPhysics to true. The template that will be spawned has already been setup so that objects which support Debris Physics are in a Supported group.
- Select the Exploding Damageable Object in the Hierarchy so it becomes the active object.
- In Project Content search for General Scatter and drag it onto the Destroy on Death Networked Template property.
The ScatterClient Script
In the General Scatter template, there is a script called ScatterClient. Open up the ScatterClient script and take a look at the code. The code below contains annotations that briefly explain what is happening.
local SUPPORTED = script:GetCustomProperty("Supported"):WaitForObject() -- (1)
local NOT_SUPPORTED = script:GetCustomProperty("NotSupported"):WaitForObject() -- (2)

NOT_SUPPORTED:Destroy() -- (3)

local meshes = SUPPORTED:FindDescendantsByType("StaticMesh") -- (4)
local power = 800 -- (5)
local RNG = RandomStream.New() -- (6)

for _, mesh in ipairs(meshes) do -- (7)
    mesh.collision = Collision.FORCE_ON -- (8)
    mesh.cameraCollision = Collision.FORCE_OFF -- (9)
    mesh.isSimulatingDebrisPhysics = true -- (10)

    if mesh.isSimulatingDebrisPhysics then
        mesh.lifeSpan = RNG:GetNumber(2.5, 5) -- (11)
        mesh:SetVelocity(RNG:GetVector3FromCone(Vector3.UP, 45, 45) * power) -- (12)
    else
        mesh:Destroy() -- (13)
    end
end
- Any mesh that supports Debris Physics will be in a group called Supported.
- Any mesh that does not support Debris Physic will be in a group called Not Supported.
- All the meshes not supported and destroyed instantly.
- Store a reference to all the StaticMesh objects that are in the Supported group.
- The amount of power to apply when setting the velocity of the objects.
- A RandomStream instance they will be used to get a random Vector3 later.
- Looping through all the static meshes that are in the Supported group.
- Debris physics needs collision to be turned on.
- Turn off camera collision to prevent interrupting the player's camera if objects come towards them.
- Turn on debris physic by setting
isSimulatingDebrisPhysicstotrue. - Set the
lifeSpanof the object so it is automatically cleaned up. A random number between 2.5 and 5 is used. - Set the velocity of the object by passing in a random Vector3 that is generated by the
GetVector3FromConefunction. Because the objects need to go in an upwards direction, the worldVector.UPis used. - If any meshes were in the Supported group that don't support debris physics, then destroy them. These objects will show up in the Event Log as a warning.
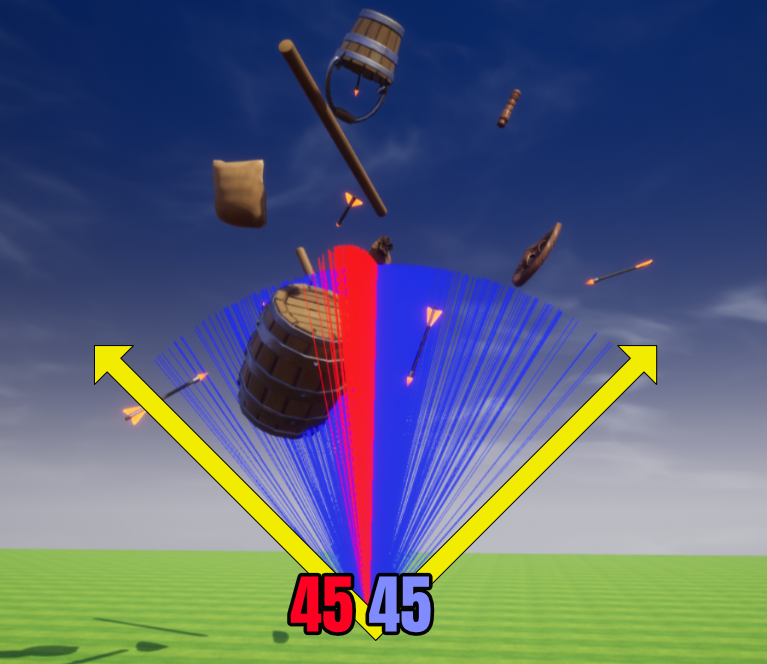
GetVector3FromCone Visualization
The GetVector3FromCone function will return a random Vector3. The function takes 2 inputs (arguments) that specify the angles of the cone. Below is a visual representation of how this would look when using 45 for the horizontal angle, and 45 for the vertical angle.
The horizontal angle is in blue, and the vertical angle is in red.
Test the Game
Test the game to make sure when the dummy is killed, the scatter template is spawned that explodes all the pieces everywhere.
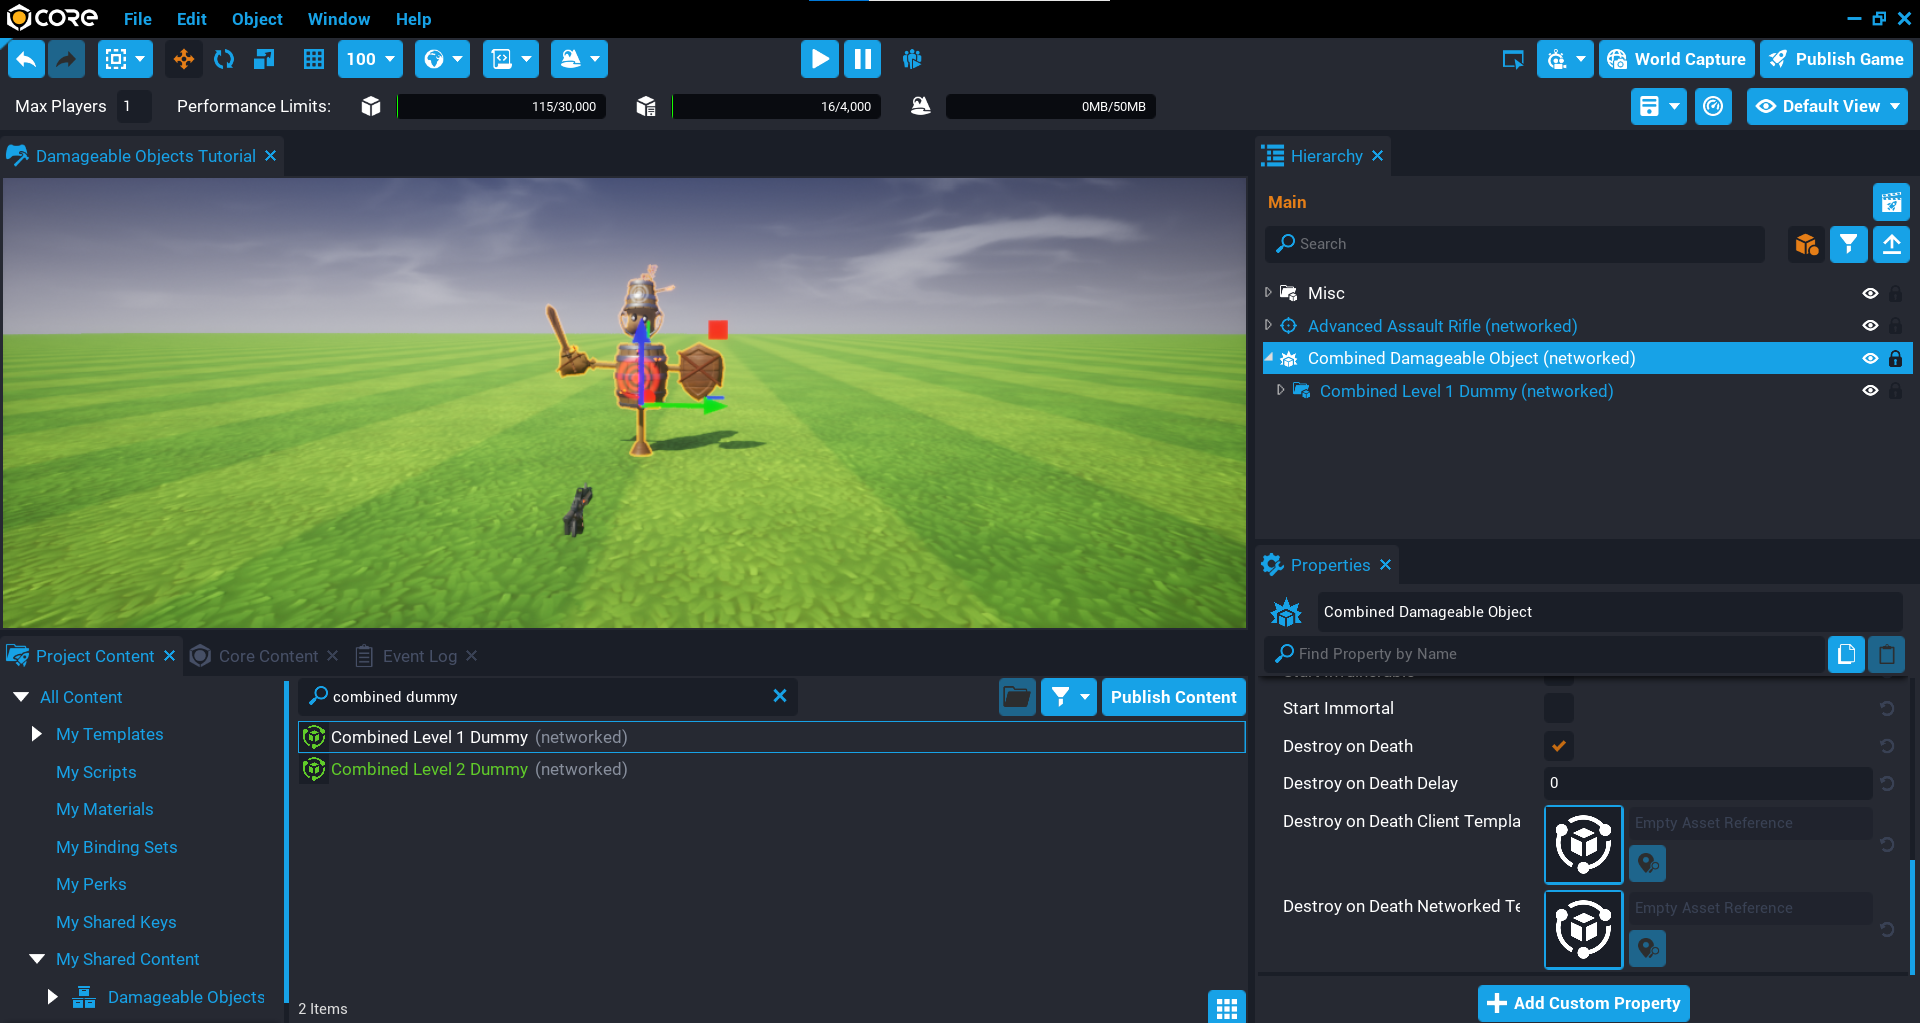
Combined Dummy
With the knowledge from the previous sections, it is now possible to layer up these effects by creating damageable objects that are far more interesting to kill by your players.
The templates have already been created for you that will play an explosion effect when the dummy is killed, explode all the static meshes over the place, and spawn a level 2 dummy that will also have the same effects from the first dummy.
- In Core Content search for
Damageable Objectand add it to your Hierarchy. - Rename Damageable Object to
Combined Damageable Object. - In Project Content search for
Combined Level 1 Dummyand add it as a child of Combined Damageable Object. - Move the Combined Damageable Object so it is not in the ground, and away from the player.
Add Destroy on Death Client Template
The Destroy on Death Client Template will spawn an explosion effect when the dummy has been killed.
- Select the Combined Damageable Object in the Hierarchy so it becomes the active object.
- In Project Content search for General Explosion VFX and drag it onto the Destroy on Death Client Template property.
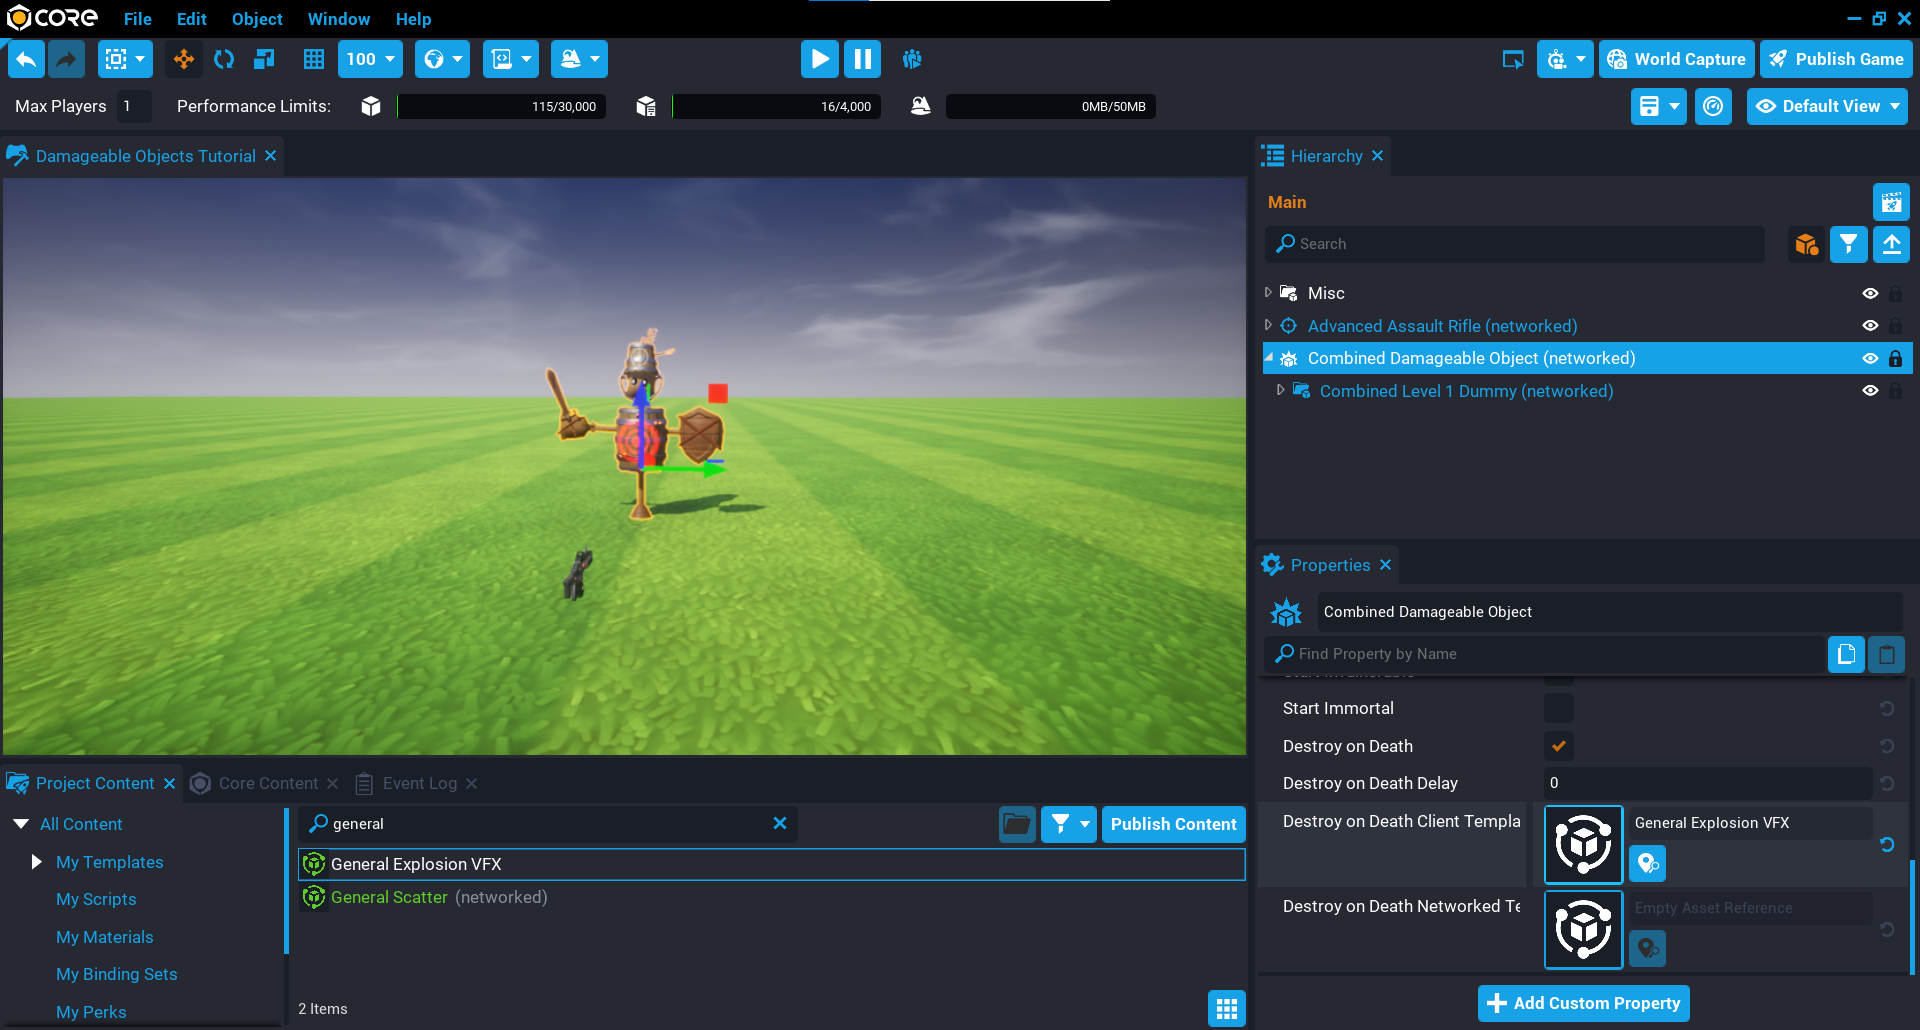
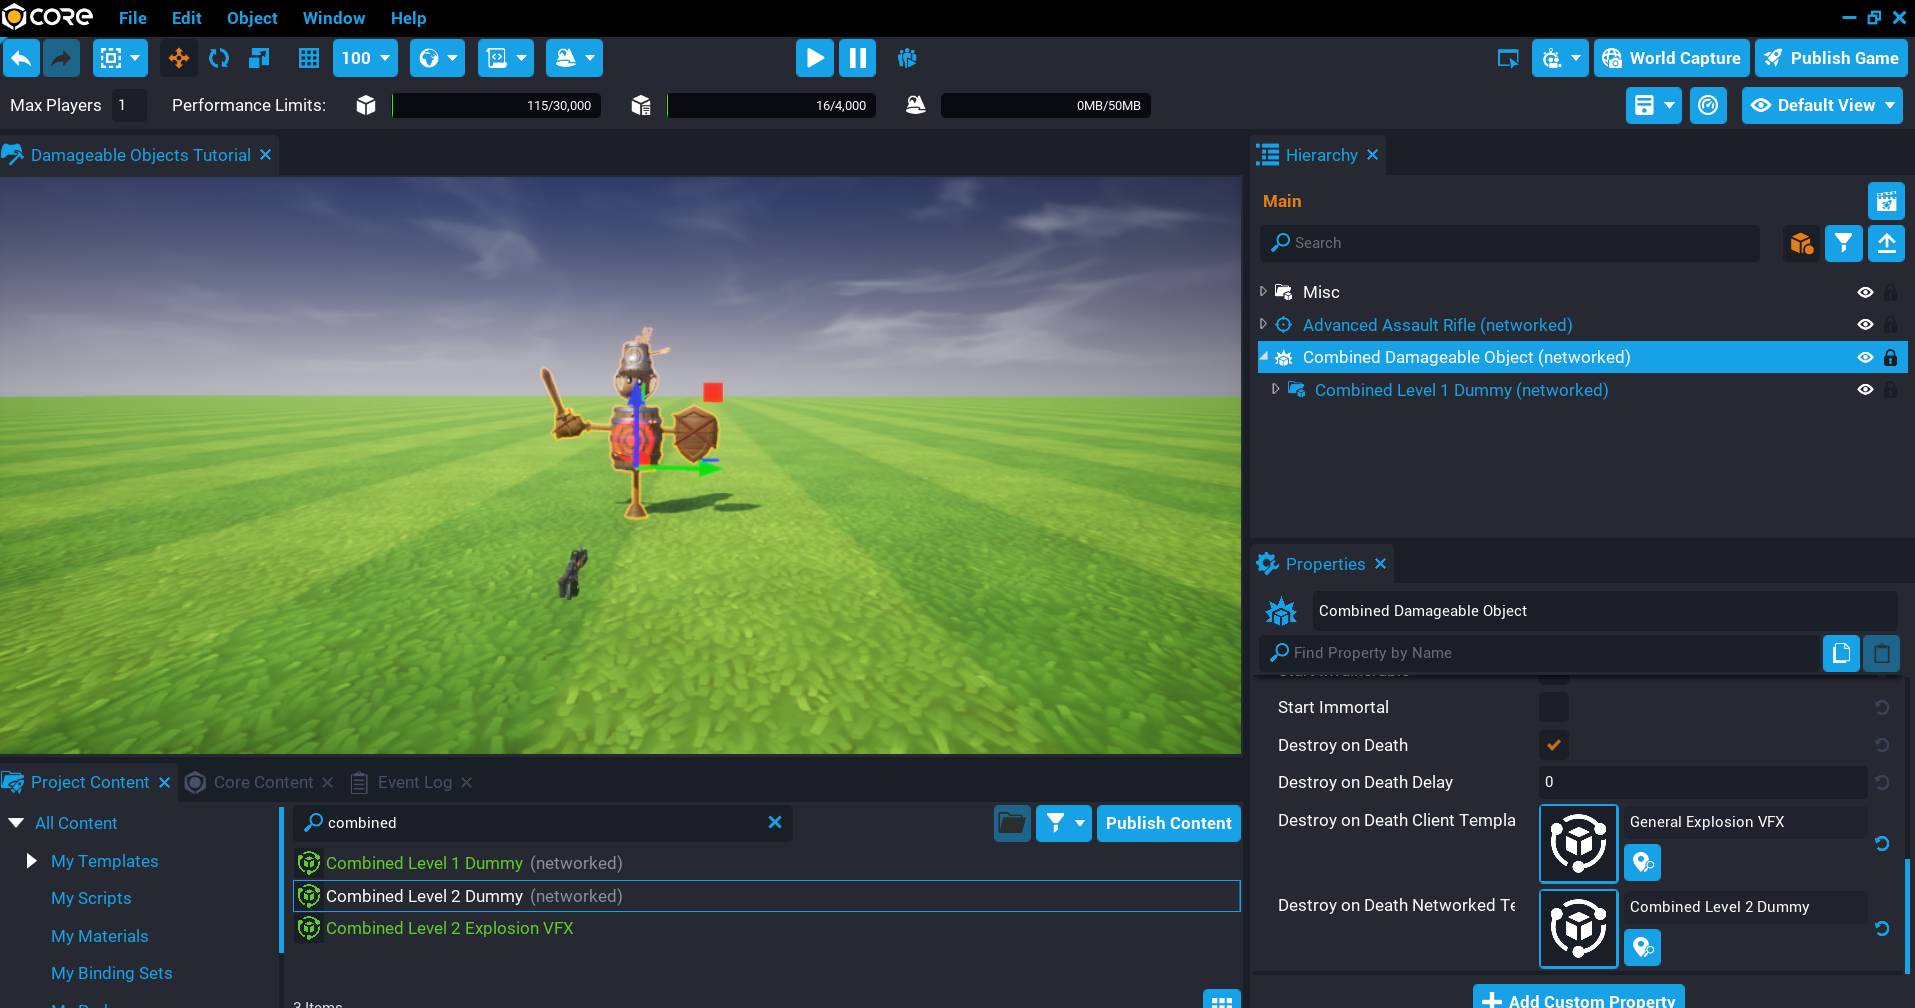
Add Destroy on Death Networked Template
The Destroy on Death Networked Template property will be set to template that is also a damageable object. This shows you how easy it is to create damageable objects that can be added to existing damageable objects to get far more interesting effects. This is all possible without any Lua scripting, because the ScatterClient script is an optional component to improve the effects when the dummy has been killed.
- Select the Combined Damageable Object in the Hierarchy so it becomes the active object.
- In Project Content search for Combined Level 2 Dummy and drag it onto the Destroy on Death Networked Template property.
Test the Game
Test the game to make sure the level 1 dummy can be killed, and a level 2 dummy is spawned that can also be killed.
Advanced Dummy
In this section you will be creating a more advanced dummy that will require the player to destroy individual parts of the dummy first before it can be killed. You will be setting up nested damageable objects for the individual parts, and also writing some Lua code to communicate between the server and the client to show the amount of damage the player is doing to each part.
The damageable object for the advanced dummy has the Start Invulnerable property enabled (checked). This will be controlled from a Lua script that will keep track of how many parts of the dummy have been destroyed. Once all the parts have been destroyed, the main body (barrel) will become vulnerable.
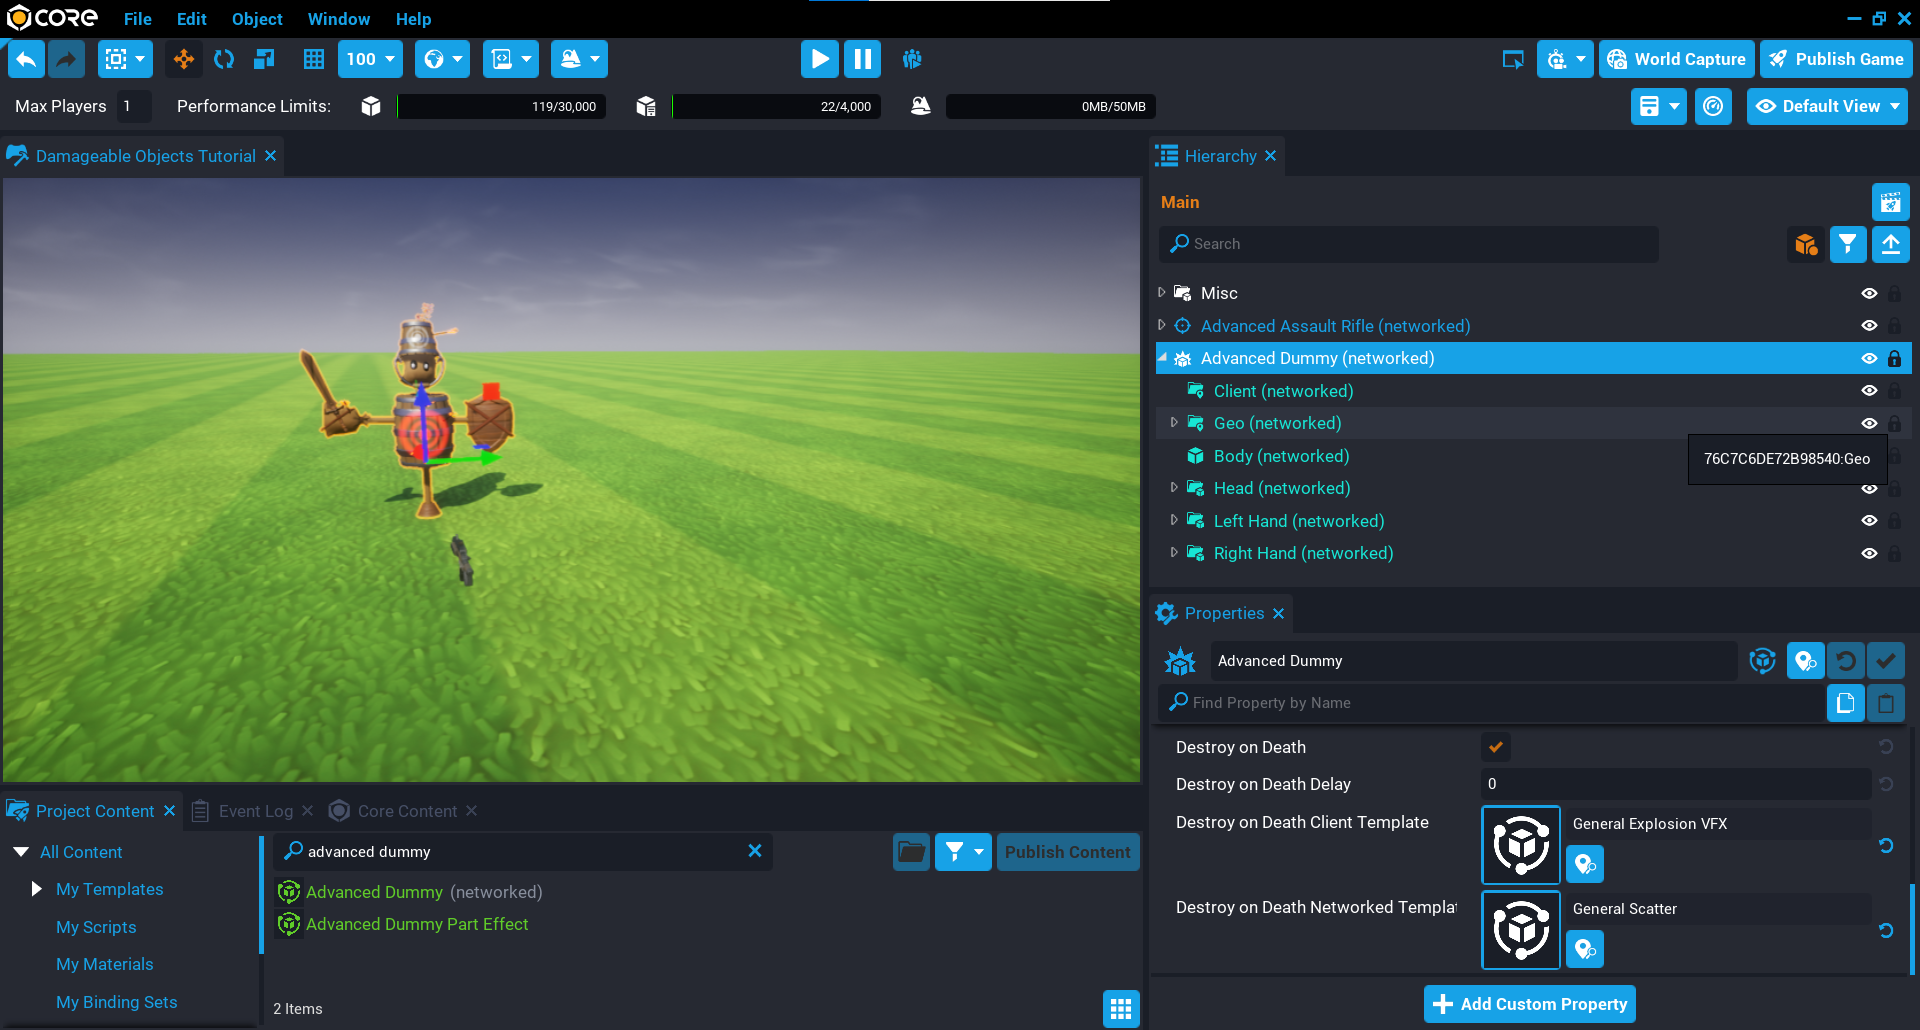
Add Advanced Dummy Template
The Advanced Dummy Template in Project Content has been setup for you already. The properties for the client and networked templates have been set.
- In Project Content search for
Advanced Dummyand add it to the Hierarchy. - Deinstance the Advanced Dummy template, and open up the folder to see the objects.
Create Nested Damageable Objects
There are 3 areas of the dummy that need to have their own damageable object. For each object listed below, create a Damageable Object inside the Advanced Dummy and drag the part as a child of the damageable object. Make sure to copy the Position property of the group and set that for the damageable object, otherwise when applying damage later on the damage numbers will not show in the correct position.
Head Damageable Object
- Copy the Position of the Head group from the Properties window.
- Create a Damageable Object inside the Advanced Dummy and rename it to
Head. - Paste the Position that was copied earlier on to the Head damageable object.
- Drag the Head group onto the Head damageable object.
Left Hand Damageable Object
- Copy the Position of the Left Hand group from the Properties window.
- Create a Damageable Object inside the Advanced Dummy and rename it to
Left Hand. - Paste the Position that was copied earlier on to the Left Hand damageable object.
- Drag the Left Hand group onto the Left Hand damageable object.
Right Hand Damageable Object
- Copy the Position of the Right Hand group from the Properties window.
- Create a Damageable Object inside the Advanced Dummy and rename it to
Right Hand. - Paste the Position that was copied earlier on to the Right Hand damageable object.
- Drag the Right Hand group onto the Right Hand damageable object.
Create MakeVulnerableServer Script
A script will be created that will keep track of how many parts have been destroyed. Once all the parts of the dummy have been destroyed, the dummy will then become vulnerable and can be killed.
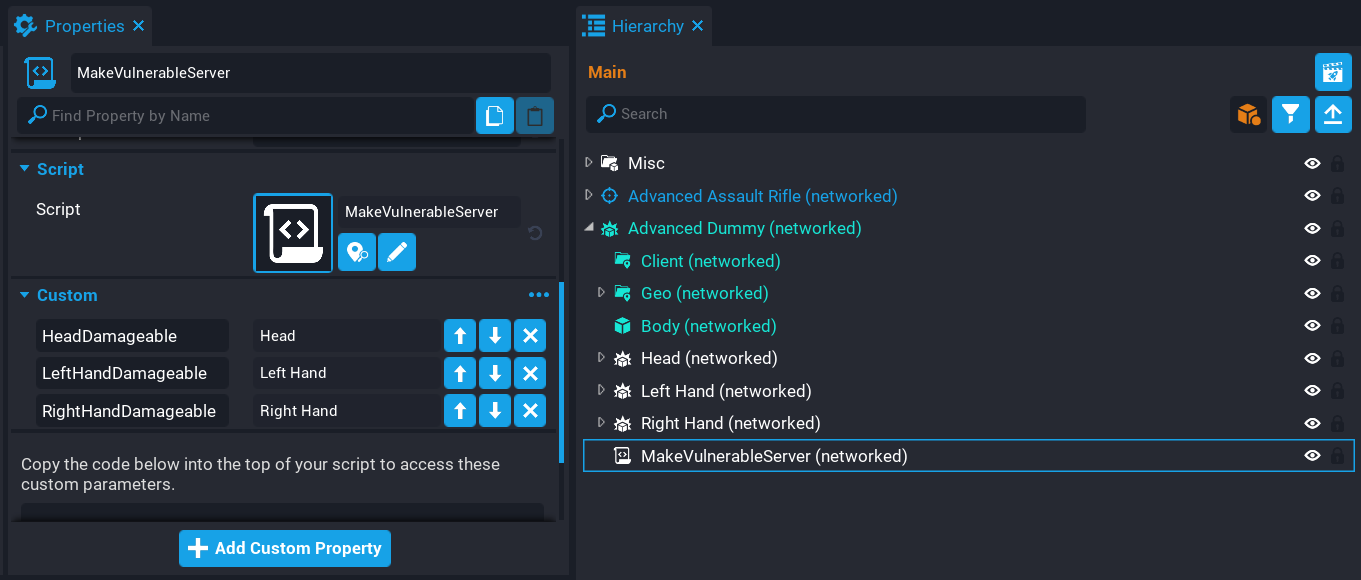
Create a script called MakeVulnerableServer and place it as a child of the Advanced Dummy object in the Hierarchy. This script is in the Default Context.
Add Custom Properties
The MakeVulnerableServer script needs to know about the different damageable object parts. These can be added as a custom property to the script.
- Add the Head damageable object to the MakeVulnerableServer script as a custom property and rename it to
HeadDamageable. - Add the Left Hand damageable object to the MakeVulnerableServer script as a custom property and rename it to
LeftHandDamageable. - Add the Right Hand damageable object to the MakeVulnerableServer script as a custom property and rename it to
RightHandDamageable.
Add Variables
Open up the MakeVulnerableServer script and add the following variables.
The ROOT variable will be a reference to the damageable object that contains everything.
The parts table contains all of the nested damageable objects that will be looped over to set up the events. This is so that you can keep track of how many parts have been destroyed.
The partsDestroyed variable will be incremented for each part destroyed.
local ROOT = script.parent

local parts = {

    script:GetCustomProperty("HeadDamageable"):WaitForObject(),
    script:GetCustomProperty("RightHandDamageable"):WaitForObject(),
    script:GetCustomProperty("LeftHandDamageable"):WaitForObject()

}

local partsDestroyed = 0
Create Damageable Object Loop
You will need to loop over all the damageable objects in the parts table and connect a destroyEvent and damagedEvent. The destroyEvent will fire when the damageable object part is destroyed. This will also increment the partsDestroyed counter by 1. If the total amount of parts destroyed is equal to the total child damageable objects, then the isVulnerable property on the parent damageable object is set to false, meaning it can now be damaged and killed.
The damagedEvent is also connected for each part, this will broadcast to the player who applied damaged so they can see how much damage they are doing to the part. The broadcast event needs to be unique for the whole dummy in case there are multiple dummies in the word. In this case you can concatenate the ROOT.id with the show_damage_ string. This can then be connected on the client as the ROOT.id value will be the same. This prevents other dummies in the game also receiving the event.
for i, part in ipairs(parts) do
    part.destroyEvent:Connect(function()
        partsDestroyed = partsDestroyed + 1

        if partsDestroyed == #parts then
            ROOT.isInvulnerable = false
        end
    end)

    part.damagedEvent:Connect(function(obj, damage)
        Events.BroadcastToPlayer(damage.sourcePlayer, "show_damage_" .. ROOT.id, damage.amount, obj:GetWorldPosition()) -- (1)
    end)
end
- Send the damage amount done and the damageable object position so the damage numbers show in the correct place.
Connect damagedEvent
The damageable object for the dummy also needs the damagedEvent connected so that the damage numbers will show up to the player.
ROOT.damagedEvent:Connect(function(obj, damage)
    Events.BroadcastToPlayer(damage.sourcePlayer,"show_damage_" .. ROOT.id, damage.amount, ROOT:GetWorldPosition())
end)
The MakeVulnerableServer Script
MakeVulnerableServer
local ROOT = script.parent

local parts = {

    script:GetCustomProperty("HeadDamageable"):WaitForObject(),
    script:GetCustomProperty("RightHandDamageable"):WaitForObject(),
    script:GetCustomProperty("LeftHandDamageable"):WaitForObject()

}

local partsDestroyed = 0

for i, part in ipairs(parts) do
    part.destroyEvent:Connect(function()
        partsDestroyed = partsDestroyed + 1

        if partsDestroyed == #parts then
            ROOT.isInvulnerable = false
        end
    end)

    part.damagedEvent:Connect(function(obj, damage)
        Events.BroadcastToPlayer(damage.sourcePlayer, "show_damage_" .. ROOT.id, damage.amount, obj.id)
    end)
end

ROOT.damagedEvent:Connect(function(obj, damage)
    Events.BroadcastToPlayer(damage.sourcePlayer,"show_damage_" .. ROOT.id, damage.amount, root.id)
end)
Create ShowDamageClient Script
Create a script called ShowDamageClient and place it in to the Client folder inside the Advanced Dummy in the Hierarchy. This script will be responsible for showing the damage numbers to the player when the parts receive damage.
Add Variable
Open up the ShowDamageClient script and add the following variable that is a reference to the dummy damageable object.
local ROOT = script.parent.parent
Create ShowDamage Function
Create a function called ShowDamage that will receive the damageAmount and position of the damageable object that has took damage. This function will use the UI.ShowFlyUpText and setting the optional parameters for isBig to true and color to Color.YELLOW.
local function ShowDamage(damageAmount, position)
    UI.ShowFlyUpText(tostring(damageAmount), position, {

        isBig = true,
        color = Color.YELLOW

    })
end
Connect Event
Connect up the broadcast event that is sent from the server. The event name is unique for this dummy because it is using the ROOT.id in the event name. This prevents the event being fired for other dummies in the game.
Events.Connect("show_damage_" .. ROOT.id, ShowDamage)
The ShowDamageClient Script
ShowDamageClient
local ROOT = script.parent.parent

local function ShowDamage(damageAmount, position)
    UI.ShowFlyUpText(tostring(damageAmount), position, {

        isBig = true,
        color = Color.YELLOW

    })
end

Events.Connect("show_damage_" .. ROOT.id, ShowDamage)
Test the Game
Test the game to make sure the following work:
- Applying damage to the body of the dummy does no damage.
- Applying damage to the parts show the damage numbers.
- Each part can be destroyed.
- The dummy can be killed and plays fireworks.
Summary
Damageable objects are a lot of fun to experiment with. You can get polished results without needing to to write any Lua code because of the custom properties that are provided to you. Being able to add layers onto the damageable objects opens up many ideas, and with a little Lua knowledge, those ideas can be endless.
Learn More
Damageable Objects Reference | Damageable Object API | Boss Fight Tutorial | UI API | Events API | Debris Physics Reference