Make an Obby in Core
Overview
In this tutorial, you are going to make an Obby, which is a platform and obstacle game. The game will have moving, rotating, and shrinking platforms as well as deadly spinning blades. The game will also have a rewards chest that can animate open and close. The reward inside is a flying pet that follows the player.
- Completion Time: ~2 hours
- Knowledge Level: It's recommended to have completed the Scripting Beginner and Scripting Intermediate tutorials.
- Skills you will learn:
- Using CoreObject API to move, rotate, and scale objects.
- When to use Client, Networked, Static, and Server contexts.
- Triggers.
- Spawning a template.
- Client to server communication.
Creating a Project and Starting Platform
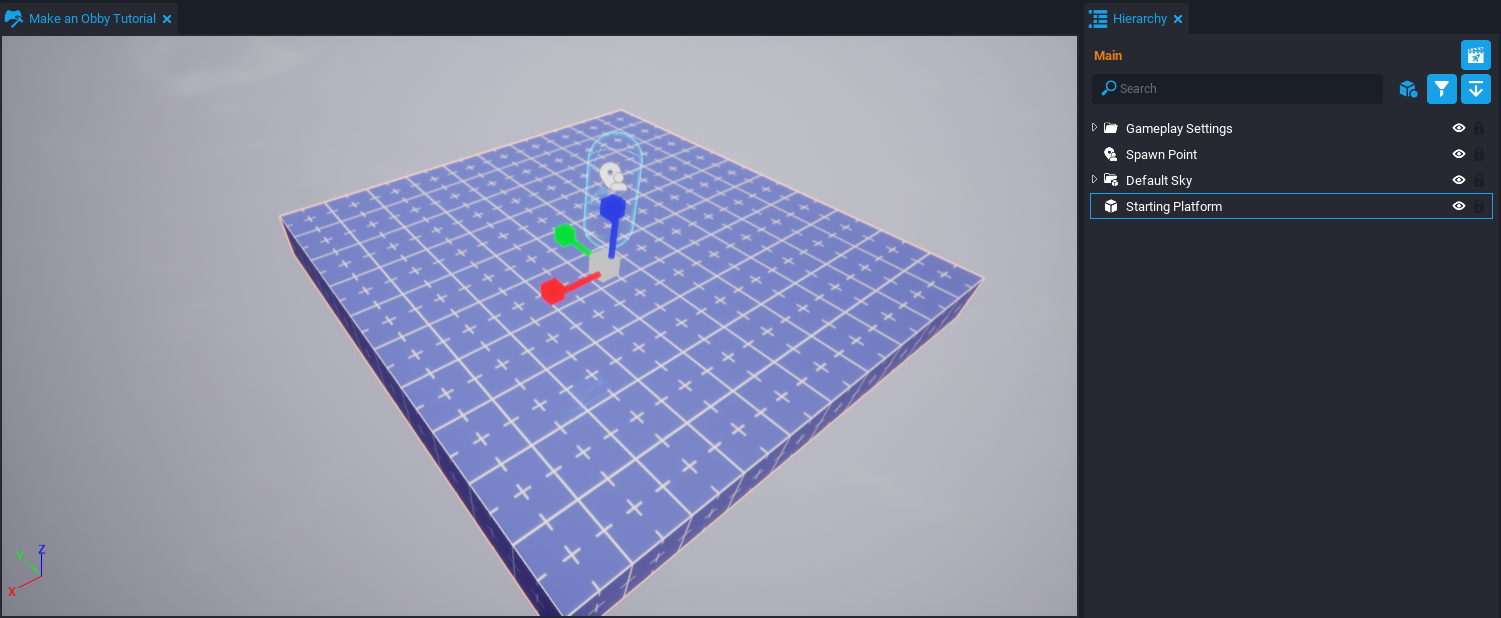
Create a new empty project. In the Hierarchy window, select the Default Floor and rename it to Starting Platform using the F2 button. Then in the scene, switch to Scale Mode using the R button and scale it to a smaller size.
Creating a Moving Platform
The Moving Platforms will move back and forth between two positions. They pause for some time when they reach a position before heading back to the other position.
Create a New Platform
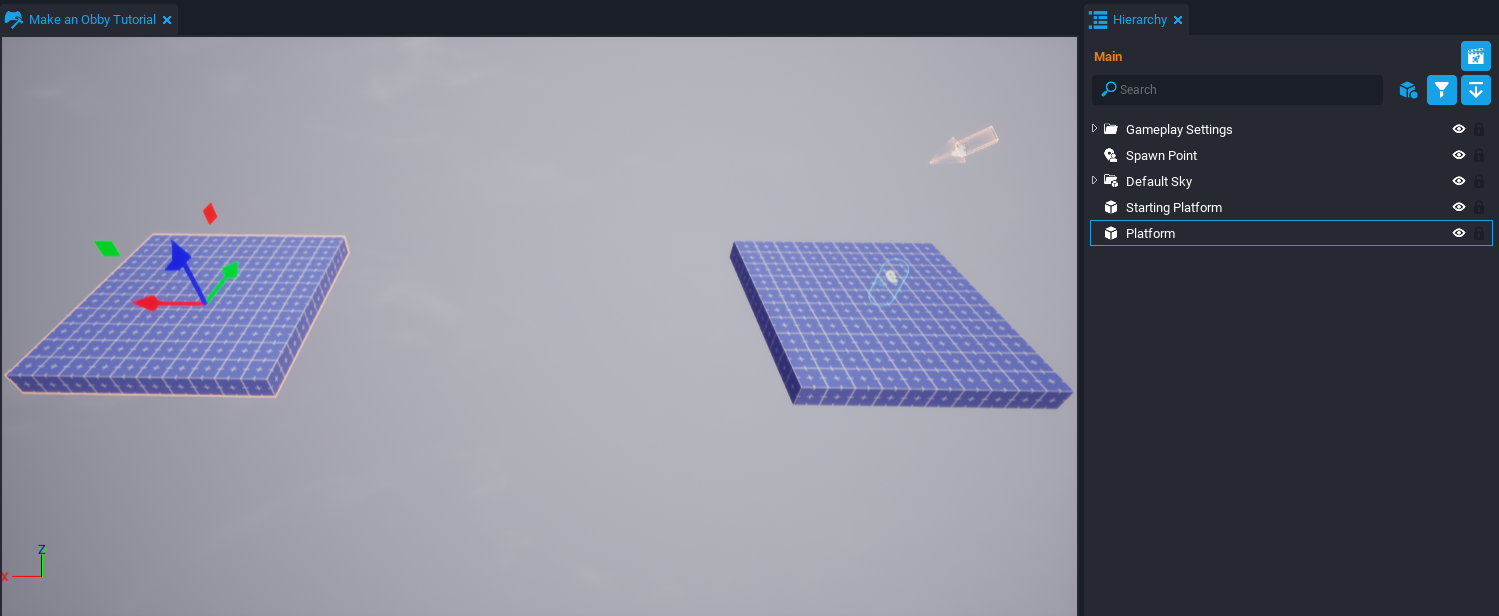
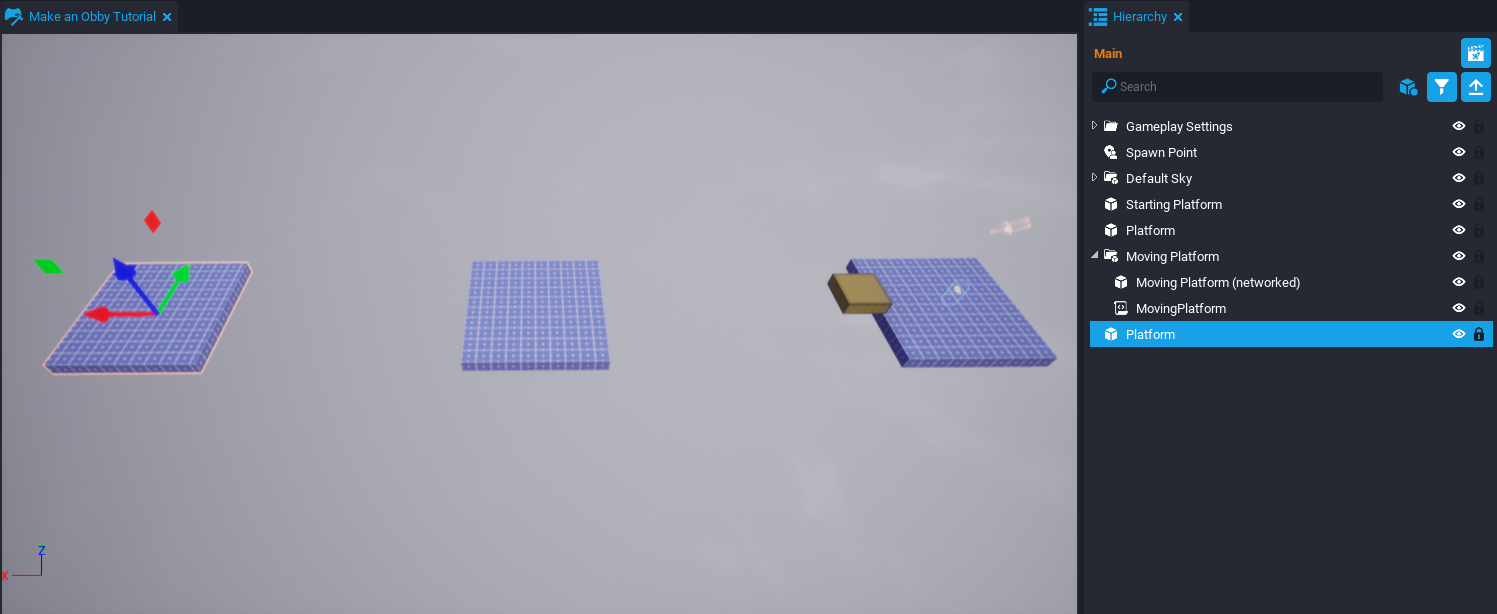
Select the Starting Platform in the Hierarchy and duplicate it using the Ctrl+W shortcut. Rename the duplicated platform to Platform. In the scene, enter Translation Mode using the W button and move it away from the Starting Platform.
This new platform is the next destination the player wants to reach from the Starting Platform.
Create a Moving Platform
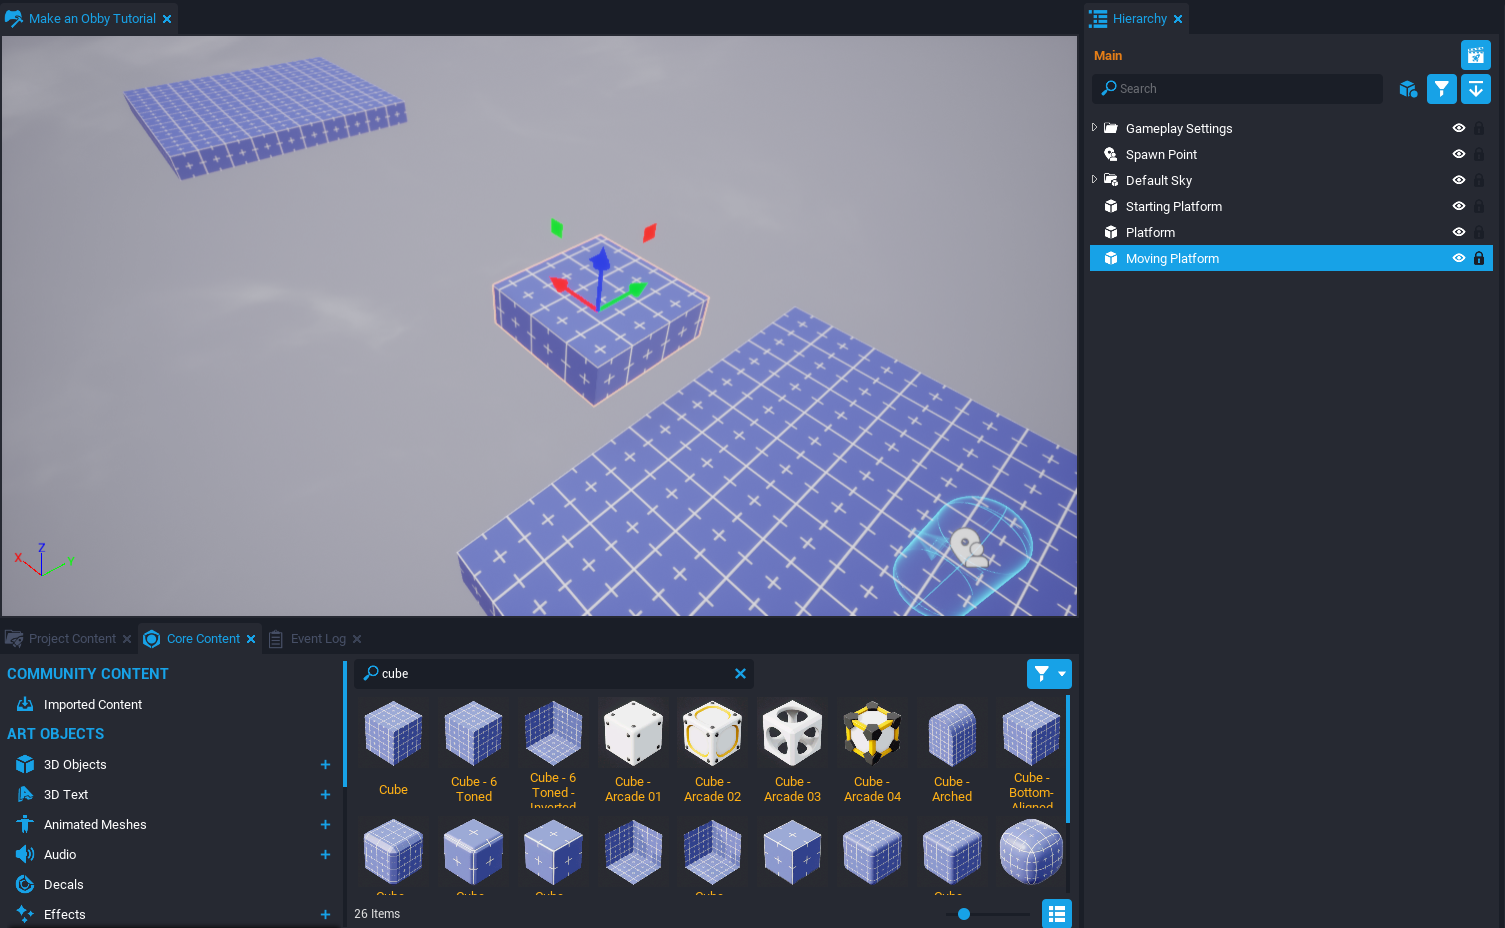
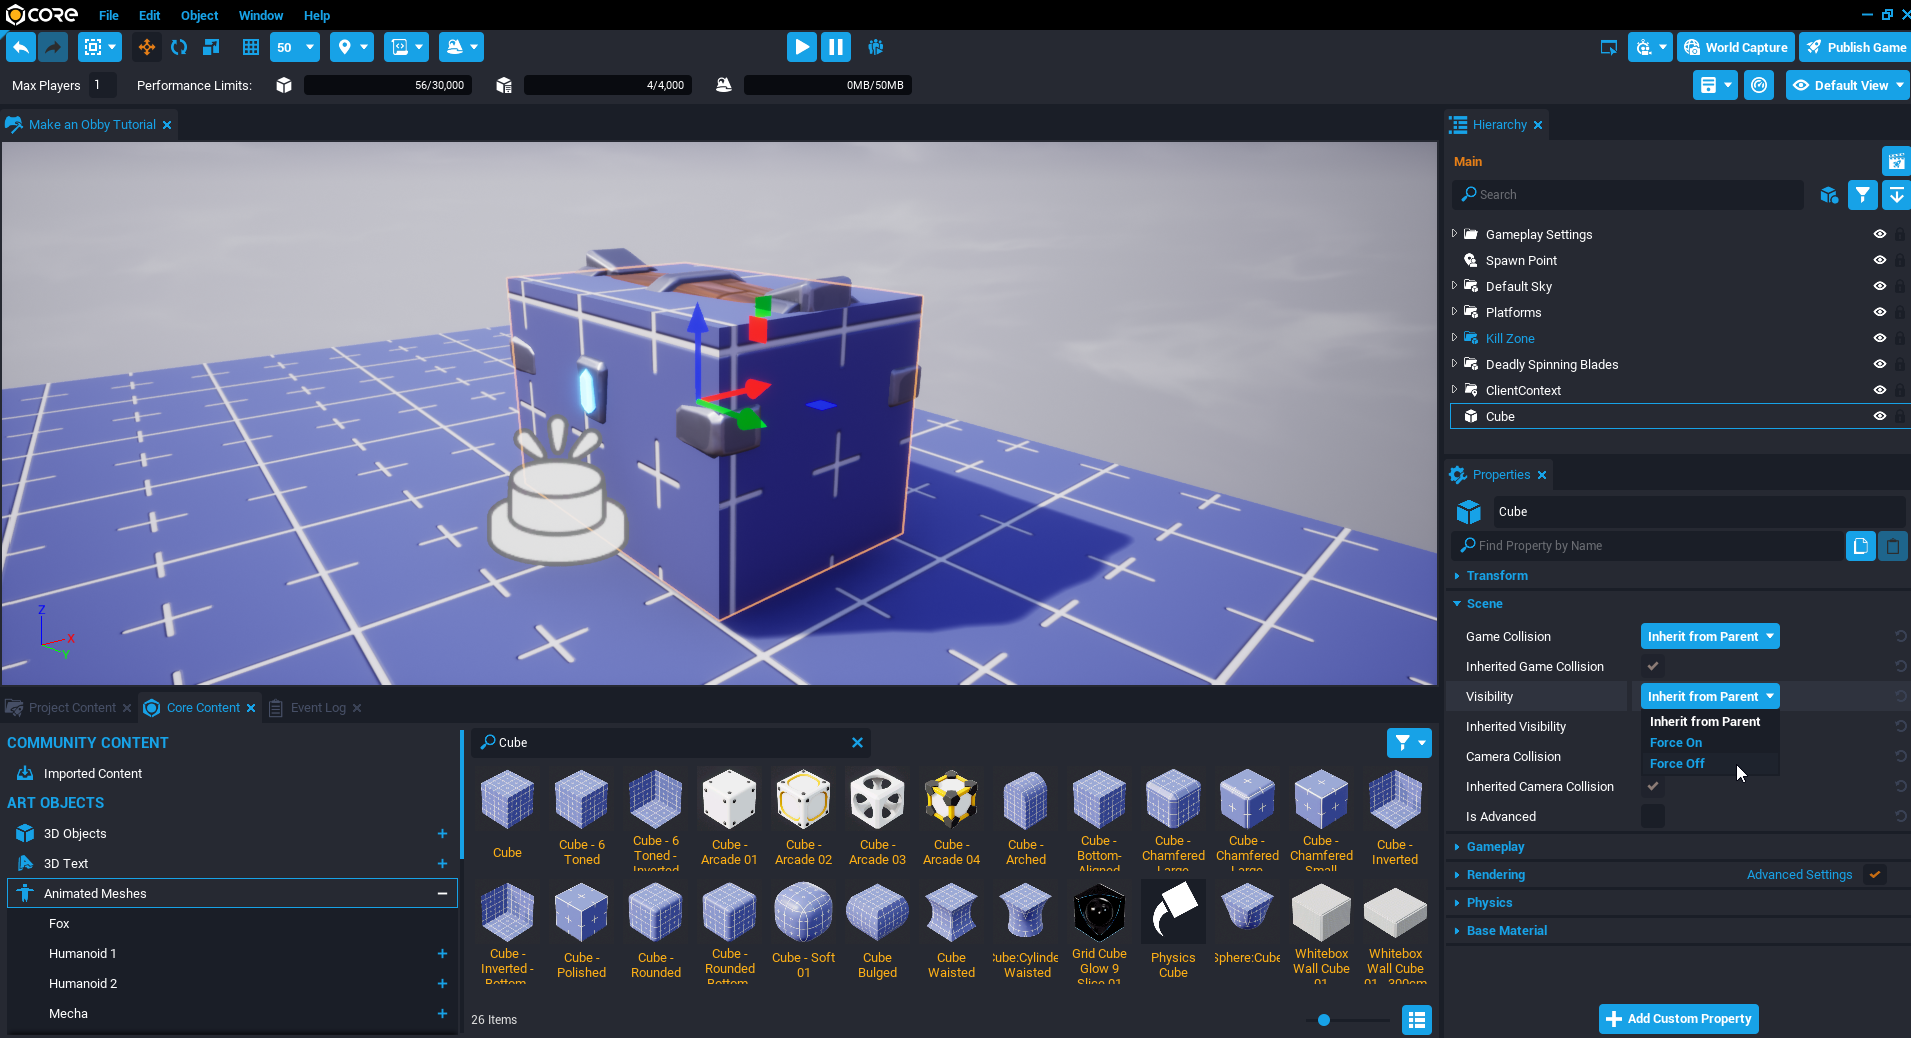
Open the Core Content window and search for cube to find a Cube object and place it into the scene. In the Hierarchy, rename the cube to Moving Platform. In the scene, position, and resize the cube to be in the desired starting state.
Network the Moving Platform
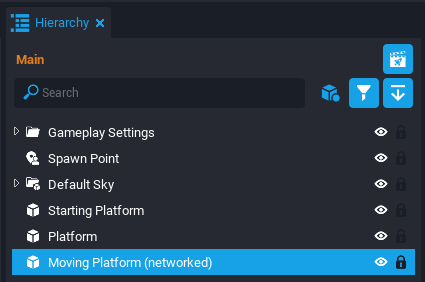
Currently, the Moving Platform is in a Default Context. This context is useful for objects such as the Starting Platform because players need to collide with the object and the object will never change its position, rotation, or size. The Moving Platform will be changing its position so it needs to be a Networked Object in the Default Context. In the Hierarchy, right click the Moving Platform and select the Enable Networking.
Networked Objects
Networked Objects are the most expensive type of object because the server has to send all the information about an object to each player. Consider looking at other solutions such as [Local Contexts](../references/networking.md] and Dormancy.
Create the MovingPlatform_Server Script
When naming scripts, it is a good habit to append the context the script is in (Client, Server, Static). Scripts in Default Context are equivalent to scripts in Server Context.
Add a New Script
Create a new script by pressing the Script button ![]() above the scene. Name it
above the scene. Name it MovingPlatform_Server. In the Project Content window, find the MovingPlatform_Server script in the My Scripts folder and drag it into the Hierarchy.

Add Custom Properties
In the Hierarchy, select the MovingPlatform_Server script and then open the Properties window. The script will need some custom properties to know how to move the platform.
- From the Hierarchy, drag and drop the Moving Platform (networked) object into the Custom Property section.
- Add a new Vector3 custom property and name it
TargetPosition. - Add a new Float custom property and name it
TravelTime. - Add a new Float custom property and name it
WaitTime.
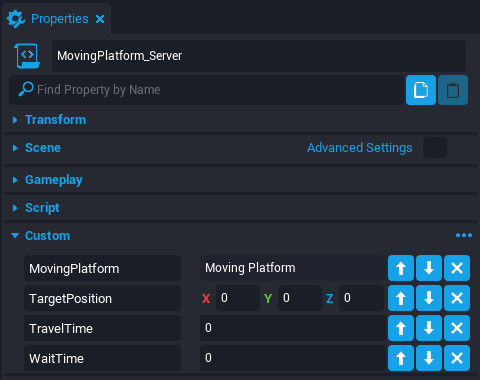
Set the Custom Properties
Set the TravelTime property to 2. Set the WaitTime property to 1. The TargetPosition property can be copied easily using the Moving Platform (networked) object.
- In the scene, move the Moving Platform (networked) object to the desired target position.
- In the Properties window, right click the Position property and select Copy [Position].
- In the Hierarchy, select the MovingPlatform_Server script and open the Properties window.
- Right click the TargetPosition custom property and select Paste Last Copied.
- Move the Moving Platform (networked) object back to its starting position.
Add Code to the Script
In the Hierarchy, right click the MovingPlatform_Server script and select Edit Script to open the Script Editor window.
Access Custom Properties
local MOVING_PLATFORM = script:GetCustomProperty("MovingPlatform"):WaitForObject()
local TARGET_POSITION = script:GetCustomProperty("TargetPosition")
local TRAVEL_TIME = script:GetCustomProperty("TravelTime")
local WAIT_TIME = script:GetCustomProperty("WaitTime")
There needs to be variables that have a reference to the custom properties inside the script.
This code is automatically generated at the bottom of the Properties window for creators to easily copy and paste into their scripts.
Access Starting Position
local STARTING_POSITION = MOVING_PLATFORM:GetWorldPosition()
The Moving Platform is a CoreObject so it contains a function GetWorldPosition to access the current position of the object.
The Tick Function
function Tick()
    Task.Wait(WAIT_TIME)
    MOVING_PLATFORM:MoveTo(TARGET_POSITION, TRAVEL_TIME, false)
    Task.Wait(TRAVEL_TIME + WAIT_TIME)
    MOVING_PLATFORM:MoveTo(STARTING_POSITION, TRAVEL_TIME, false)
    Task.Wait(TRAVEL_TIME)
end
The Tick function is a special function that runs every game tick. This means the platform will forever move between the two locations. The MoveTo function requires three arguments to be passed in: The target position, the travel time, and whether the location is in local space.
The MovingPlatform_Server Script
local MOVING_PLATFORM = script:GetCustomProperty("MovingPlatform"):WaitForObject()
local TARGET_POSITION = script:GetCustomProperty("TargetPosition")
local TRAVEL_TIME = script:GetCustomProperty("TravelTime")
local WAIT_TIME = script:GetCustomProperty("WaitTime")

local STARTING_POSITION = MOVING_PLATFORM:GetWorldPosition()

function Tick()
    Task.Wait(WAIT_TIME)
    MOVING_PLATFORM:MoveTo(TARGET_POSITION, TRAVEL_TIME, false)
    Task.Wait(TRAVEL_TIME + WAIT_TIME)
    MOVING_PLATFORM:MoveTo(STARTING_POSITION, TRAVEL_TIME, false)
    Task.Wait(TRAVEL_TIME)
end
Test the Moving Platform
Save the script and preview the project. The platform should be moving back and forth for the player to traverse platforms.
Organize the Moving Platform
In the Hierarchy, multi-select the MovingPlatform_Server script and Moving Platform (networked) object by holding down Ctrl button while left clicking the mouse. Right click and select the New Group Containing These option. Name the group Moving Platform.

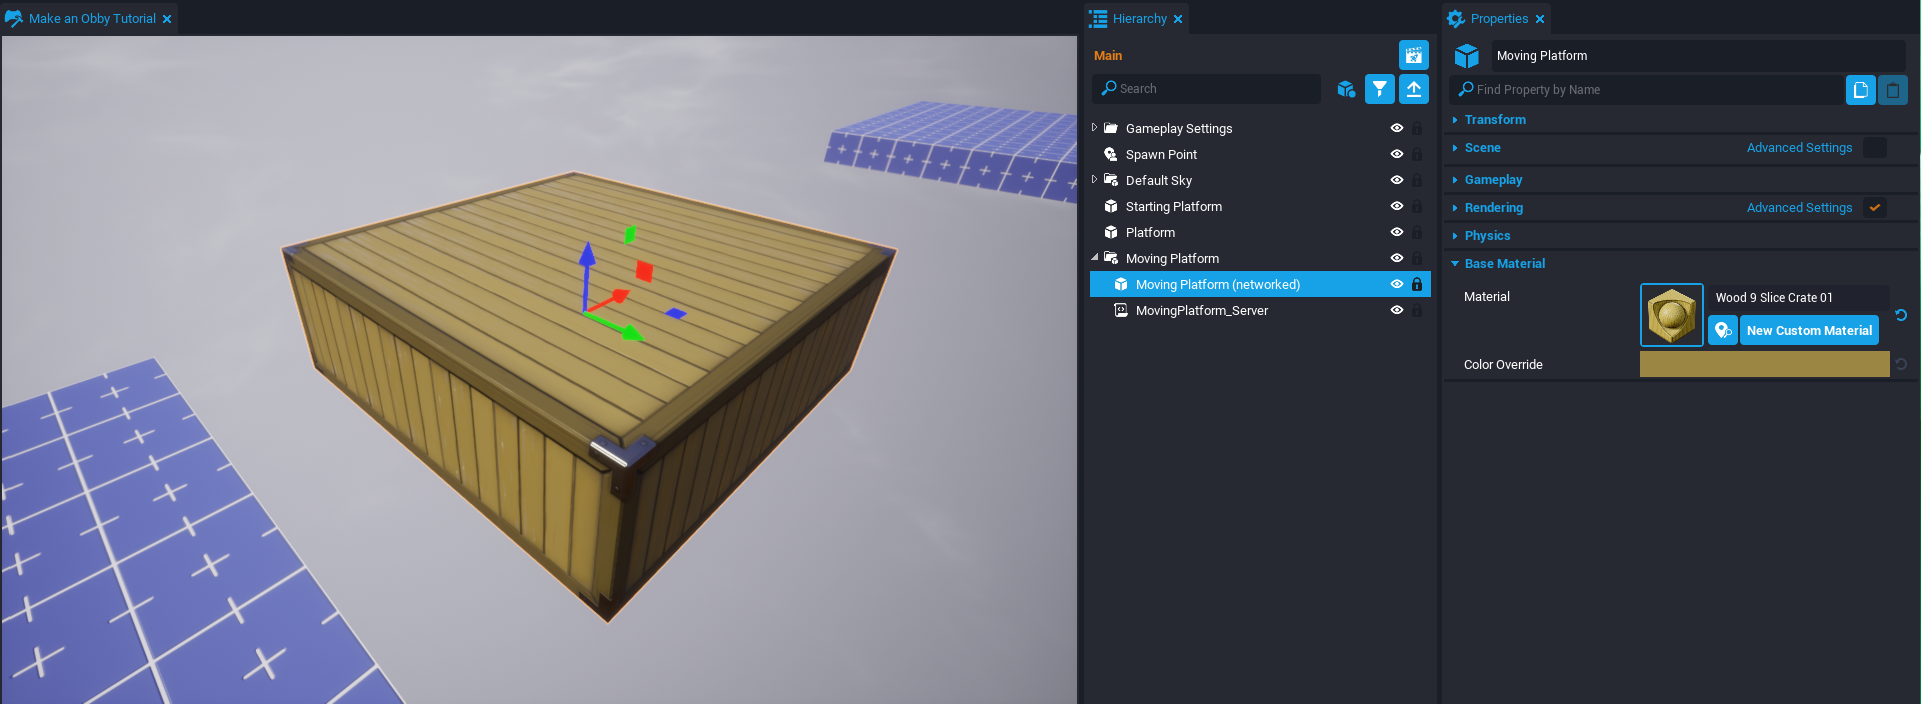
Add Material to Platform
Select the Moving Platform (networked) object and open the Properties window. Set the Material property to Wood 9 Slice Crate 01.
Creating a Rotating Platform
The Rotating Platform will spin in a certain direction continuously.
Create a New Platform
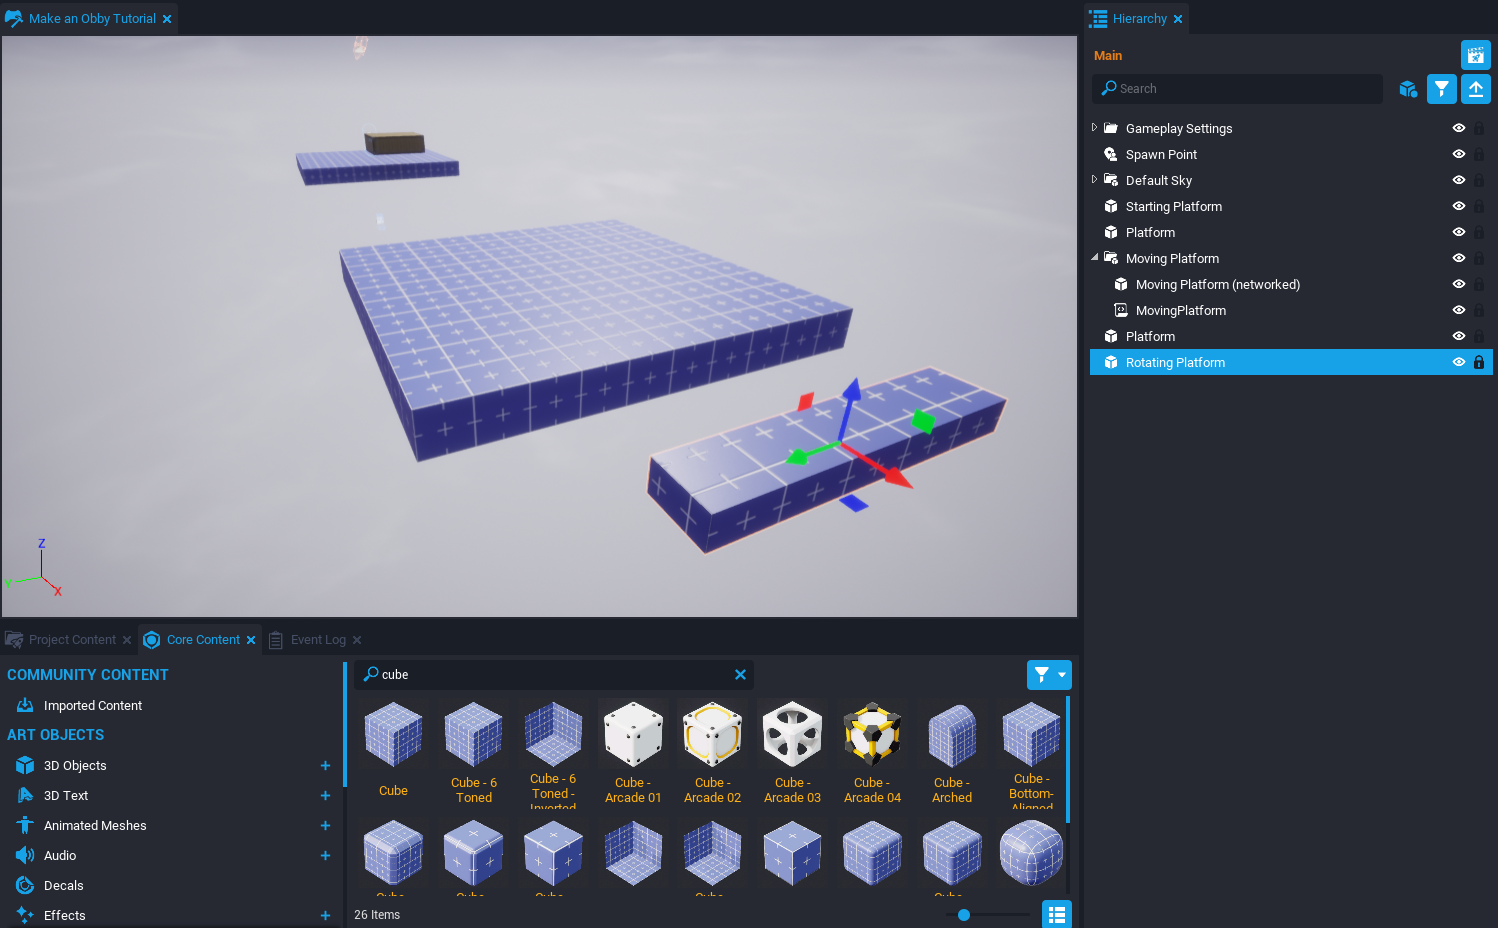
In the Hierarchy, select the Platform object and duplicate it. Extend the level by moving the duplicate platform away from the other platform.
Create a Rotating Platform
In the Core Content window, find the Cube object and add it to the scene. Rename the cube to Rotating Platform. Then scale and position the cube to a good starting state.
Network the Rotating Platform
The Rotating Platform needs collision and will also be rotating so it needs to be networked to update for all players. Right click the Rotating Platform and select Enable Networking.
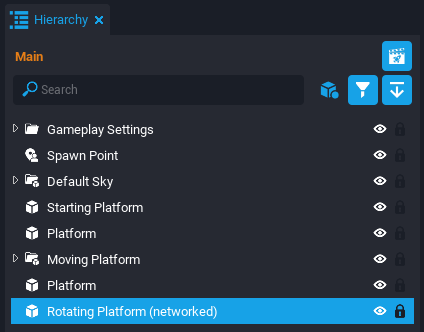
Create the RotatingPlatform_Server Script
Add a New Script
Create a new script and name it RotatingPlatform_Server. From the Project Content window, drag the RotatingPlatform_Server script into the Hierarchy.

Add Custom Properties
In the Hierarchy, select the RotatingPlatform_Server script and open the Properties window. The script will need two custom properties at the bottom.
- Add the Rotating Platform (networked) object as a custom property.
- Add a Vector3 custom property and name it
RotationSpeed.
Set the RotationSpeed Property
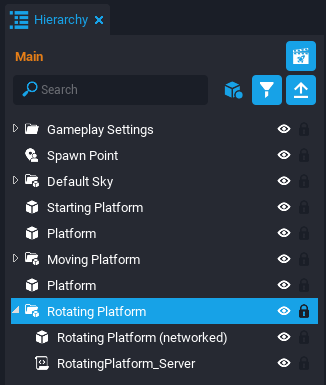
Rotation Axis
There are three axis that an object can rotate around (X, Y, and Z). When using Rotation Mode in the editor (enabled with the E button), there are three colored orbits around the object representing the axis. Dragging these colored orbits will also change the same colored Rotation values in the Properties window. This is helpful to understand which axis needs to change for a certain rotation direction.
Set the RotationSpeed property to X 0, Y 0, Z 1. This will only spin it on the Z axis at a speed of 1 degree per tick.
Add Code to the Script
Open the Script Editor for the RotatingPlatform_Server script.
Access Custom Properties
Add code to access the custom properties for the platform and speed.
local ROTATING_PLATFORM = script:GetCustomProperty("RotatingPlatform"):WaitForObject()
local ROTATION_SPEED = script:GetCustomProperty("RotationSpeed")
Rotate Continuously
CoreObject has a function named RotateContinuous that allows two arguments to be passed: a Vector3 for the angular speed and a boolean for whether it is rotating in local space. Add this code to the bottom of the script.
ROTATING_PLATFORM:RotateContinuous(ROTATION_SPEED, false)
The RotatingPlatform_Server Script
local ROTATING_PLATFORM = script:GetCustomProperty("RotatingPlatform"):WaitForObject()
local ROTATION_SPEED = script:GetCustomProperty("RotationSpeed")

ROTATING_PLATFORM:RotateContinuous(ROTATION_SPEED, false)
Test the Rotating Platform
Save the script and preview the project. The platform should be rotating and the player should rotate if on top of it.
Use the Shift+= shortcut to spawn the player in Preview Mode where the scene camera location currently is.
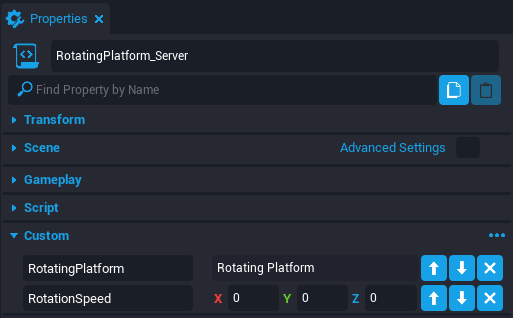
Organize the Rotating Platform
In the Hierarchy, multi-select the RotatingPlatform_Server script and Rotating Platform (networked) object by holding down Ctrl button while left clicking the mouse. Right click and select the New Group Containing These option. Name the group Rotating Platform.
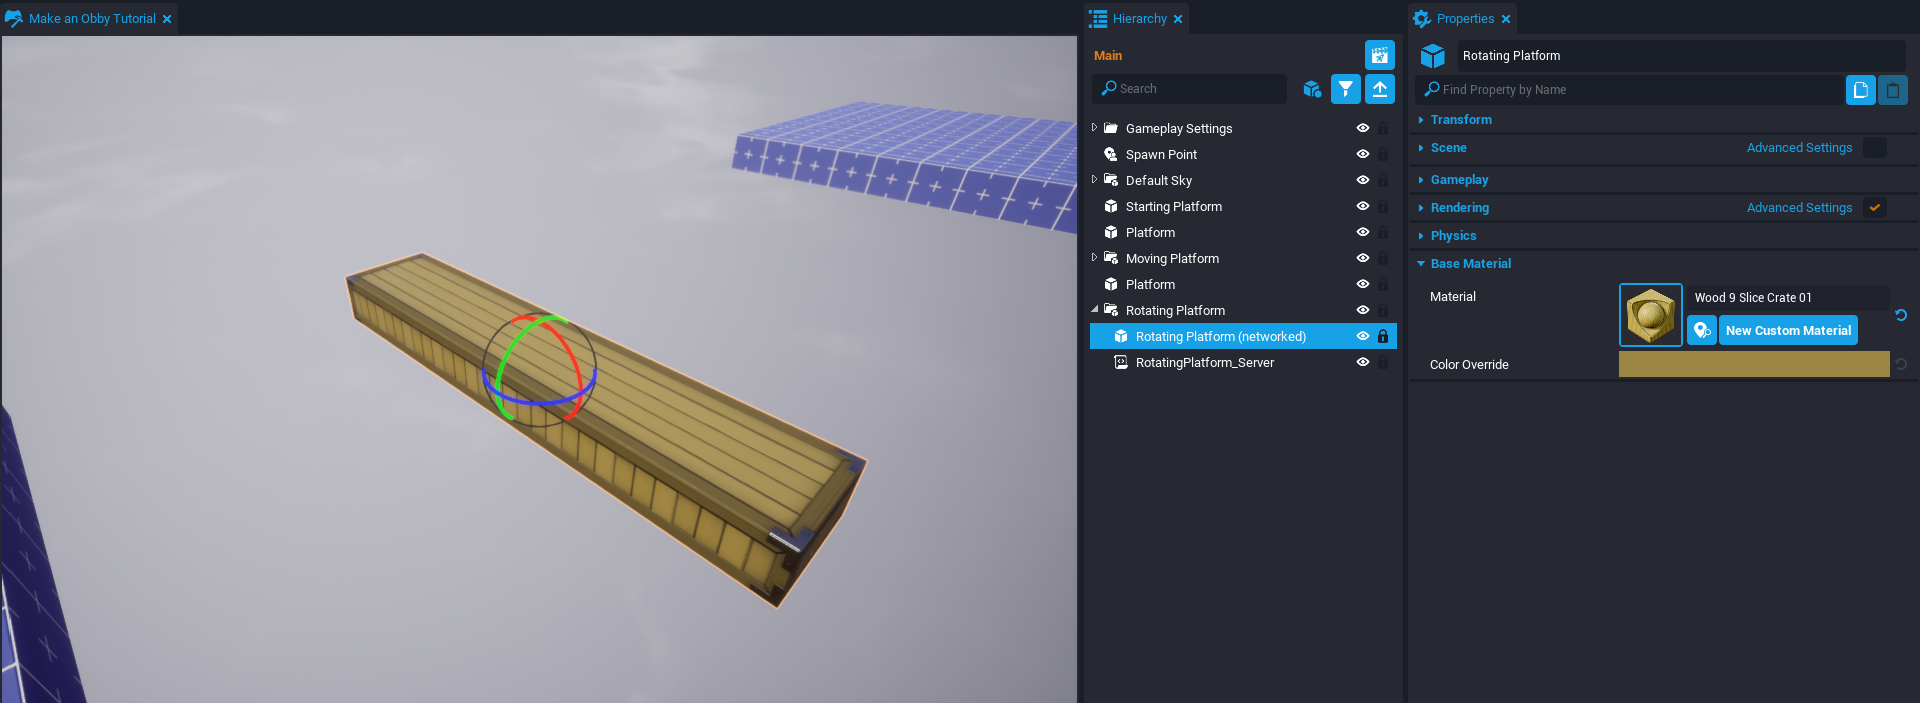
Add Material to Platform
Select the Rotating Platform (networked) object and open the Properties window. Set the Material property to Wood 9 Slice Crate 01.
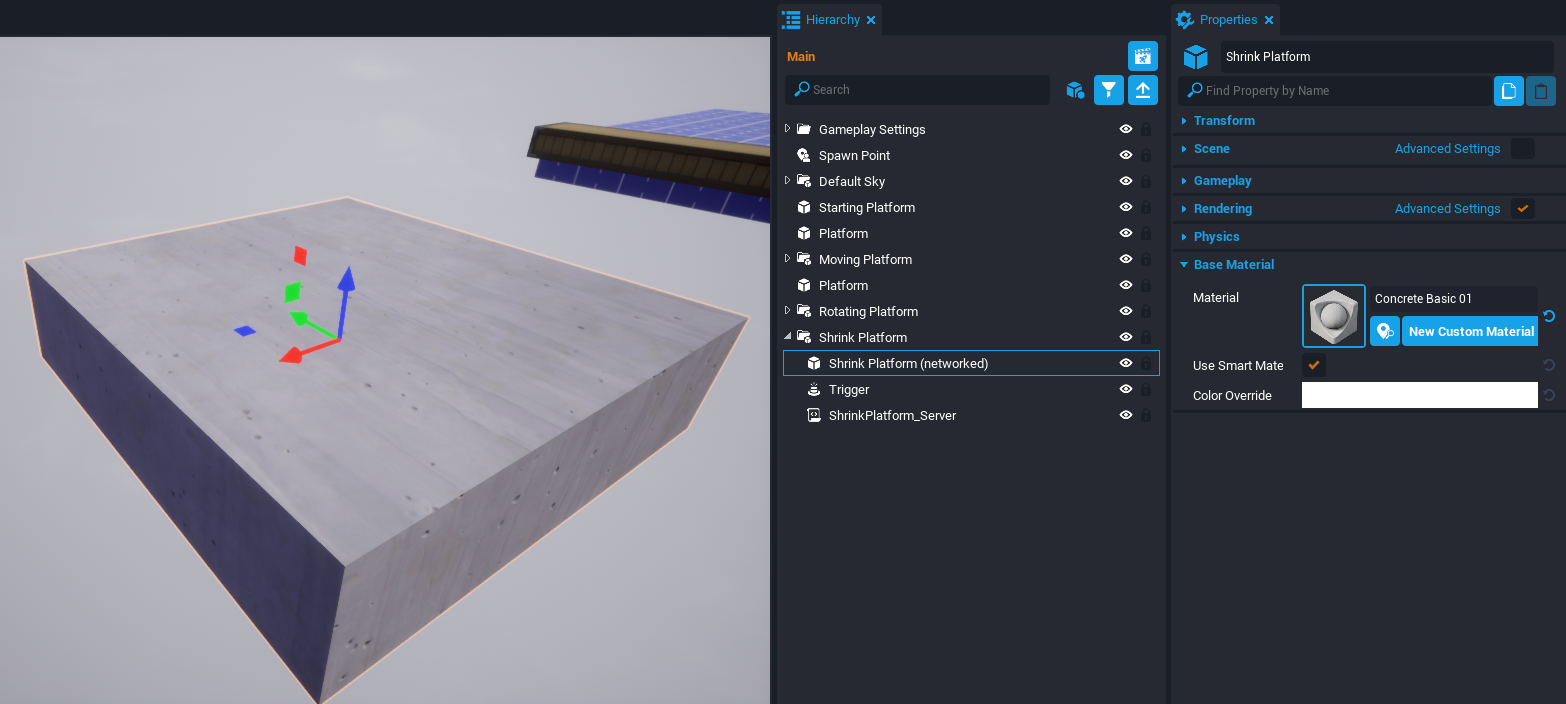
Creating a Shrink Platform
The Shrink Platform will detect if a player stepped on the platform and begin shrinking until it disappears. After some time, it will grow back to normal and wait again for a player to step on it.
Add a New Cube
In the Core Content window, find the Cube object and add it to the scene. Rename the cube to Shrink Platform. Then scale and position the cube to a good starting state.

Network the Shrink Platform
The Shrink Platform needs collision and will also be changing in size so it needs to be networked to update for all players. Right click the Shrink Platform and select Enable Networking.
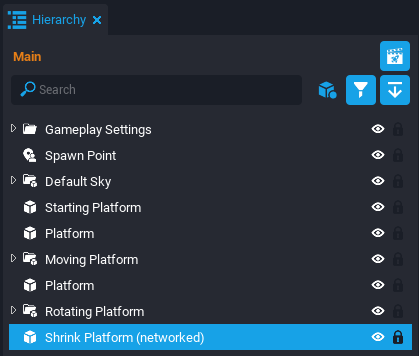
Add a Trigger
Press the 9 button to create a new Trigger. Position the trigger to be on top of the Shrink Platform.
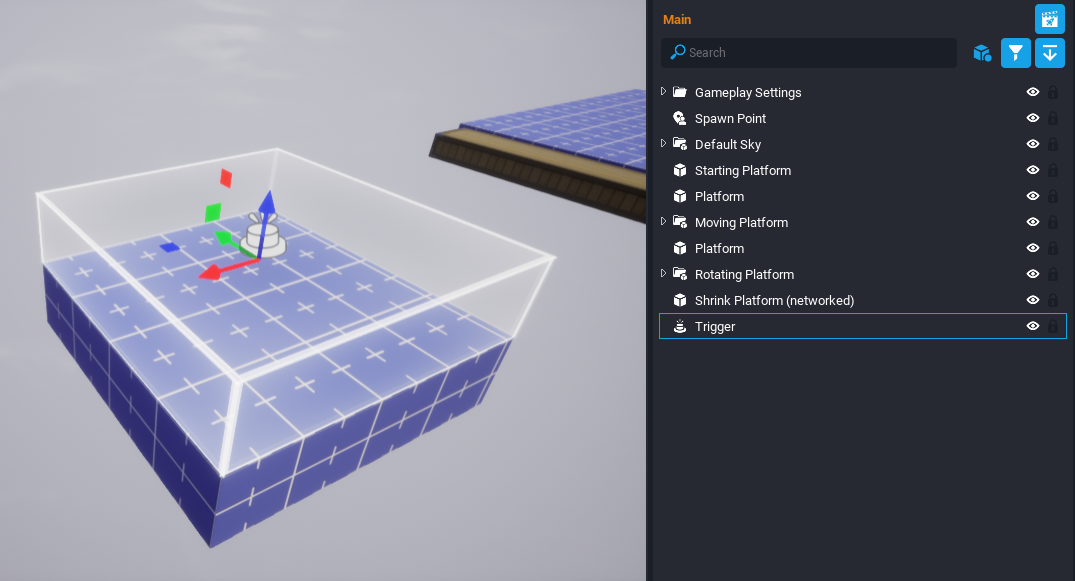
Copying Properties
A useful tip to get the Trigger in the correct position and size is to copy it from the Shrink Platform. There is a Copy Properties ![]() button at the top right of the Properties window that will copy all the properties from an object. Then there is a Paste Properties
button at the top right of the Properties window that will copy all the properties from an object. Then there is a Paste Properties ![]() button that lets the creator choose which properties to paste that were copied.
button that lets the creator choose which properties to paste that were copied.
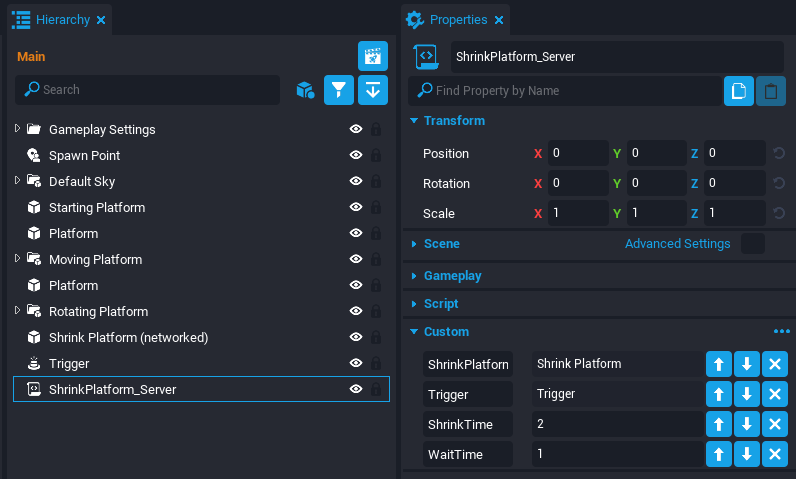
Create the ShrinkPlatform_Server Script
Create a new script named ShrinkPlatform_Server and add it to the Hierarchy.
Add Custom Properties
With the ShrinkPlatform_Server script selected, open the Properties window. Add the following custom properties.
- Drag and drop the Shrink Platform (networked) object as a custom property.
- Drag and drop the Trigger object as a custom property.
- Add a new Float custom property named
ShrinkTimeand set it to2. - Add a new Float custom property named
WaitTimeand set it to1.
Add Code to the Script
Open the Script Editor for the ShrinkPlatform_Server script.
Access Custom Properties
Add this code to the script to access the custom properties.
local SHRINK_PLATFORM = script:GetCustomProperty("ShrinkPlatform"):WaitForObject()
local TRIGGER = script:GetCustomProperty("Trigger"):WaitForObject()
local SHRINK_TIME = script:GetCustomProperty("ShrinkTime")
local WAIT_TIME = script:GetCustomProperty("WaitTime")
Add More Variables
The platform will need to remember its starting size when it starts growing back. It also needs to know if it's in the shrinking phase to avoid activating the trigger more than once.
local STARTING_SIZE = SHRINK_PLATFORM:GetWorldScale()
local shrinking = false
Shrink Function
There is a CoreObject function named ScaleTo that will scale an object to a certain size and for a certain amount of time. Using Vector3.ZERO as a target size will make the object disappear once it becomes small enough. Add this function at the bottom of the script.
local function Shrink()
    shrinking = true
    SHRINK_PLATFORM:ScaleTo(Vector3.ZERO, SHRINK_TIME, false)
    Task.Wait(SHRINK_TIME + WAIT_TIME)
    SHRINK_PLATFORM:ScaleTo(STARTING_SIZE, SHRINK_TIME, false)
    Task.Wait(SHRINK_TIME)
    shrinking = false
end
OnBeginOverlap Function
When the Trigger detects a player has overlapped with it, then it will call the Shrink function as long as it is not shrinking already. Add this function at the bottom of the script.
local function OnBeginOverlap(whichTrigger, other)
    if other:IsA("Player") and not shrinking then
        Shrink()
    end
end
Connect the Function to the Event
The OnBeginOverlap function needs to fire when the actual event of the Trigger object being overlapped occurs in game. Add this code to connect the function with the event.
TRIGGER.beginOverlapEvent:Connect(OnBeginOverlap)
The ShrinkPlatform_Server Script
local SHRINK_PLATFORM = script:GetCustomProperty("ShrinkPlatform"):WaitForObject()
local TRIGGER = script:GetCustomProperty("Trigger"):WaitForObject()
local SHRINK_TIME = script:GetCustomProperty("ShrinkTime")
local WAIT_TIME = script:GetCustomProperty("WaitTime")

local STARTING_SIZE = SHRINK_PLATFORM:GetWorldScale()
--Used to disable trigger while the platform is shrinking
local shrinking = false

local function Shrink()
    shrinking = true
    --Vector3.ZERO will make the platform disappear after its done shrinking
    SHRINK_PLATFORM:ScaleTo(Vector3.ZERO, SHRINK_TIME, false)
    Task.Wait(SHRINK_TIME + WAIT_TIME)
    SHRINK_PLATFORM:ScaleTo(STARTING_SIZE, SHRINK_TIME, false)
    Task.Wait(SHRINK_TIME)
    shrinking = false
end


local function OnBeginOverlap(whichTrigger, other)
    if other:IsA("Player") and not shrinking then
        Shrink()
    end
end

TRIGGER.beginOverlapEvent:Connect(OnBeginOverlap)
Test the Shrink Platform
Save the script and preview the project. The platform should shrink once the player lands on the platform and then reset to its normal size after some time.
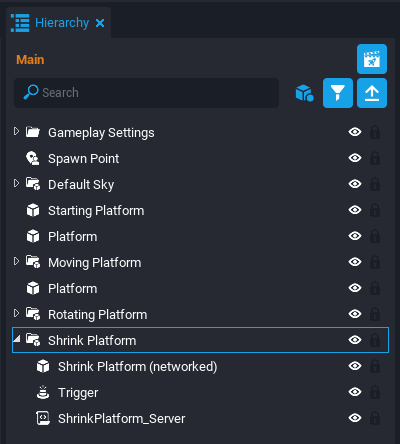
Organize the Shrink Platform
In the Hierarchy, multi-select the ShrinkPlatform_Server script, Trigger, and Shrink Platform (networked) object by holding down Ctrl button while left clicking the mouse. Right click and select the New Group Containing These option. Name the group Shrink Platform.
Add Material to Platform
Select the Shrink Platform (networked) object and open the Properties window. Set the Material property to Concrete Basic 01.
Adding a Kill Zone and Spawn Settings
Organize the Hierarchy
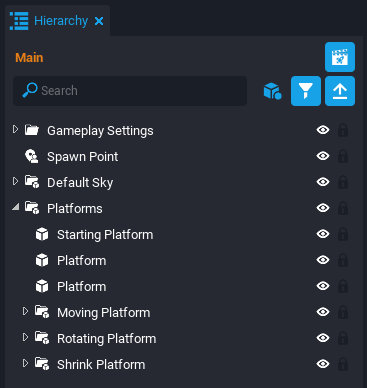
Before adding more, the Hierarchy needs to be cleaned up from all these new platforms. In the Hierarchy, multi-select (by holding Ctrl) the Starting Platform, Platform objects, Moving Platform group, Rotating Platform group, and Shrink Platform group. Right click and select New Group Containing These. Name the group Platforms.
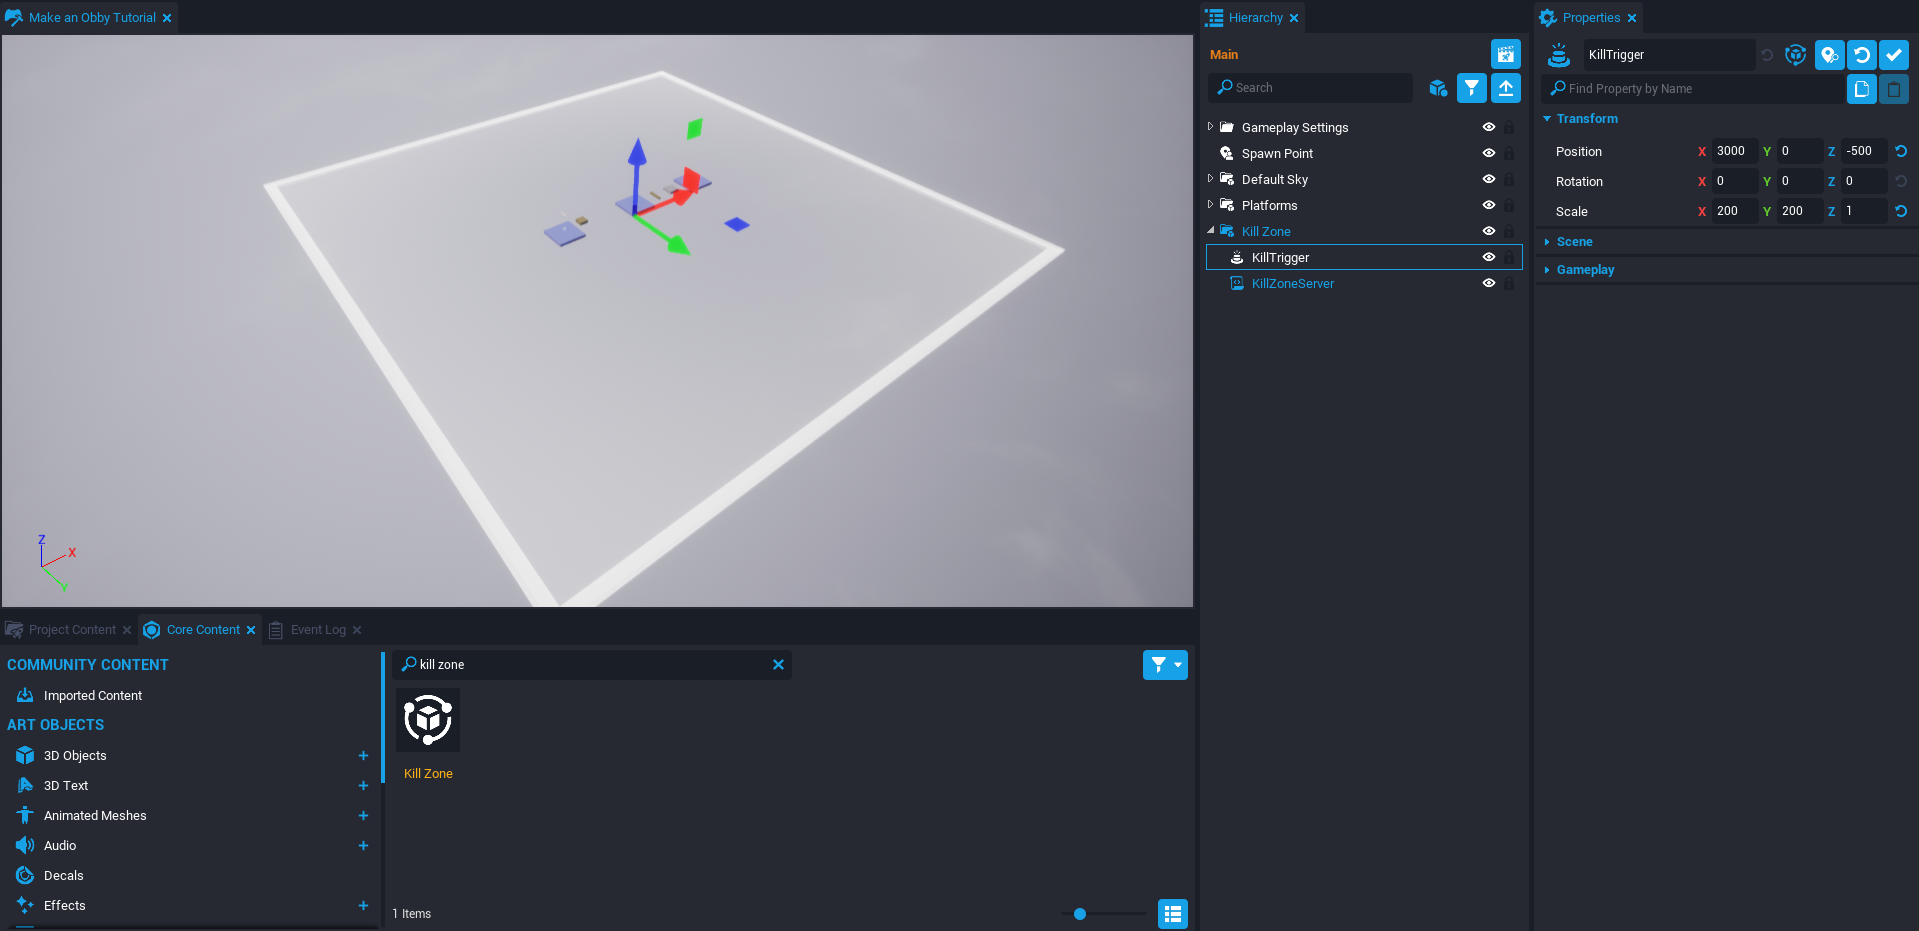
Add a Kill Zone
A Kill Zone is a trigger that will kill a player when they overlap it. This is useful for killing any player that falls below the map.
- In the Core Content window, search for
Kill Zoneand drag it into the scene. - In the Hierarchy, select the KillTrigger inside the Kill Zone group.
- Increase the size of the trigger to be much larger than the map and move it to be below all the platforms.
Test the Kill Zone
Preview the project. When the player jumps off a platform, it will die once it hits the Kill Zone.
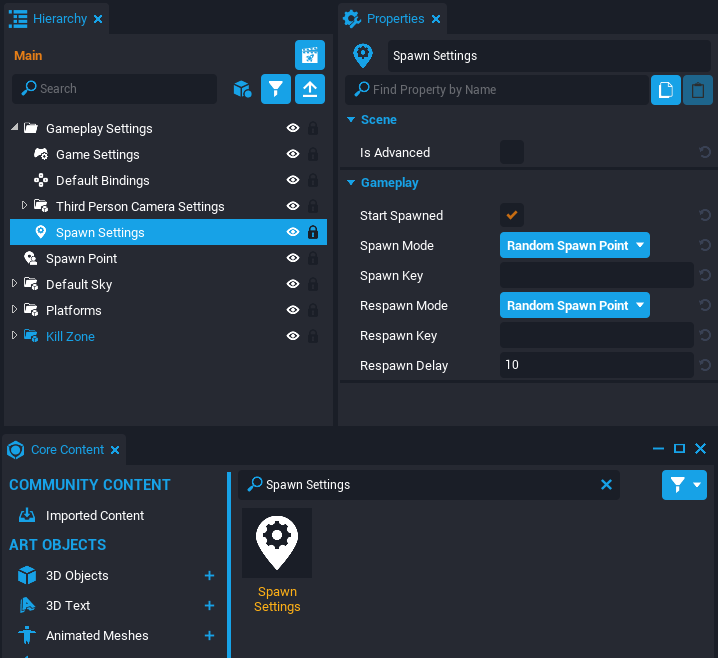
Add Spawn Settings
The player needs settings to spawn at the start once it dies. Search Core Content for Spawn Settings and drag it into the Gameplay Settings folder in the Hierarchy. For faster testing, open the Properties window for the Spawn Settings and set the Respawn Delay property to 1.
Test the Spawn Settings
Preview the project. The player should spawn at the start after 1 second of it dying.
Creating a Deadly Spinning Blade
The Deadly Spinning Blade is an obstacle that has four fast spinning blades circling around a cylinder platform. The player will instantly die if it gets in range of the blades.
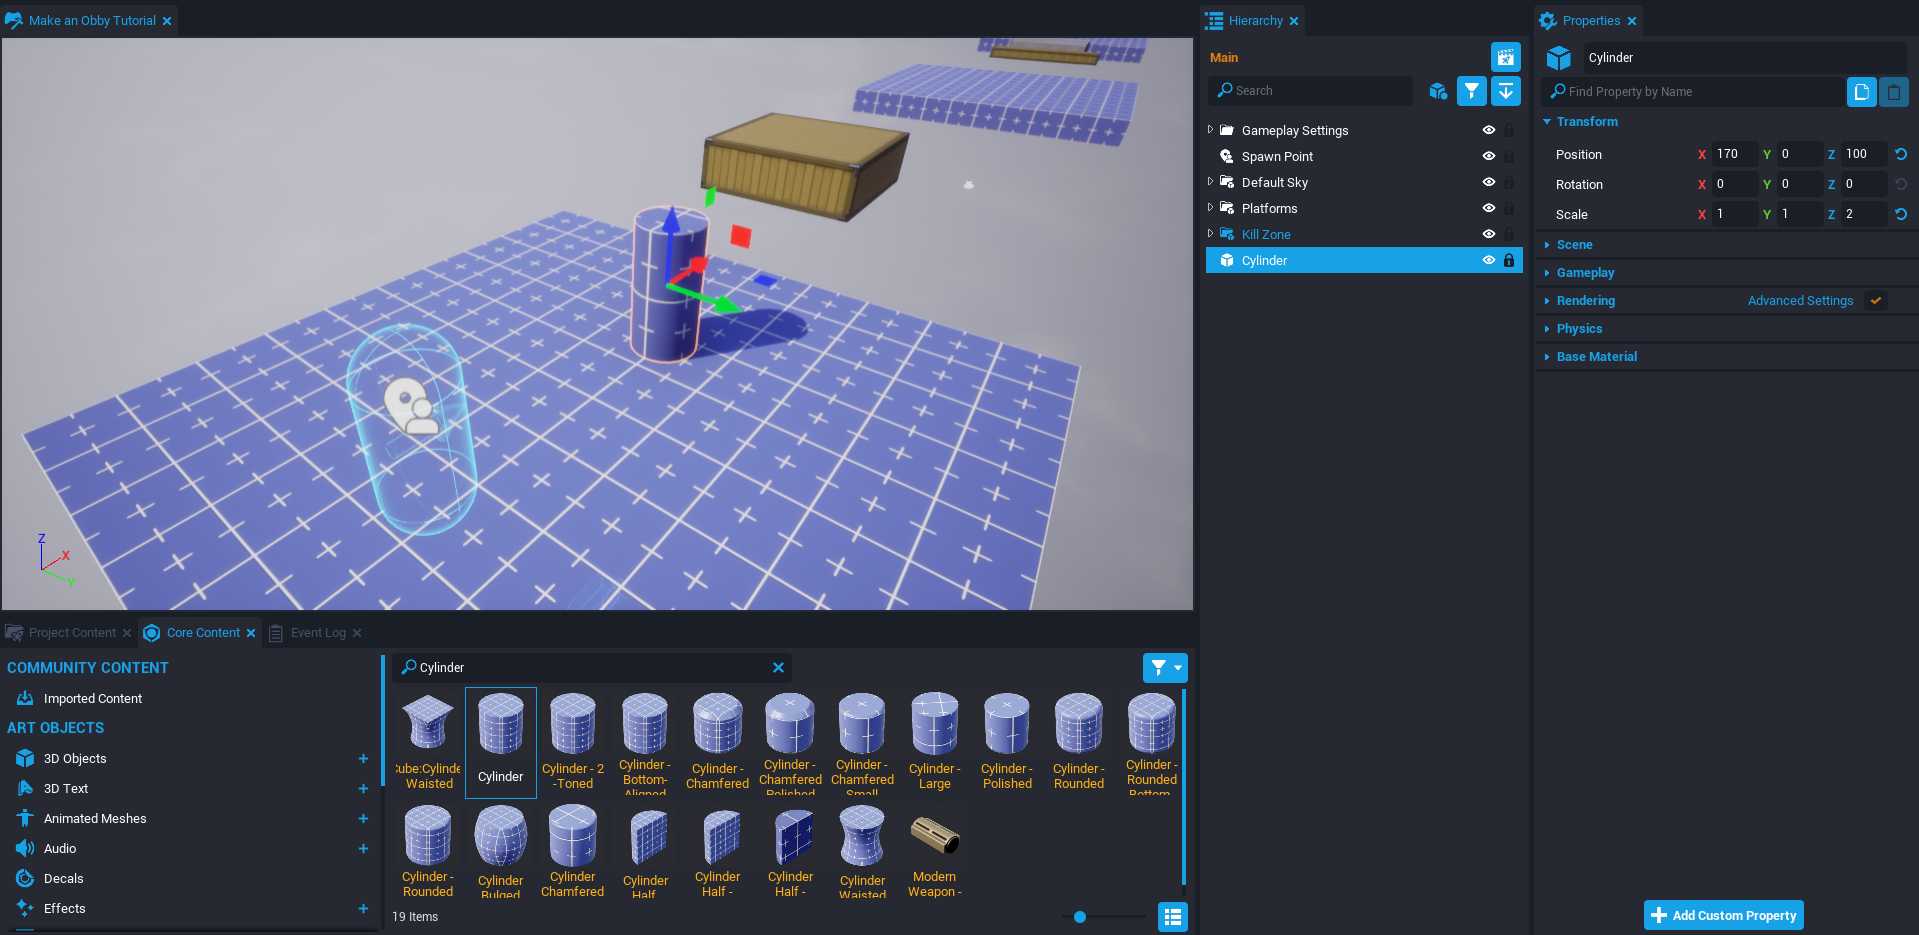
Add a Cylinder Platform
The player will be able to jump on the cylinder platform to avoid being hit by the blades. Search Core Content for the Cylinder and drop it into the scene on the Starting Platform. Resize and move the Cylinder so it is in a good jumpable position.
Add a Blade Center
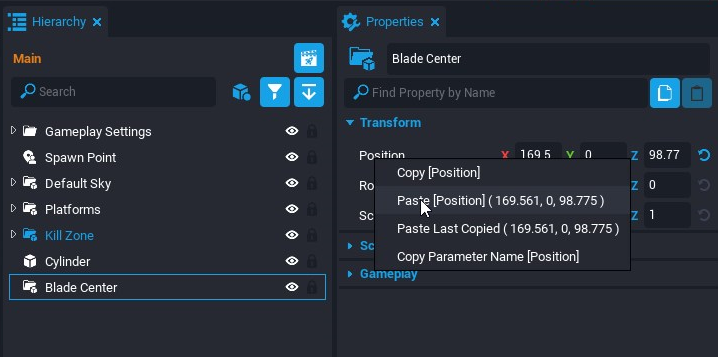
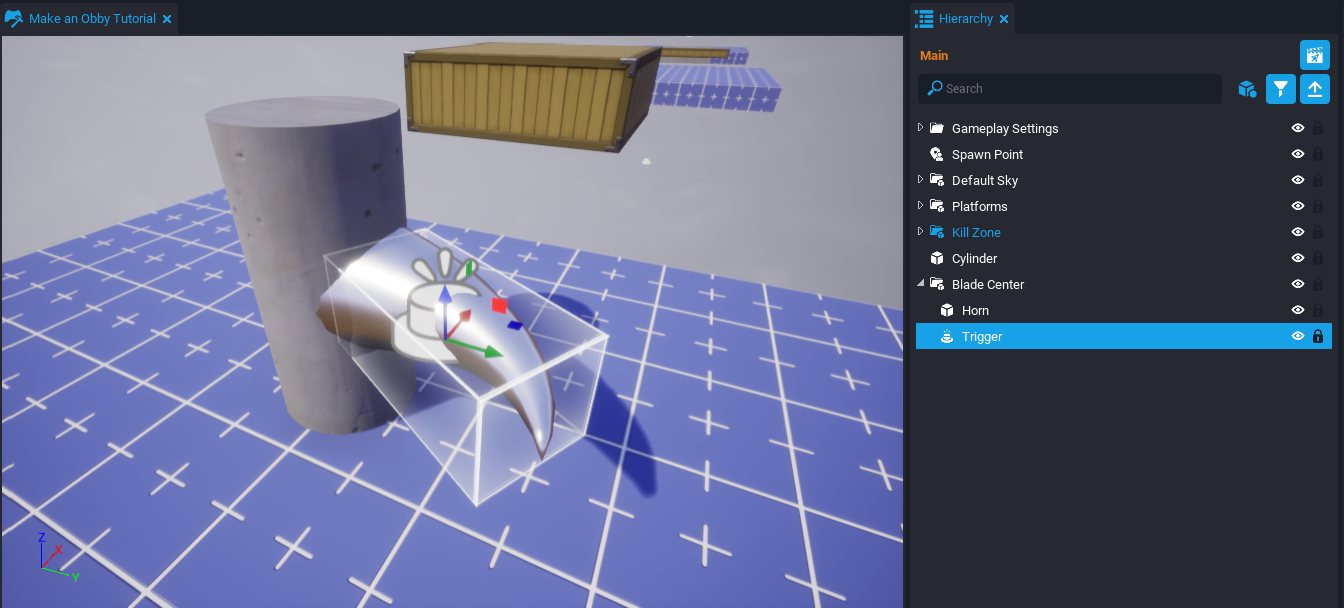
The blade will need a center point to rotate around. The cylinder is not rotating so a group object at the cylinder's position can be the blade's center point.
- Right click the Hierarchy and select Add New Group and name it
Blade Center. - Select the Cylinder and open the Properties window.
- Right click the Position property and select Copy [Position].
- Select the Blade Center group and open the Properties window.
- Right click the Position property and select Paste [Position].
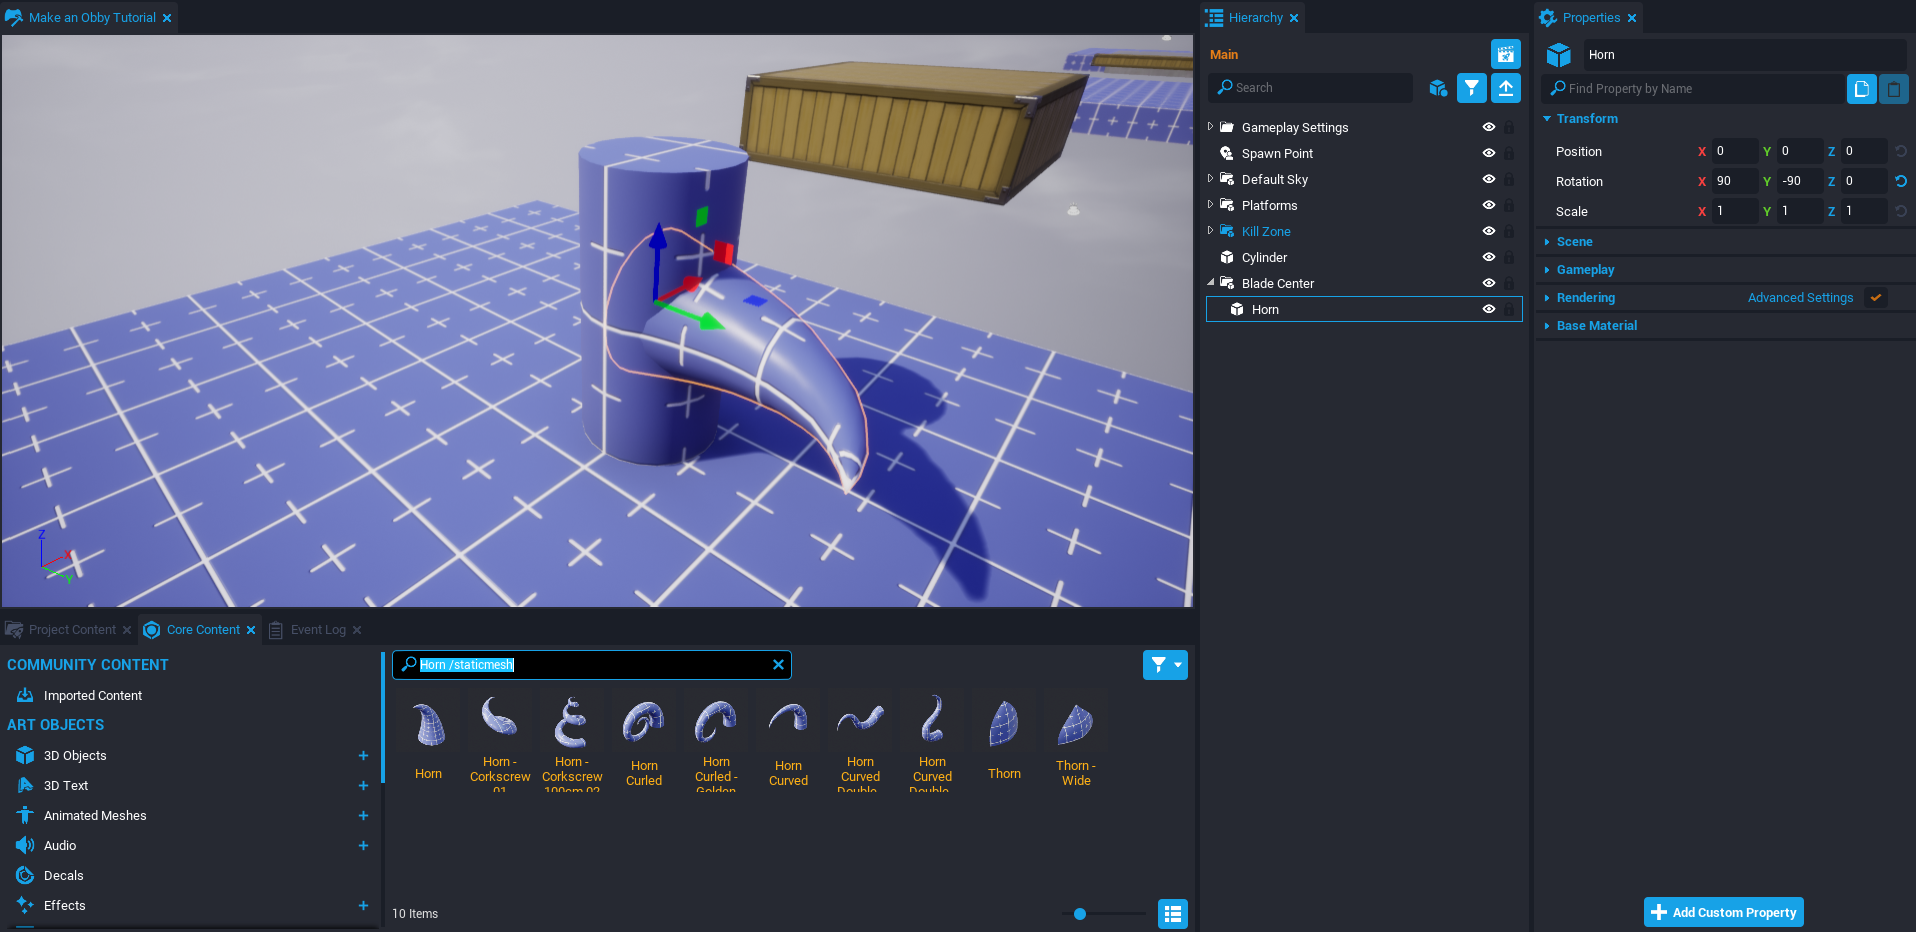
Add a Blade
In the Core Content window, search for Horn /staticmesh and drag the Horn into the Blade Center group. The bottom of the horn should be in the center of the cylinder so it only needs to be rotated sideways to be in position. Open the properties of the Horn and set the Rotation property to X 90, Y -90, Z 0.
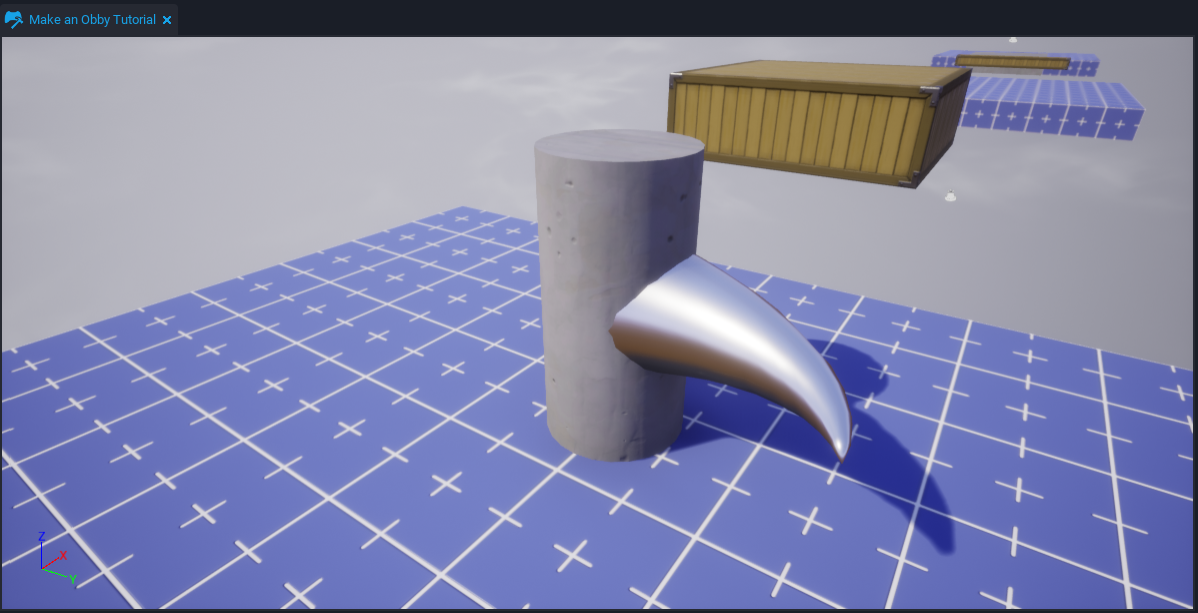
Set the Material
Before adding more blades, it would save time to choose a material for the blade now. Select the Horn and open the Properties window. Set the Material property to Metal Basic Steel. Select the Cylinder and set the Material property to Concrete Basic 01.
Add a Trigger
Add a Trigger object inside the Blade Center group by using the 9 button. Position and resize the trigger to roughly match the Horn mesh.
Add More Blades
Currently the blade can be spun by changing the Z Rotation property of the Blade Center group. This can also be used to add three more blades around the cylinder.
- Right click the Blade Center group and select Duplicate.
- Select the duplicate Blade Center group and open the Properties window.
- Increase the Rotation Z property value by
90. - Repeat this until there are four blades around the cylinder.
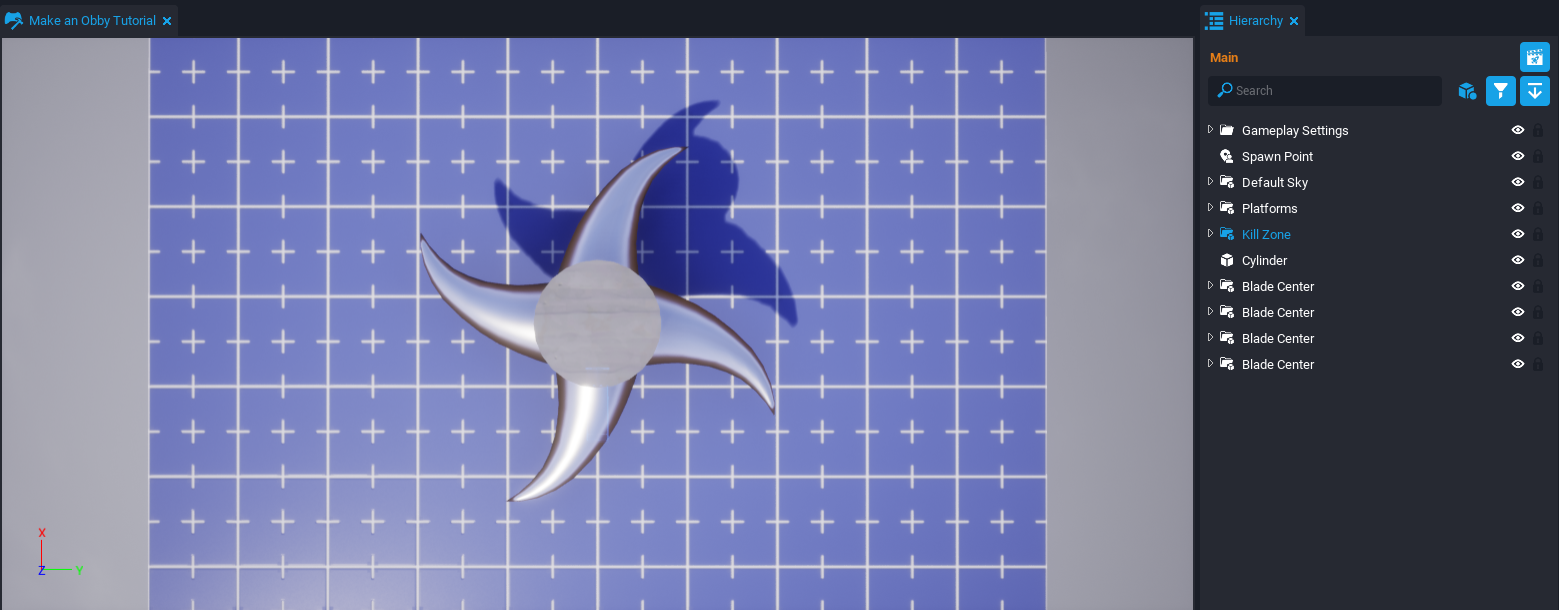
Group the Blades
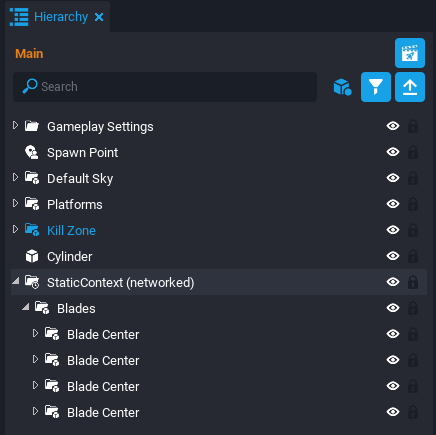
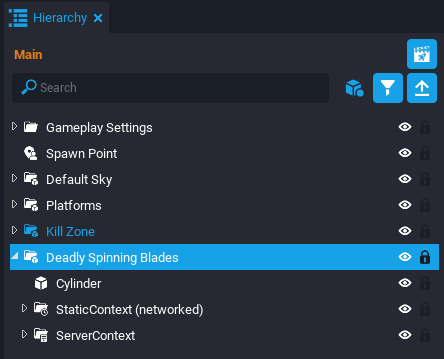
Select all the Blade Center groups in the Hierarchy. Right click and select the option New Group Containing These. Name it Blades.
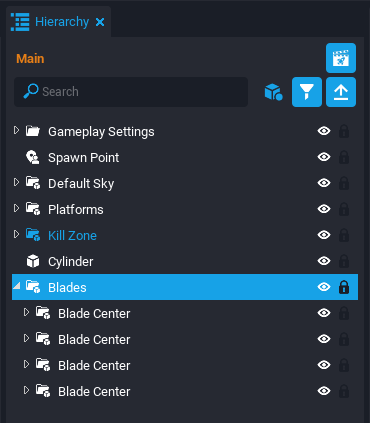
Add Static Context
Static Context is an interesting networking option because it creates a copy for the client and server. It is useful to reduce the amount of networked objects because it can group a collection of objects as one unit, such as our Deadly Spinning Blades. Right click the Blades group and select Create Network Context followed by selecting New Static Context Containing This.
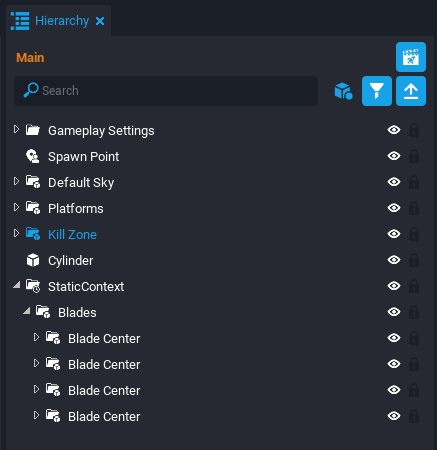
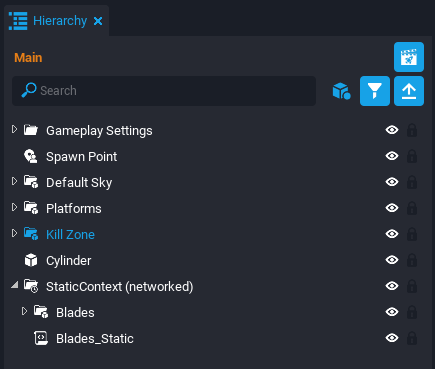
Network the Static Context
Now that the Blades are grouped into one unit, it will need to be networked so the code can make it rotate. Right click the StaticContext and select Enable Networking.
The powerful advantage of Static Context is that only one object is networked instead of all the children objects.
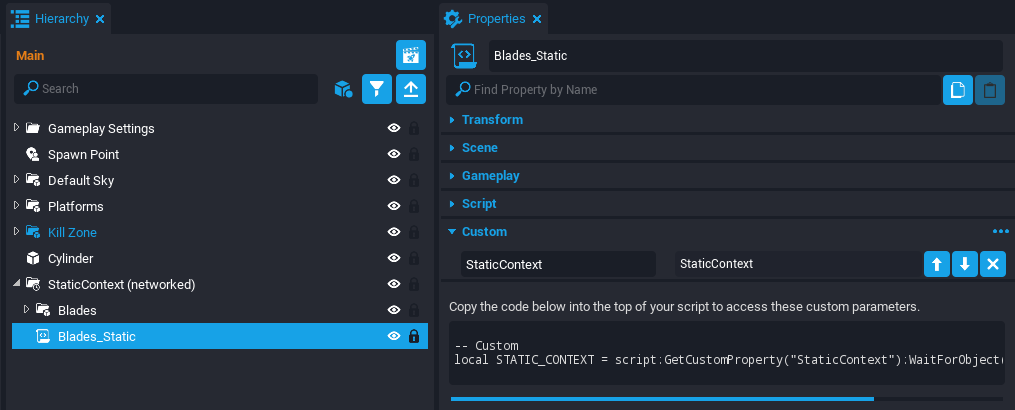
Create Blades_Static Script
Add a New Script
There needs to be a script that can fire a broadcast when a player collides with the triggers inside the Static Context. Since they are inside the Static Context, there is a Server Context trigger and Client Context trigger. A Static Context script can run code for both of these triggers.
- Create a new script and name it
Blades_Static. - Drag and drop the Blades_Static script into the StaticContext.
Add Custom Property
Select the Blades_Static script and open the Properties window. Drag and drop the StaticContext into the Custom Property section.
Add Code to the Script
Right click the Blades_Static script and select Edit Script.
Reference Custom Property
Add this code to reference the StaticContext custom property.
local STATIC_CONTEXT = script:GetCustomProperty("StaticContext"):WaitForObject()
OnBeginOverlap Function
Create the OnBeginOverlap function that will fire a broadcast when a player overlaps a trigger. The other parameter is being passed in the broadcast because another script will need to know which player to kill.
local function OnBeginOverlap(whichTrigger, other)
    if other:IsA("Player") then
        Events.Broadcast("BladeOverlap", other)
    end
end
This Broadcast will be fired in the same context of the trigger, so either Server or Client.
Connect All Triggers
CoreObject's have a useful function named FindDescendantsByType that returns a table with all the children objects of a certain type. Add a for loop that connects all children triggers' overlap event to the OnBeginOverlap function.
local triggers = STATIC_CONTEXT:FindDescendantsByType("Trigger")

for _, trigger in ipairs(triggers) do
    trigger.beginOverlapEvent:Connect(OnBeginOverlap)
end
The Blades_Static Script
local STATIC_CONTEXT = script:GetCustomProperty("StaticContext"):WaitForObject()

local function OnBeginOverlap(whichTrigger, other)
    if other:IsA("Player") then
        Events.Broadcast("BladeOverlap", other)
    end
end

local triggers = STATIC_CONTEXT:FindDescendantsByType("Trigger")

for _, trigger in ipairs(triggers) do
    trigger.beginOverlapEvent:Connect(OnBeginOverlap)
end
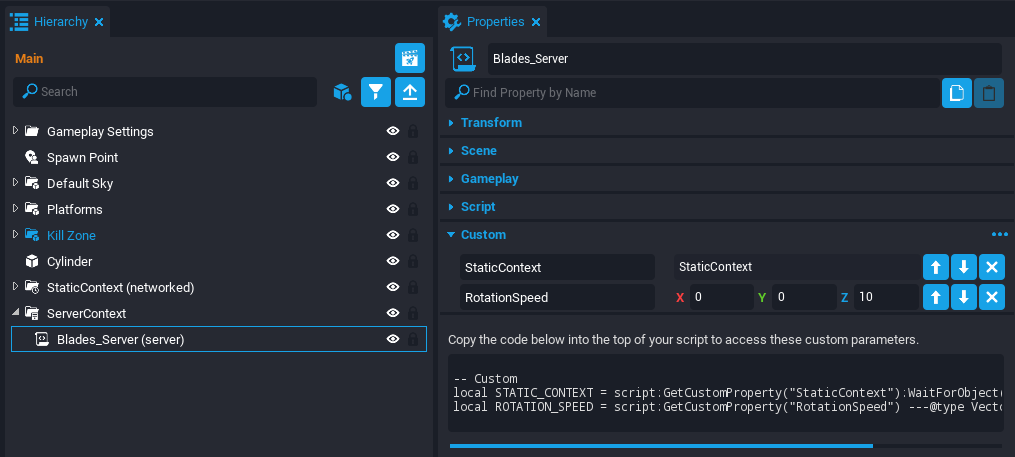
Create Blades_Server Script
Add a New Script
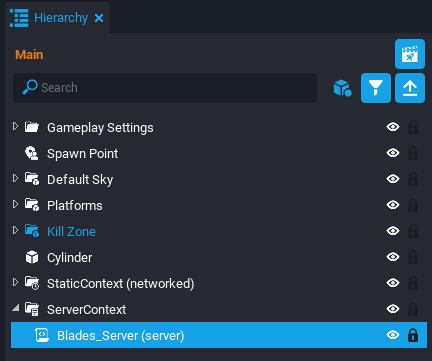
Now a message is being broadcasted to the server and client when a player overlaps the blade's trigger. There needs to be another script that can receive the message and kill the correct player. The player can only be killed server side so this new script should be in Server Context.
- Right click the Hierarchy and select Create Network Context followed by Add Server Context.
- Create a new script and name it
Blades_Server. - Drag and drop the Blades_Server script into the ServerContext.
Add Custom Properties
Select the Blades_Server script and open the Properties window. Drag and drop the StaticContext into the Custom Property section. Then add a new Vector3 custom property and name it RotationSpeed. Set the values of the RotationSpeed property to X 0, Y 0, Z 10.
Add Code to the Script
Right click the Blades_Server script and select Edit Script.
Reference the Custom Properties
Add two variables to reference to the custom properties.
local STATIC_CONTEXT = script:GetCustomProperty("StaticContext"):WaitForObject()
local ROTATION_SPEED = script:GetCustomProperty("RotationSpeed")
Rotate the Blades
Use the RotateContinuous function to rotate the entire StaticContext.
STATIC_CONTEXT:RotateContinuous(ROTATION_SPEED, false)
KillPlayer Function
Create a KillPlayer function that takes in a player parameter and makes it die.
local function KillPlayer(player)
    player:Die()
end
Connect the KillPlayer Function
When the BladeOverlap message is broadcasted along the Server Context, then the KillPlayer function will occur to kill the correct player.
Events.Connect("BladeOverlap", KillPlayer)
The Blades_Server Script
local STATIC_CONTEXT = script:GetCustomProperty("StaticContext"):WaitForObject()
local ROTATION_SPEED = script:GetCustomProperty("RotationSpeed")

STATIC_CONTEXT:RotateContinuous(ROTATION_SPEED, false)

local function KillPlayer(player)
    player:Die()
end

Events.Connect("BladeOverlap", KillPlayer)
Test the Deadly Spinning Blades
Preview the project. The blades should be spinning and cause the player to die when they collide. Also test in Multiplayer Preview mode ![]() with multiple players to see if the correct player is being killed.
with multiple players to see if the correct player is being killed.
It is always encouraged to test in Multiplayer Preview mode to get a realistic experience of players in your game.
Group the Deadly Spinning Blades
Multi-select the Cylinder, StaticContext (networked), and ServerContext. Right click them and select Create New Group Containing These. Name the group Deadly Spinning Blades.
Creating a Rewards Chest
The Rewards Chest will be at the end of the level and have an animation that opens to present a reward for the player. The reward will be a flying pet that follows the player.
Add the Art Assets
Open the Core Content window and drag and drop these three assets into the scene.
Fantasy Chest Base 02Fantasy Chest Lid 02Whelp Mob
Position the Chest Lid on top of the Chest Base. Shrink the Whelp Mob and place inside the chest.

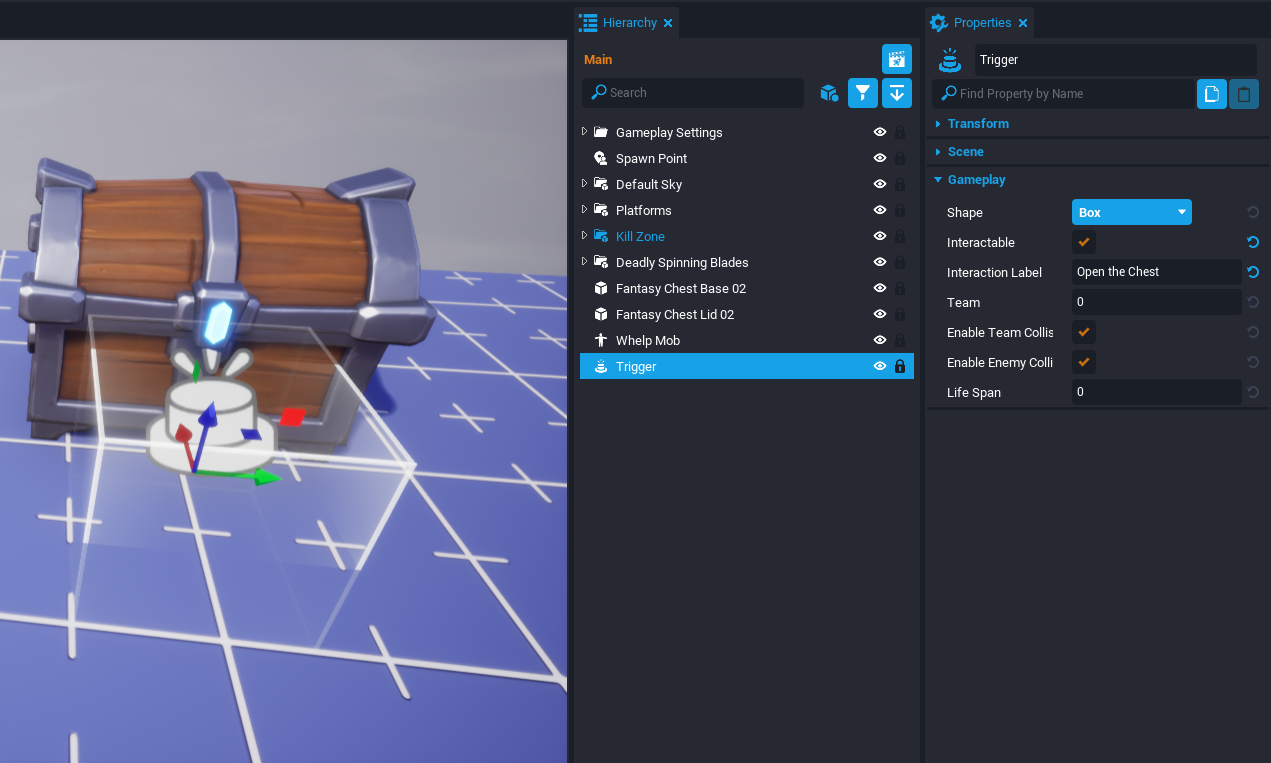
Add a Trigger
There needs to be a trigger in front of the chest that prompts the player to open the chest. Press 9 to add a new Trigger to the scene and place it in front of the chest. Select the Trigger and open the Properties window.
- Set the Game Collision property to Force On.
- Activate the Interactable property.
- Set the Interaction Label property to
Open the Chest.
Use Client Context
Client Context is going to be used for the chest art and animation because only the player that interacted with the chest should see the reward. Multi-select the Chest Base, Chest Lid, Whelp Mob, and Trigger. Right click them and select Create Network Context followed by selecting New Client Context Containing These.
Using Client Context will remove collision for objects except for triggers.
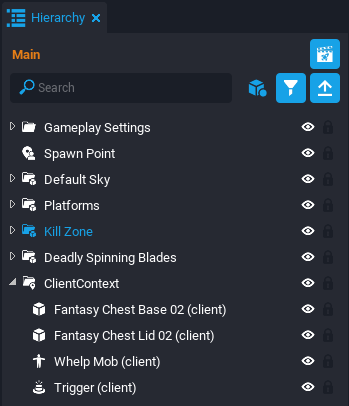
Fix the Lid Rotation
For the script to easily rotate the lid to an open and close position, it is important the Rotation properties of the chest are all zeros. If the chest needs to be rotated to face a certain direction then rotate the ClientContext group.
Create the ChestAnimation_Client Script
Create a new script named ChestAnimation_Client and add it to the ClientContext.
Add Custom Properties
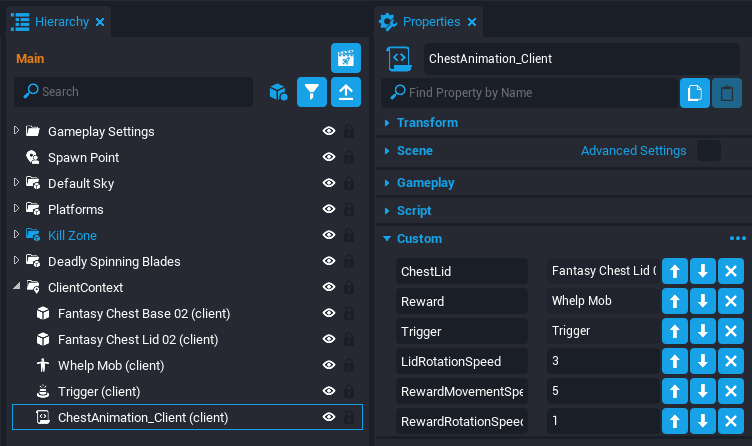
Select the ChestAnimation_Client script and open the Properties window. Add the following custom properties.
- Add the Fantasy Chest Lid 02 as a custom property named
ChestLid. - Add the Whelp Mob as a custom property named
Reward. - Add the Trigger object as a custom property.
- Add a new float custom property named
LidRotationSpeedand set it to3. - Add a new float custom property named
RewardMovementSpeedand set it to5. - Add a new float custom property named
RewardRotationSpeedand set it to1.
Add Code to the Script
Right click the ChestAnimation_Client script and select Edit Script.
Reference the Custom Properties
Add this code to reference the custom properties.
local CHEST_LID = script:GetCustomProperty("ChestLid"):WaitForObject()
local REWARD = script:GetCustomProperty("Reward"):WaitForObject()
local TRIGGER = script:GetCustomProperty("Trigger"):WaitForObject()
local LID_ROTATION_SPEED = script:GetCustomProperty("LidRotationSpeed")
local REWARD_MOVEMENT_SPEED = script:GetCustomProperty("RewardMovementSpeed")
local REWARD_ROTATION_SPEED = script:GetCustomProperty("RewardRotationSpeed")
Add Variables
The isChestOpen variable will track if the trigger should prompt the player to open the chest or claim the reward. The rewardTargetPosition uses vector addition to find the position 100 cm above the reward's starting position.
local isChestOpen = false
local rewardTargetPosition = REWARD:GetWorldPosition() + Vector3.UP * 100
OpenChest Function
The function OpenChest will rotate the lid to an open position using its local space. It then moves the reward upwards and continuously spins it. There is also code to stop trigger interaction during the animation and update the interaction label afterwards.
local function OpenChest()
    TRIGGER.isInteractable = false

    CHEST_LID:RotateTo(Rotation.New(-90, 0, 0), LID_ROTATION_SPEED, true)
    Task.Wait(LID_ROTATION_SPEED)

    REWARD:MoveTo(rewardTargetPosition, REWARD_MOVEMENT_SPEED, false)
    Task.Wait(REWARD_MOVEMENT_SPEED)
    REWARD:RotateContinuous(Vector3.New(0, 0, REWARD_ROTATION_SPEED), false)

    isChestOpen = true
    TRIGGER.isInteractable = true
    TRIGGER.interactionLabel = "Claim Reward"
end
CloseChest Function
The CloseChest function sets the trigger to non-interactable, destroys the reward, and closes the chest lid.
local function CloseChest()
    TRIGGER.isInteractable = false
    REWARD:Destroy()
    CHEST_LID:RotateTo(Rotation.ZERO, LID_ROTATION_SPEED, true)
end
OnInteracted Function
When the player interacts with the trigger, it checks the isChestOpen variable to either open or close the chest. If closing the chest, a message RewardClaimed is broadcasted to the server. In another script, that broadcast will spawn a pet to follow the player.
local function OnInteracted(whichTrigger, other)
    if other:IsA("Player") then
        if not isChestOpen then
            OpenChest()
        else
            Events.BroadcastToServer("RewardClaimed", other, rewardTargetPosition)
            CloseChest()
        end
    end
end
Connect the OnInteracted Function
Add this code at the bottom to connect the Trigger's interact event to the OnInteracted function.
TRIGGER.interactedEvent:Connect(OnInteracted)
The ChestAnimation_Client Script
local CHEST_LID = script:GetCustomProperty("ChestLid"):WaitForObject()
local REWARD = script:GetCustomProperty("Reward"):WaitForObject()
local TRIGGER = script:GetCustomProperty("Trigger"):WaitForObject()
local LID_ROTATION_SPEED = script:GetCustomProperty("LidRotationSpeed")
local REWARD_MOVEMENT_SPEED = script:GetCustomProperty("RewardMovementSpeed")
local REWARD_ROTATION_SPEED = script:GetCustomProperty("RewardRotationSpeed")

local isChestOpen = false
local rewardTargetPosition = REWARD:GetWorldPosition() + Vector3.UP * 100

local function OpenChest()
    TRIGGER.isInteractable = false

    CHEST_LID:RotateTo(Rotation.New(-90, 0, 0), LID_ROTATION_SPEED, true)
    Task.Wait(LID_ROTATION_SPEED)

    REWARD:MoveTo(rewardTargetPosition, REWARD_MOVEMENT_SPEED, false)
    Task.Wait(REWARD_MOVEMENT_SPEED)
    REWARD:RotateContinuous(Vector3.New(0, 0, REWARD_ROTATION_SPEED), false)

    isChestOpen = true
    TRIGGER.isInteractable = true
    TRIGGER.interactionLabel = "Claim Reward"
end

local function CloseChest()
    TRIGGER.isInteractable = false
    REWARD:Destroy()
    CHEST_LID:RotateTo(Rotation.ZERO, LID_ROTATION_SPEED, true)
end

local function OnInteracted(whichTrigger, other)
    if other:IsA("Player") then
        if not isChestOpen then
            OpenChest()
        else
            Events.BroadcastToServer("RewardClaimed", other, rewardTargetPosition)
            CloseChest()
        end
    end
end

TRIGGER.interactedEvent:Connect(OnInteracted)
Test the Reward Chest
Save the script and preview the project with multiple players. The chest animation should work properly and only show for the player that interacted with the trigger.
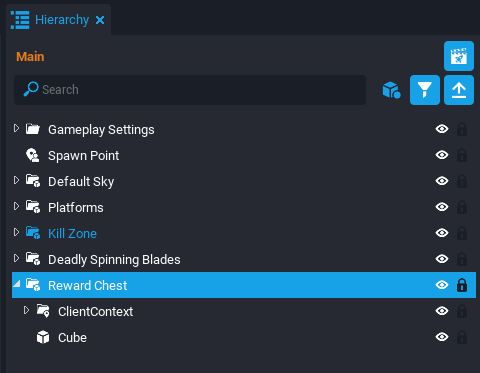
Add Collision Cube
You may have noticed the player can walk through the chest because all the objects are in Client Context. This can be fixed by adding an invisible cube in Default Context to implement collision with the chest.
- Search Core Content for a
Cubeand drag it into the scene. - Position and resize the Cube to match the Reward Chest.
- Select the Cube and open the Properties window.
- Set the Visibility property to Force Off.
Group the Reward Chest
Select the ClientContext and Cube. Right click them and select Create New Group Containing These. Name the group Reward Chest.
Creating a Pet
The reward from the chest is a flying pet that follows the player that claimed the reward.
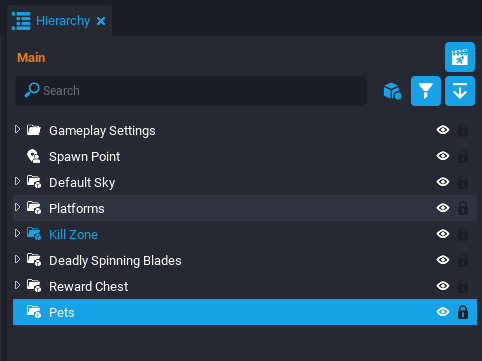
Create a Pets Group
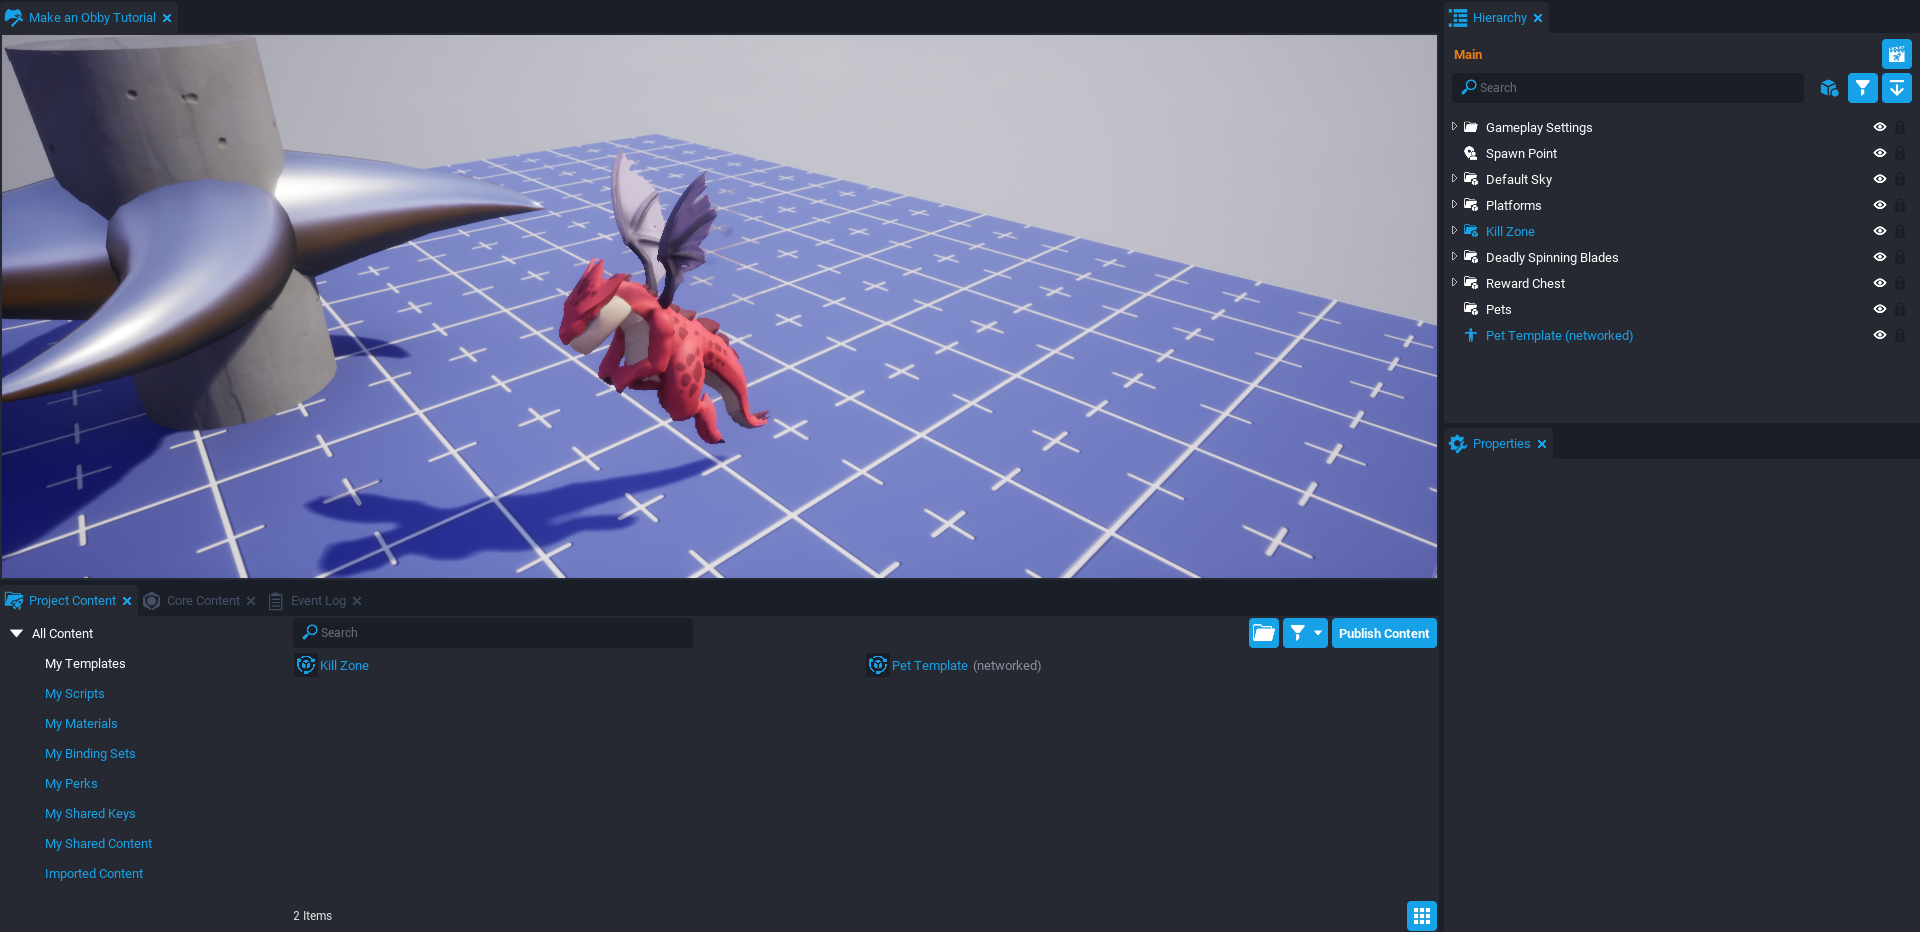
Right click the Hierarchy and select New Group. Name the group Pets. This group will be the parent to the pets that are spawned, as well as the script that is spawning them.
Create a Pet Template
In the Core Content window, search for Whelp Mob and drag it into the scene. In the Hierarchy, right click the Whelp Mob and select Enable Networking. Right click Whelp Mob (networked) and select Create New Template From This. Name the template Pet Template and then delete Pet Template (networked) from the Hierarchy.
Create the PetsController_Server Script
The last step is to make a script that can spawn pets and make them follow the appropriate targets.
Add a New Script
Create a new script and name it PetsController_Server. Place the script inside the Pets group.
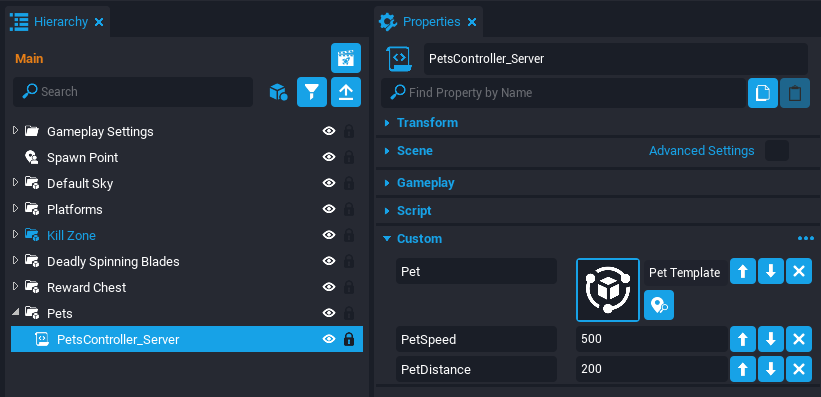
Create Custom Properties
Select the PetsController_Server script and open the Properties window. The script will need a reference to the template to spawn the pet. Add the following custom properties.
- From the Project Content window, add the Pet Template as a custom property.
- Add a new float custom property named
PetSpeedand set it to500. - Add a new float custom property named
PetDistanceand set it to200.
Add Code to the Script
Right click the PetsController_Server script and select Edit Script.
Reference the Custom Properties
Add this code to reference the custom properties. There also needs to be a reference to the Pets group to spawn the templates as children.
local PET_TEMPLATE = script:GetCustomProperty("Pet")
local PET_SPEED = script:GetCustomProperty("PetSpeed")
local PET_DISTANCE = script:GetCustomProperty("PetDistance")
local PETS_GROUP = script.parent
The SpawnPet Function
The pets and their targets will be tracked in a table. So when a pet is spawned it will be added to a table with the pet object and the target object. The function has two parameters (player and spawnPosition) because it needs to match the number of arguments being passed from the Rewards Chest broadcast.
local pets = {}

local function SpawnPet(player, spawnPosition)
    local pet = {
        object = World.SpawnAsset(PET_TEMPLATE, {parent = PETS_GROUP, position = spawnPosition}),
        target = player
    }
    table.insert(pets, pet)
end
Connect the SpawnPet Function
The Rewards Chest broadcast will call the SpawnPet function. Add this code to connect the event to the function.
Events.Connect("RewardClaimed", SpawnPet)
The Tick Function
The pets need to constantly be following and looking at their target. CoreObjects have two useful functions named Follow and LookAt to get the desired behavior of the pets.
function Tick()
    for _, pet in ipairs(pets) do
        if Object.IsValid(pet.object) and Object.IsValid(pet.target) then
            pet.object:Follow(pet.target, PET_SPEED, PET_DISTANCE)
            pet.object:LookAt(pet.target:GetWorldPosition())
        end
    end
end
The OnPlayerLeft Function
If a player with a pet leaves the server then it would make sense for the pet to be deleted and the table to be updated.
local function OnPlayerLeft(player)
    for _, pet in ipairs(pets) do
        if Object.IsValid(pet.object) and Object.IsValid(pet.target) then
            if player.id == pet.target.id then
                pet.object:Destroy()
                pet = nil
            end
        end
    end
end
Connect the OnPlayerLeft Function
Add this code to the bottom to connect the OnPlayerLeft function to the playerLeftEvent.
Game.playerLeftEvent:Connect(OnPlayerLeft)
The PetsController_Server Script
local PET_TEMPLATE = script:GetCustomProperty("Pet")
local PET_SPEED = script:GetCustomProperty("PetSpeed")
local PET_DISTANCE = script:GetCustomProperty("PetDistance")
local PETS_GROUP = script.parent

local pets = {}

local function SpawnPet(player, spawnPosition)
    local pet = {
        object = World.SpawnAsset(PET_TEMPLATE, {parent = PETS_GROUP, position = spawnPosition}),
        target = player
    }
    table.insert(pets, pet)
end

Events.Connect("RewardClaimed", SpawnPet)

function Tick()
    for _, pet in ipairs(pets) do
        if Object.IsValid(pet.object) and Object.IsValid(pet.target) then
            pet.object:Follow(pet.target, PET_SPEED, PET_DISTANCE)
            pet.object:LookAt(pet.target:GetWorldPosition())
        end
    end
end

local function OnPlayerLeft(player)
    for _, pet in ipairs(pets) do
        if Object.IsValid(pet.object) and Object.IsValid(pet.target) then
            if player.id == pet.target.id then
                pet.object:Destroy()
                pet = nil
            end
        end
    end
end

Game.playerLeftEvent:Connect(OnPlayerLeft)
Test the Pets
Save the script and preview the project in multiplayer mode. Try getting the pet on multiple players to see if the networking is synced. Also try leaving the server on one of the players to see if the pet is destroyed for the other player.
Summary
CoreObjects have many useful functions to make games. This tutorial showcased a couple of them but there is still many not mentioned.
Networking in Core is also very useful to understand when making multiplayer games. Making experiences synced for all players and having a manageable amount of networking traffic can be a tricky, yet important balance.
The Obby created in this tutorial can be improved in the following ways:
- Adding more material and level design.
- Checkpoint system.
- Timers and Best Times.
- Persistent Storage for pets and times.
- Different rewards based on number of completions.
- Leaderboards with best times.
Learn More
CoreObject API | Networking | Triggers | Race Timer Tutorial