Creating an NFT
Overview
With the Blockchain API in Core, creators can query the OpenSea marketplace and display NFT (Non-Fungible Tokens) content inside Core directly. This gives creators the ability to create new experiences for the players using NFTs.
This article will cover how to create an NFT by taking a screenshot from inside Core, uploading it to OpenSea, and then displaying the created NFT in Core.
MetaMask Wallet
MetaMask allows creators to store and manage account keys, broadcast transactions, send, and receive Ethereum-based cryptocurrencies and tokens, and securely connect to decentralized applications through a compatible web browser or the mobile app's built-in browser.
Creators will need a MetaMask Wallet so they can connect to the OpenSea marketplace and create their own NFTs. To create a MetaMask Wallet, head over to the MetaMask website and install the extension for your browser and follow the instructions for creating a Wallet.
Create NFT
Creating an NFT is very straightforward. It is so easy, creators can take a screenshot of an asset in Core, upload it to OpenSea, and have it displayed in Core in just a few minutes. The heavy lifting is all done by the Blockchain API in Core. This makes it very easy and allows creators to focus on creating their NFTs and integrating them into their projects.
Create Core Asset
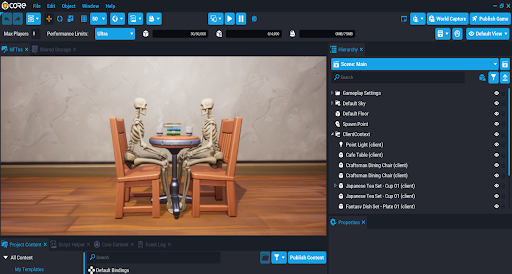
To get started, creators will need to create something in Core and take a screenshot of it that will be used as the NFT content. This step is down to the creator on what they would like to create for the NFT.
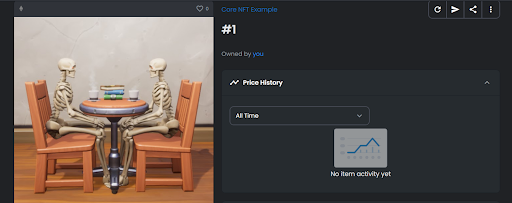
In this example, 2 skeleton meshes are sitting down at a table in a Coffee shop having a discussion. Once the shot is set up, enter full-screen with F11 and take a screenshot.
Prepare Image
With the screenshot taken, creators may want to edit the image in an image editing program. For this example, the screenshot will be resized to the resolution of 1000px by 1000px. If an image is going to be for print, then a high resolution should be considered. Since this NFT will be displayed in Core, then this resolution is suitable.
Image size should also be considered, some platforms limit what size can be uploaded. For OpenSea, that is 100 MB, and it is recommended to keep it smaller for faster load times.

Connect Wallet to OpenSea
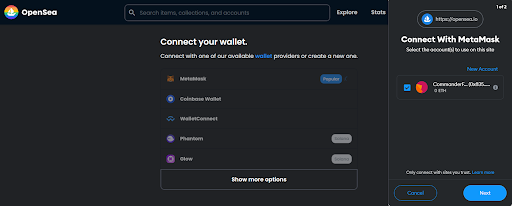
For creators to be able to create an NFT, they will need to visit the OpenSea website and connect their MetaMask wallet.
To the top right of the OpenSea website, click the Account icon, then click on Profile. OpenSea will then display various wallet providers that creators can connect to. In this case, MetaMask will be used.
Clicking on the MetaMask option, the MetaMask extension will ask the creator if they want to connect their wallet to OpenSea. Following the MetaMask steps will then connect the wallet to OpenSea which will take them to their profile upon login.
Create NFT Collection
With the NFT image asset created, it is now time to put this into a collection and list it on the OpenSea Marketplace.
The OpeSea collection manager allows creators to make NFTs without any upfront gas cost, as the NFT isn't transferred on-chain until the first purchase or transfer is made. This is called lazy minting. It unbundles the on-chain issuance of your NFTs from the metadata.
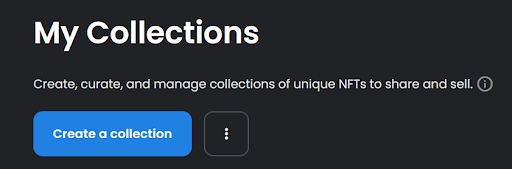
Open the URL for the OpenSea collections by going to the Account menu, or directly visiting the Collections page. Click on the button Create a Collection. Fill in all the information required and click Create.
Collections don't have to be created an NFT can be created with no association to a collection by accessing the Create page from the menu bar. But for this example, a collection will be created.
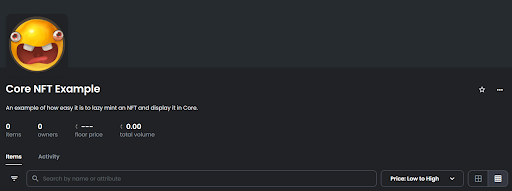
Add Item to Collection
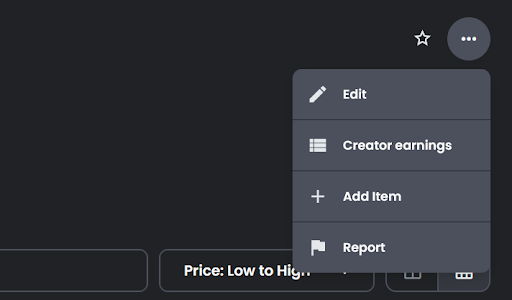
With the collection created, it is time to add a new item. On the right side of the collection page, click the options button and select Add Item. Fill out all the information that is needed for the NFT and most importantly upload the screenshot of the Core asset.
Display NFT in Core
To display the created NFT in Core, the contract address and token ID are needed.
Viewing the NFT will reveal this information in a few different places. One of those in the URL address.
https://opensea.io/assets/ethereum/0x495f947276749ce646f68ac8c248420045cb7b5e/59408398956957497854419901069627612893232823457369391015172644302431918751745
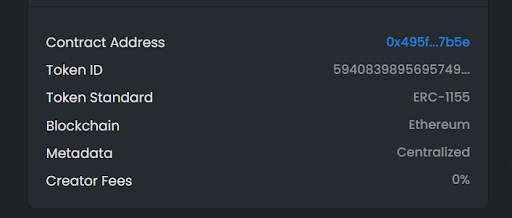
Another place that provides an easy way to copy the values needed for the Blockchain request is under the Details category when viewing an NFT. The token ID can easily be copied. In this case, because the NFT has been lazy minted, it doesn't exist on the Blockchain, so the token ID will be very long, but this will still work with the Blockchain API in Core.
Create UI
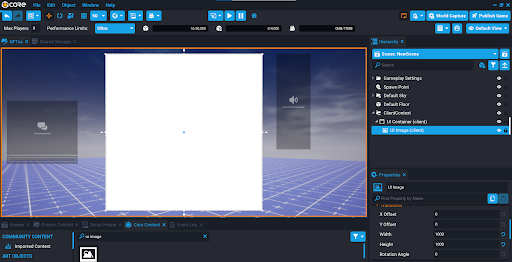
Create a Client Context in the Hierarchy.
In Core Content, search for UI Image and add it to the Client Context in the Hierarchy. This image will be used to display the NFT created. Make sure to have the contract address and token ID of the NFT that was created on OpenSea.
Create Script
Create a new script and add it as a child of the UI Image in the Hierarchy. This script will fetch the parent and set the image to the token retrieved from the Blockchain API
With a bit of Lua code, it is very easy to display the NFT created on OpenSea.
local IMAGE = script.parent
local contractAddress = "" -- Your contract address
local tokenID = "" -- Your token ID

local result, errorCode, errorMessage = Blockchain.GetToken(contractAddress, tokenID)

IMAGE:SetBlockchainToken(result)
Test the NFT
Enter preview mode and test that the NFT is loaded.

Summary
With not much effort at all and no cost, creators can lazy mint NFTs and have them displaying in Core very quickly. Core makes this very easy by providing a Blockchain API to talk to the OpenSea marketplace so creators can focus on the creating side of it.
Learn More
Blockchain API | Blockchain Reference | NFT Inventory Loot Tutorial | NFT Slideshow | UI Reference